3.
Ensure the fifth wheel jaws are fully open and
the lock control handle is fully extended as
shown in
Fig. 17.3.
4.
If equipped with a standard fifth wheel, inspect
the trailer kingpin plate to verify it is large
enough to completely cover the fifth wheel and is
properly greased.
If equipped with a no- or low-lube fifth wheel,
ensure the leading edge of the trailer skid plate
is free of sharp edges.
5.
Make sure the fifth wheel top plate is tilted so the
ramps are as low as possible.
6.
Position the tractor so the kingpin is in a position
to enter the throat of the fifth wheel as shown in
Fig. 17.4.
WARNING
When coupling, always inflate the tractor
suspension air bags prior to coupling.
Inflating the tractor suspension air bags while
positioned underneath the trailer may result in
damage to and incorrect coupling of the fifth
wheel, possibly resulting in serious personal
injury or death.
NOTICE
Attempting to couple at the wrong height may
cause improper coupling, which could result in
damage to the fifth wheel or kingpin.
7.
Adjust the trailer height if required.
For a standard fifth wheel, the trailer should
contact the fifth wheel at the top of the approach
ramps as shown in
Fig. 17.5.
For a no- or low-lube fifth wheel, the fifth
wheel must slide freely under the trailer; the
trailer should contact the fifth wheel at the pivot
point shown in
Fig. 17.6.
8.
With the fifth wheel opening aligned with the
trailer kingpin, back the tractor slowly toward the
trailer. To prevent the trailer from slamming into
the kingpin, after sliding under the trailer, stop.
Then resume backing up slowly until the fifth
wheel locks.
9.
Apply the tractor parking brakes.
f611408
04/18/2016
TRLR
AUX
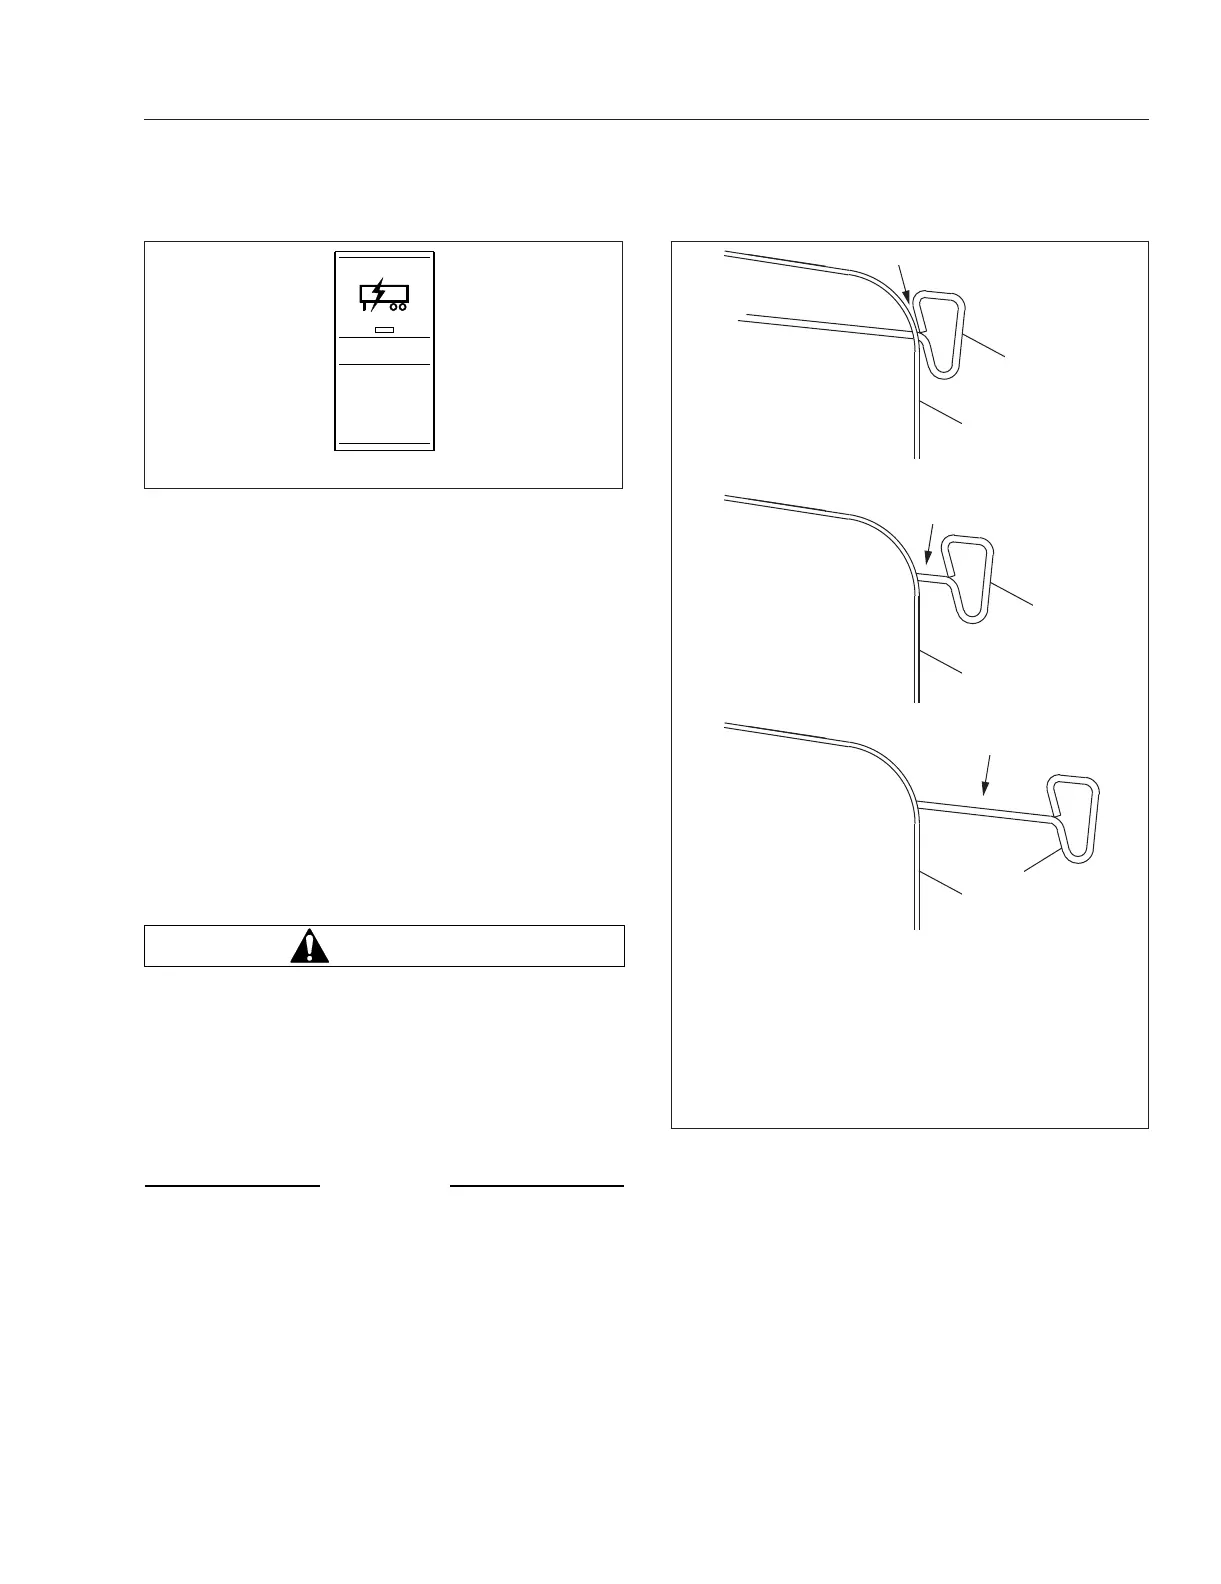
Fig. 17.2, Trailer Auxiliary Switch
f31137611/18/2021
B
A
1
1
1
C
2
2
2
A. The base of the pull handle within 1 inch of the fifth
wheel indicates the fifth wheel jaws are locked.
B. A gap of more than 1 inch between the pull handle
and fifth wheel indicates the fifth wheel jaws are
partially open.
C. A fully extended pull handle indicates the fifth wheel
jaws are open.
1. Pull Handle 2. Fifth Wheel
Fig. 17.3, Fontaine Fifth Wheel Lock Handle Positions
Fifth Wheels and Trailer Couplings
17.2