EN
FRIGOMAT KREAM 2.5 E M04.37389 R.2022.03.30 6
1 PREPARATION FOR USE
Wash and sanitize the machine as indicated in IV-1 / I-V-2 of this manual.
2 PRELIMINARY CHECKS
The following checks must be made every time you want to start
production.
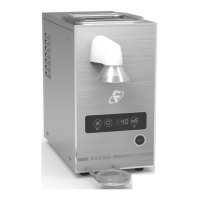
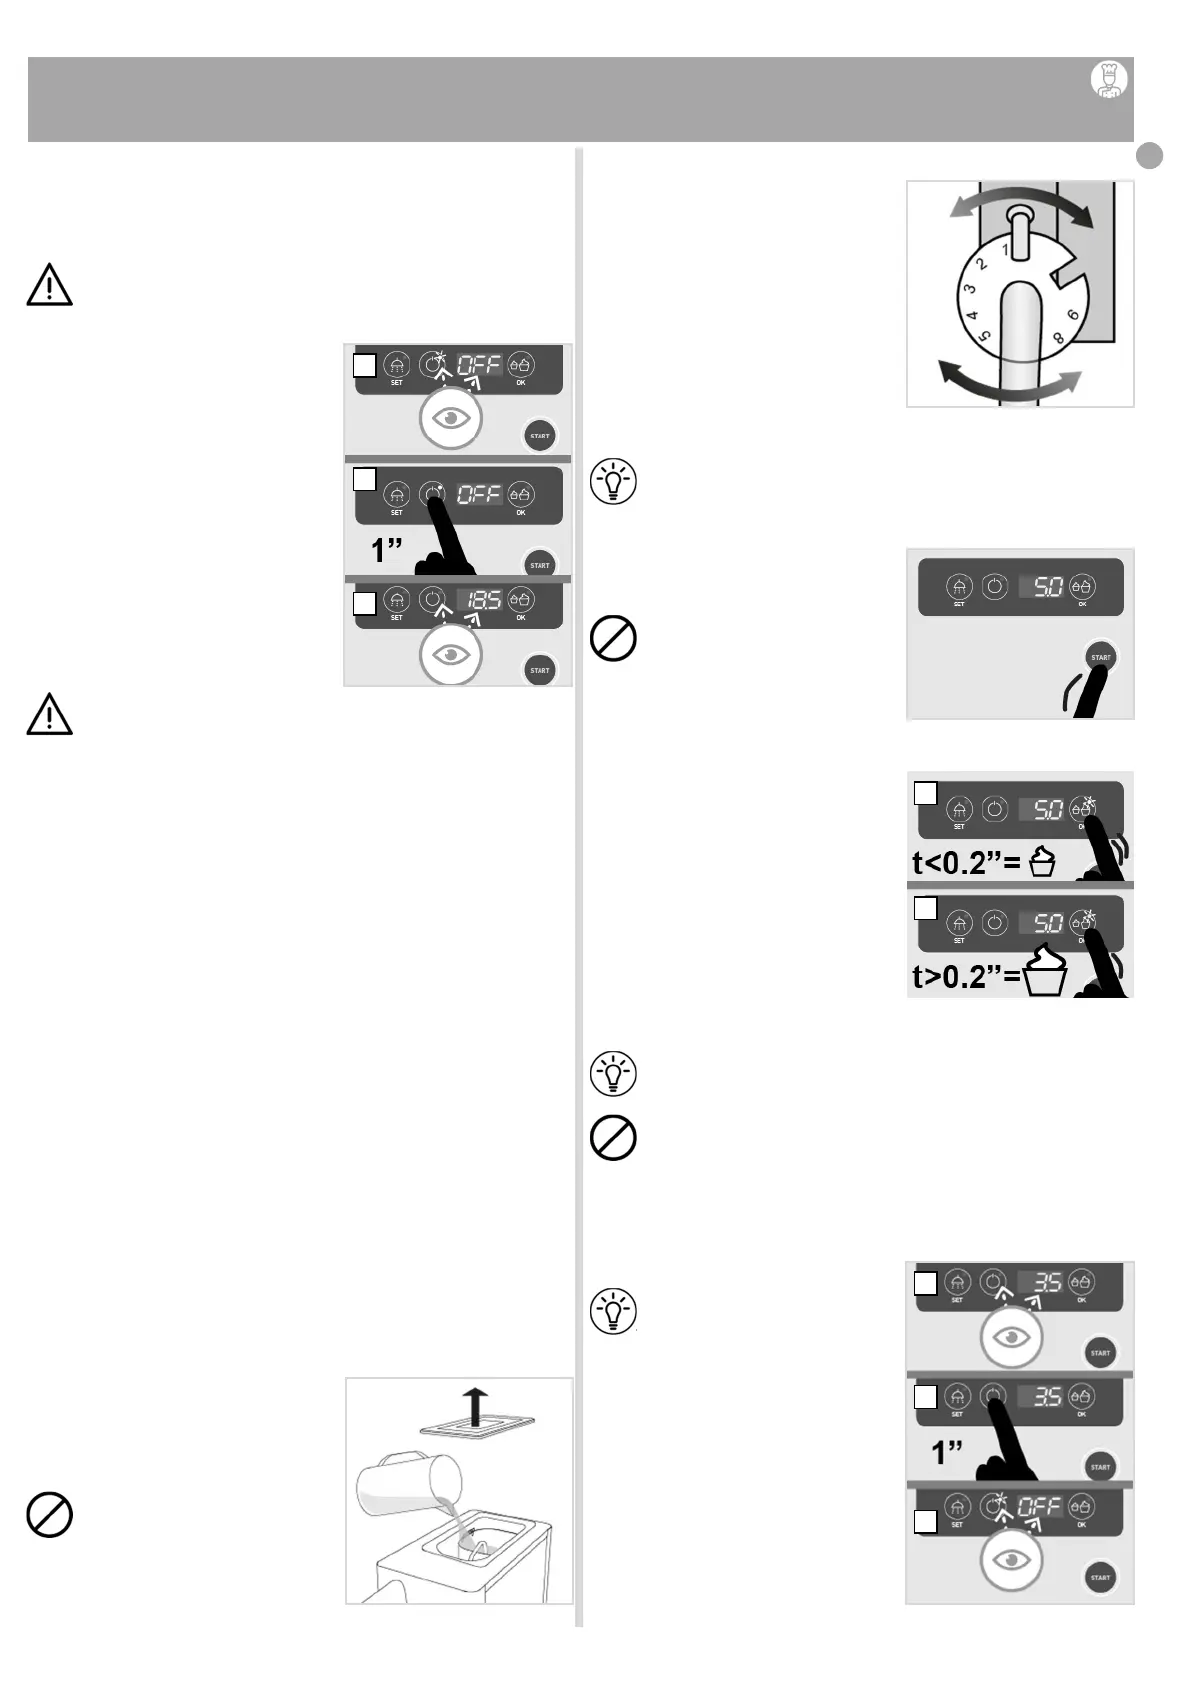
2.1 Machine checks
Make sure the master switch is closed and
that the machine is powered correctly
(fig.III/01-A).
Switch on the machine by pressing the ON-
OFF button for approx. 1 sec. (fig.III/01-B),
check that the 2 leds of the ON-OFF button
are active and that the display shows the
storage temperature (fig.III/01-C).
Check that all the machine parts are present
and correctly assembled.
Verify that the machine is empty, clean and
correctly sanitized.
Check that there are no alarms shown on
the display and that the temperature
displayed is correct.
To avoid bacterial contamination and to obtain
maximum performance from the machine, activate the
machine clean and empty and wait 10 min. and/or the
temperature of about 4°C on the display before pouring the pro-
duct in the tank and start the production.
Note: during the cooling phase, any indication of negative
temperatures on the display does not constitute a malfunction of the
machine.
2.2 Check cream and/or cream + sugar mix
To avoid the risk of malfunction or damage to the machine, the following
checks must also be carried out on the product to be used:
- Use only quality cream with a fat content between 30 and 38%.
- Do not use specific cream for equipment other than the cream whipper
(e.g.: orbital, etc.).
- Check that the cream + sugar mix is of quality and balanced (sugar ≤10%).
- Check that the mix is fluid, homogeneous, without lumps and not separated.
- It is recommended to use powdered sugar or liquid sugar. If granular sugar
is used, make sure it is completely dissolved before delivery.
- Mix the product periodically (at least once every 2 hours) in the tank to
avoid the separation of the heavier solid parts.
- Never add solid substances to the cream, such as hazelnut pieces,
chocolate pieces, etc., which would obstruct the pump and damage the
machine.
To avoid bacterial contamination and to obtain maximum performance from
the machine, always keep the mixture stored at a temperature below 5 °C
(41 °F).
3 WHIPPED CREAM DELIVERY
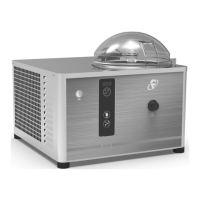
3.1 Loading product
Lift the cover (fig.III/02).
Pour the cream into the extractable tray,
respecting the minimum and maximum
quantities allowed:
Min: 0,5 kg Max: 2.5 kg
Take care not to pour the cream outside the
removable tank (fig.III/02).
Always pour the cream into the
removable tank and not into the
general compartment to ensure
perfect hygiene of the product and
easier cleaning of the machine.
Replace the cover to avoid contamination of
the product.
3.2 Cream whipper regulation
By acting on the cream regulator (fig. III/03)
it is possible to obtain the correct air-liquid
mix and therefore an excellent whipped
cream.
To make a correct adjustment, it is always
preferable to start from a middle position
(e.g. 3-5) and turn the regulator
progressively to the other positions until the
desired product is obtained.
Turning the regulator to low positions will
result in a more liquid product.
Turning the regulator to high positions
increases the air flow and produces a more
whipped product.
Different creams require different position for whipping.
Not all products can be whipped at any setting value.
3.3 Delivery
To dispense whipped cream, press and hold
the START button to extract the desired
amount (fig.III/04).
Do not deliver with extractable
tank empty or with insufficient
product level to ensure the correct
draught of the pump.
3.4 Timed Delivery
Small dose
Press and release (t<0.2") the DOSE button,
the dispensing will be activated for the set
time, if > 0.0 sec. (see chap. III 3.5 for
display and modification of timed small dose
dispensing time). The led next to the ON-
OFF key will be activated for the duration of
dispensing (fig.III/05 "A").
Large dose
Press and keep pressed (t>0,2") the DOSE
button, the dispensing will be activated for
the set time, if > 0.0 sec. (see chap. III 3.5
for visualization and modification of timed
dispensing time of large dose). The led next
to the ON-OFF key will be activated for the duration of dispensing
(fig.III/05 "B").
Use this function if you need to make frequent cream dispensing
at constant times.
Do not deliver with extractable tank empty or with insufficient
product level to ensure the correct draught of the pump.
3.5 Display/Adjustment Timed dispensing time
See Chapt. V/1 “USER MENU”
3.6 Display - Adjustment Storage temperature
See Chapt. V/1 “USER MENU”
Use this function if you need to
change the storage temperature of
the product in the removable tray.
3.7 Switching off the machine
Switch the machine off by pressing the ON-
OFF button for about 1 sec. (fig.III/06-B),
check that both the LEDs on the ON-OFF
button are on and that the display shows the
storage temperature (fig.III/06-C).
III USE
for the operator
fig.III/04
fig.III/01
C
B
A
fig.III/06
C
B
A
fig.III/03
fig.III/02
fig.III/05
B
A