81
EN
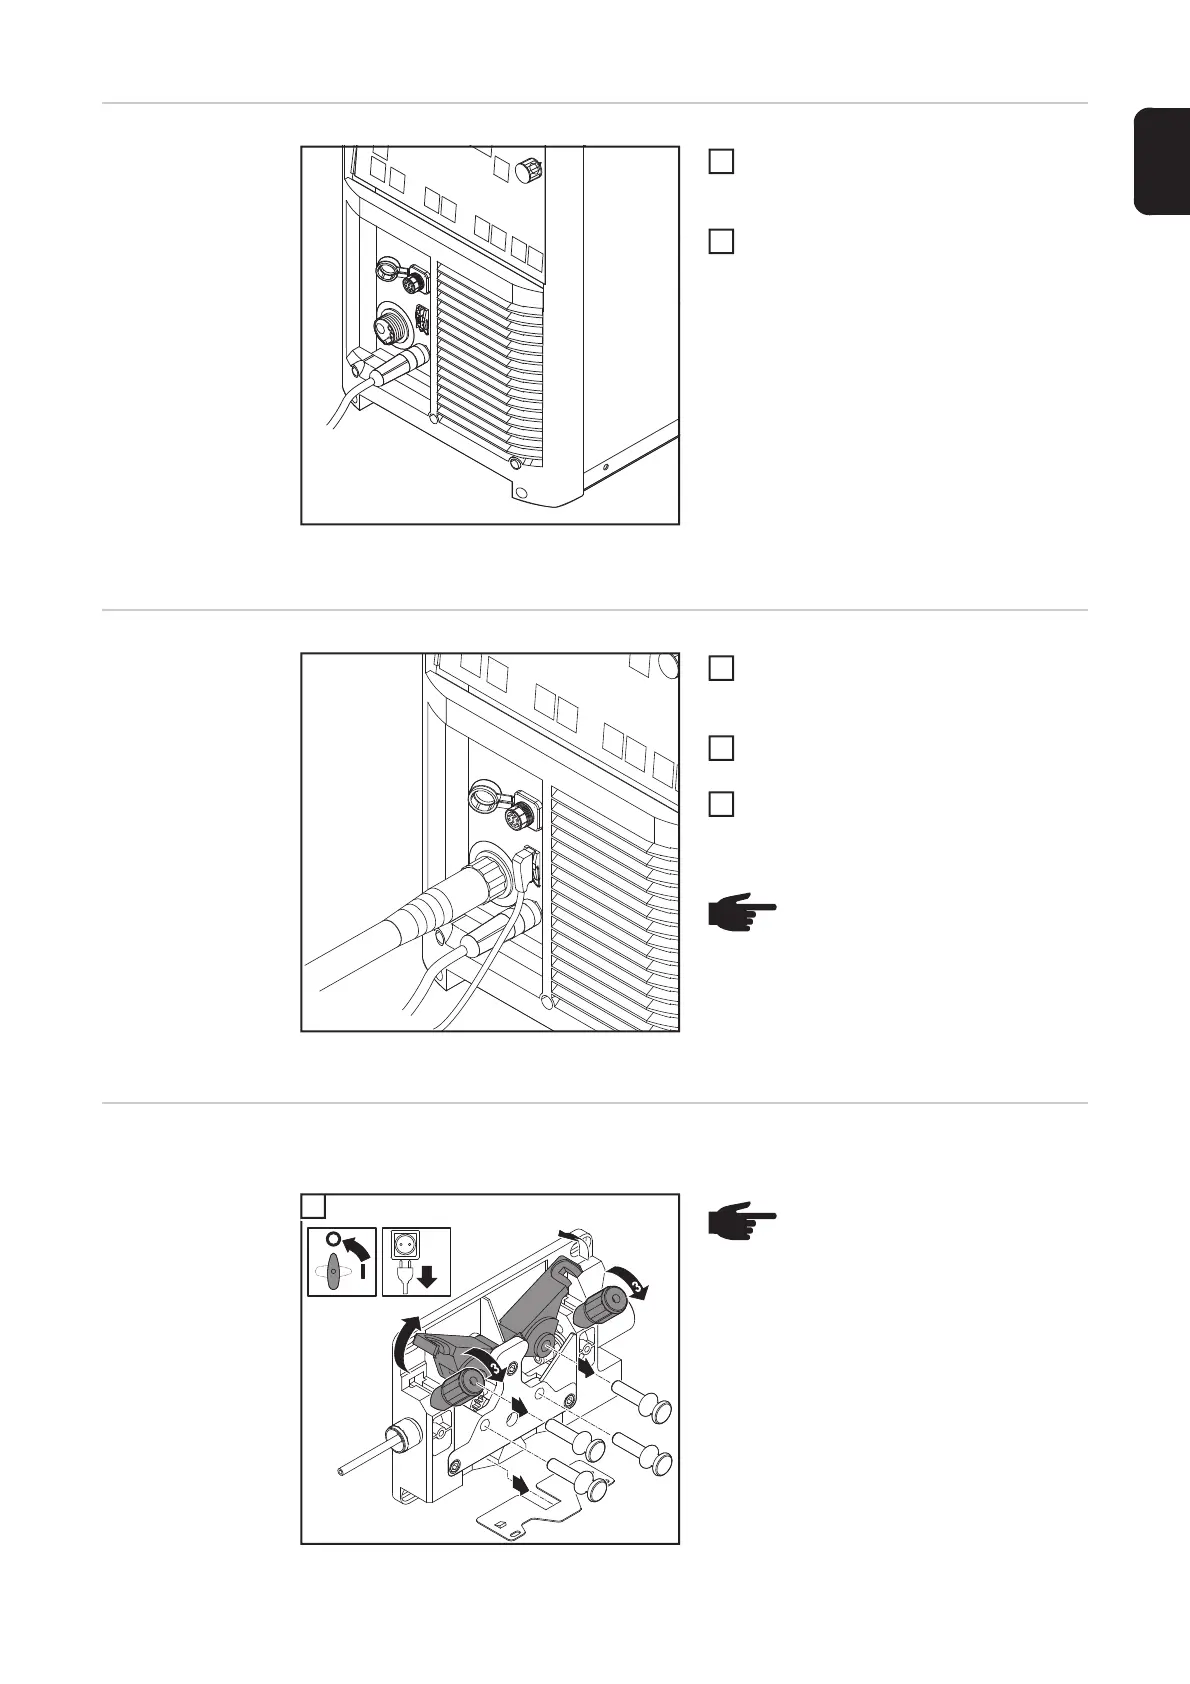
Establishing a
ground (earth)
connection
Connecting the grounding (earthing) cable to the TPS
2700
Plug the grounding (earthing) cable
into the (-) current socket and twist to
fasten it
Use the other end of the grounding
(earthing) cable to establish a connec-
tion to the workpiece
Connecting the
welding torch
Connecting the welding torch to the TPS 2700
Check that the torch is correctly and
completely tooled up. Insert it - infeed
tube first - into the torch connection
Tighten the union nut by hand to fix the
torch in place
Plug the control plug of the welding
torch into the torch control connection
and latch it in place
Inserting/replac-
ing feed rollers
In order to achieve optimum wire electrode feed, the feed rollers must be suitable for the
diameter and alloy of the wire being welded.
An overview of the feed rollers available
and their possible areas of use can be
found in the spare parts lists.
US devices are supplied without feed rol-
lers. After inserting the wirespool, insert the
feed rollers.
1
NOTE! When altering the length
and/or cross-section of the weld-
ing torch hosepack, measure the
welding circuit resistance r and the
welding circuit inductivity L (see
"Further settings").
1
2
NOTE! Only use feed rollers that
match the wire electrode.
 Loading...