Commissioning
the inverter
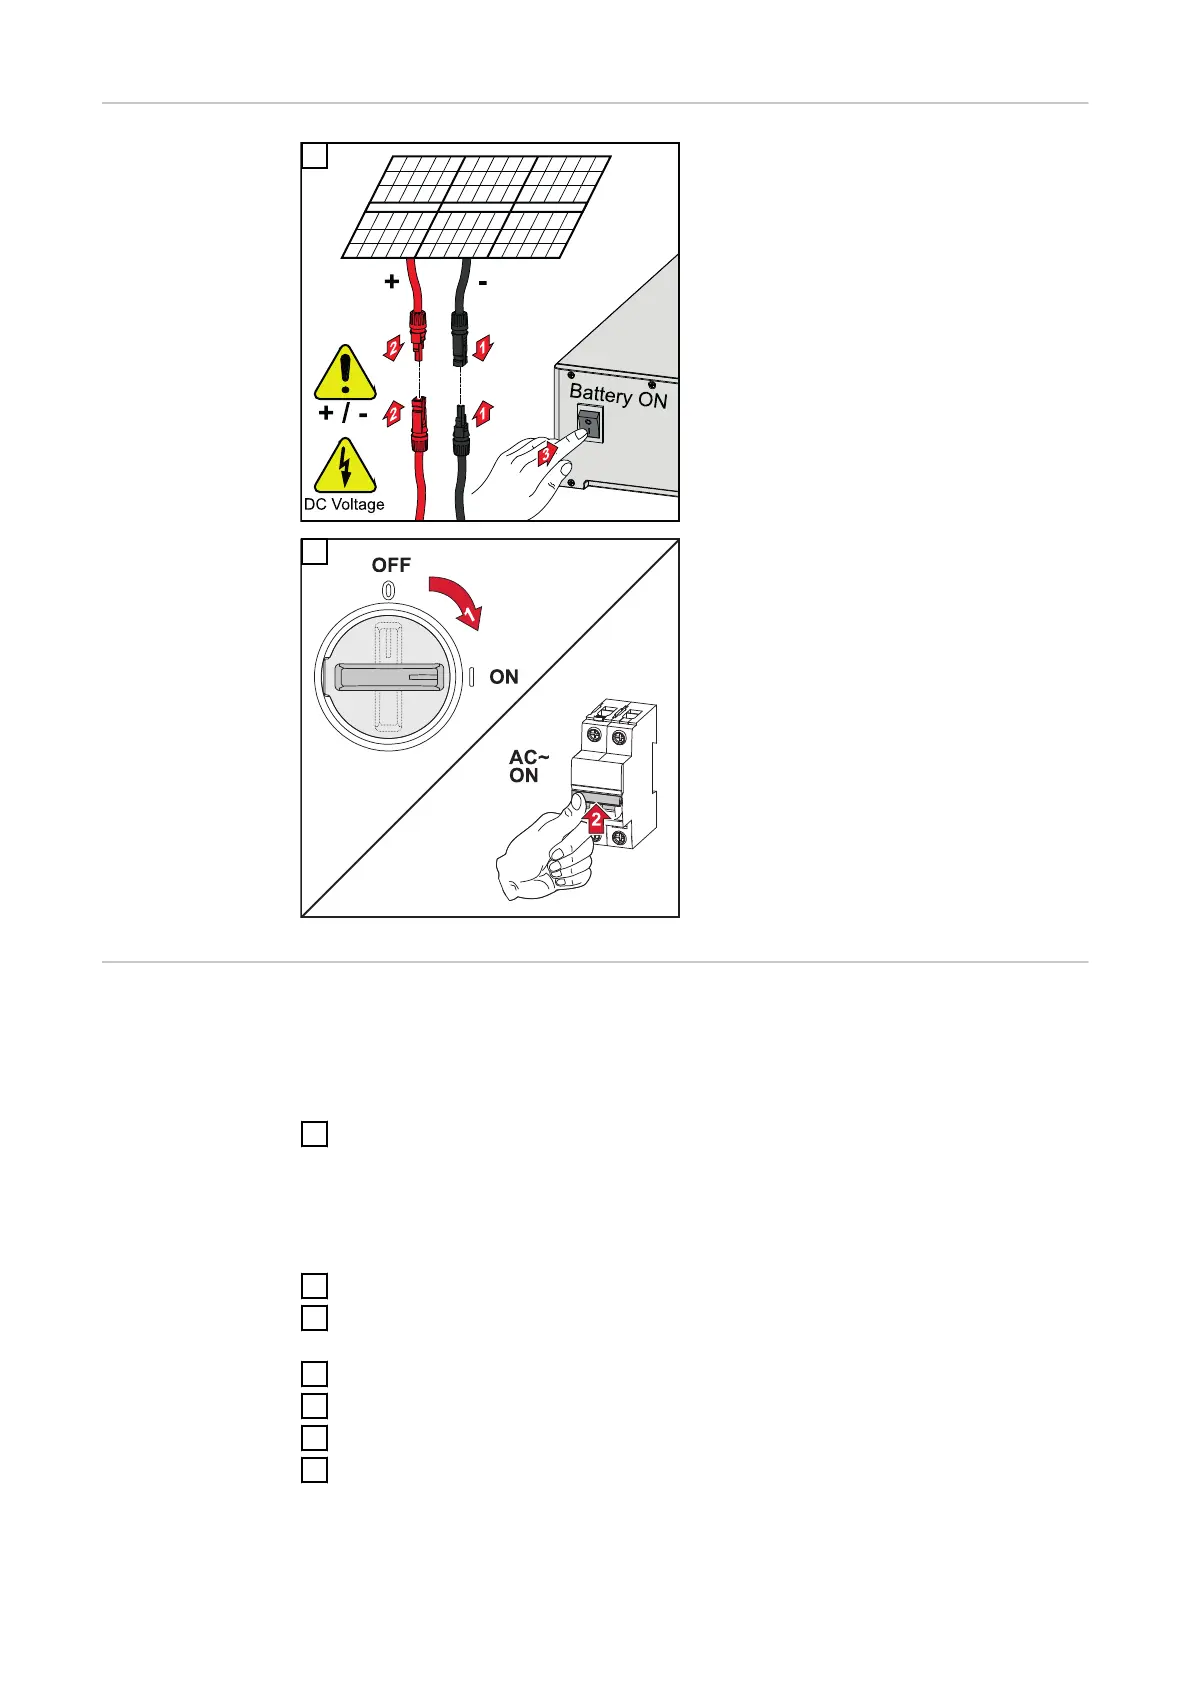
1
Connect the solar module strings (+/-).
Switch on the battery connected to
the inverter.
2
Set the DC disconnector to the "On"
switch position. Switch on the auto-
matic circuit breaker.
Configuring PV
Point Comfort
Firmware version 1.25.2 or higher is required to commission the PV Point Com-
fort. Outdated firmware versions could lead to incompatibilities between the in-
verter and PV Point Comfort. In this case, the inverter firmware should be up-
dated in accordance with the instructions in Update on page 120.
1
Access the user interface of the inverter.
-
Open your web browser.
-
In the address bar of the browser, enter the IP address (IP address for
WLAN: 192.168.250.181, IP address for LAN: 169.254.0.180) or the host
and domain name of the inverter and confirm.
-
The user interface of the inverter is displayed.
2
Click the "Device configuration" button.
3
Log in to the login area with the "Technician" user and the technician pass-
word.
4
Open the "Functions and I/Os" menu.
5
Enable "Backup power" mode.
6
Select "PV Point" in the "Backup power mode" drop-down list.
7
Click the "Save" button to save the settings.
"PV Point" backup power mode has been configured.
169
 Loading...