10
Before fitting the mains plug, check that the welding and control transformers are
switched to the correct mains voltage:
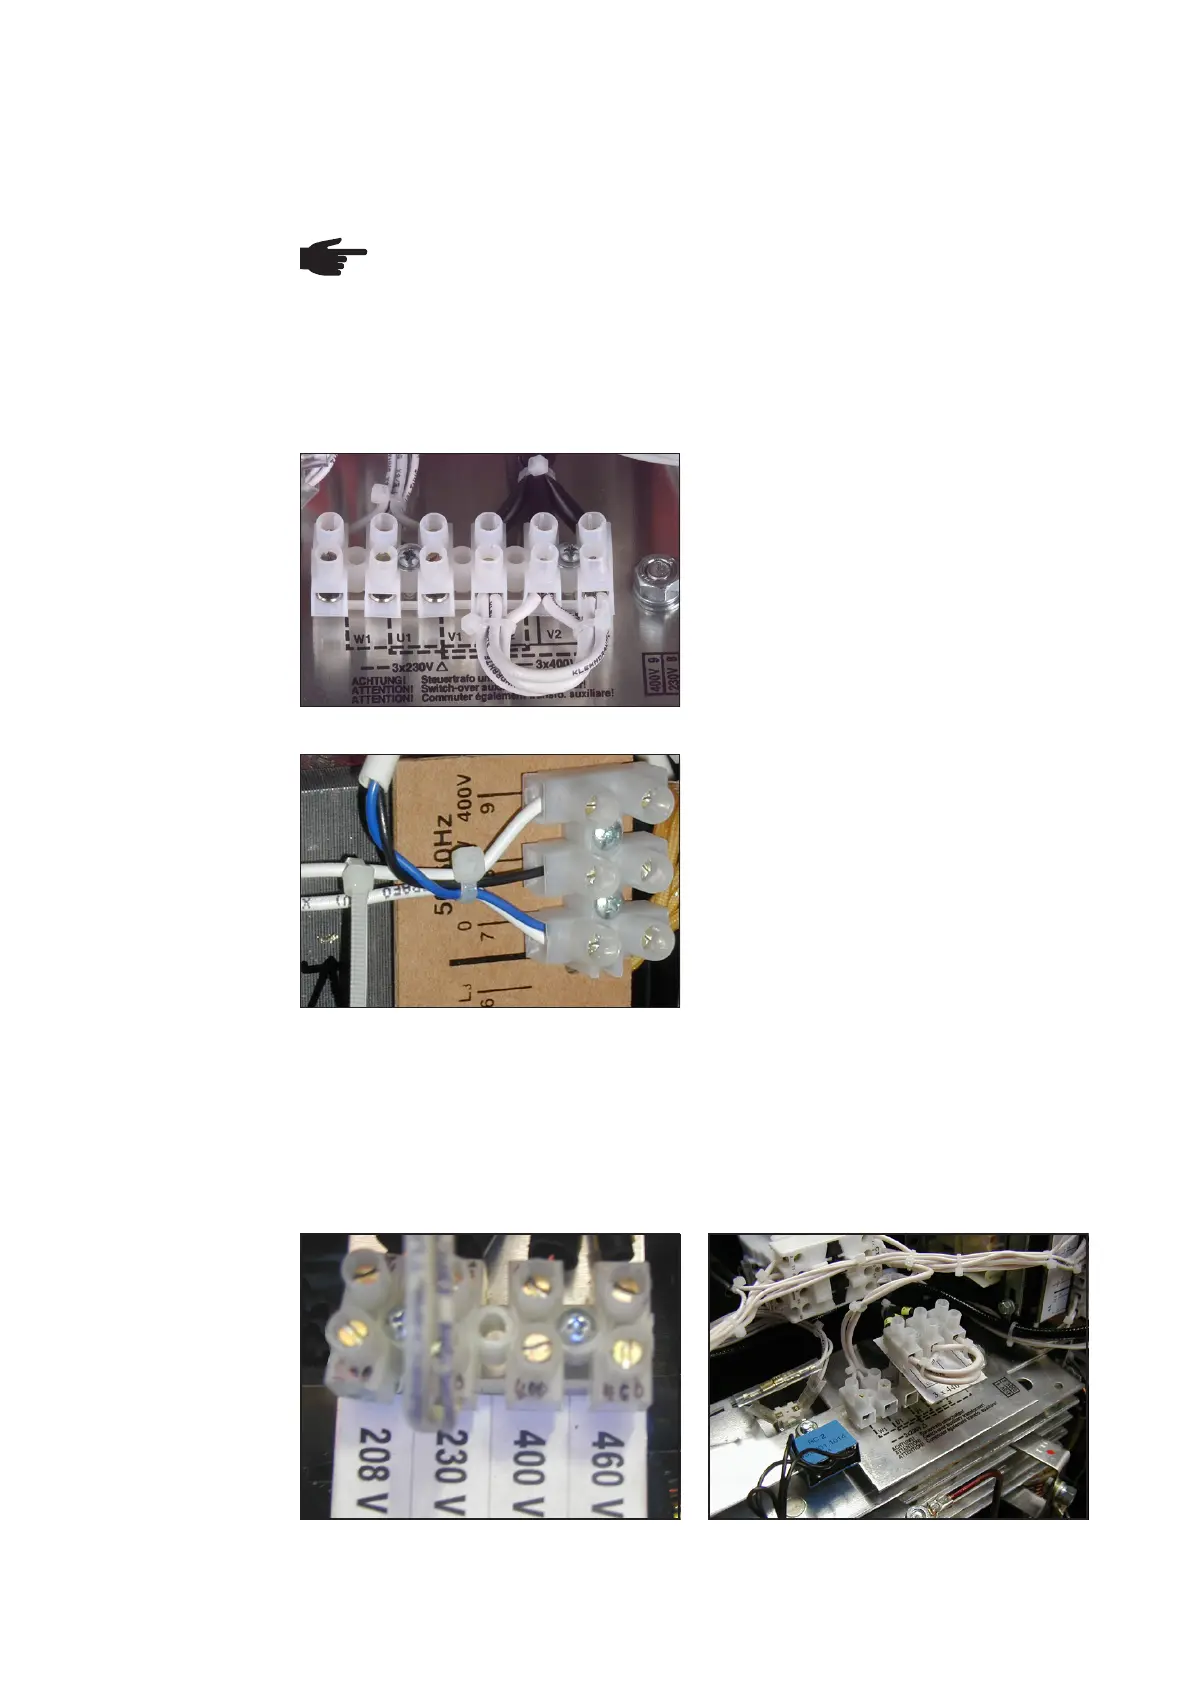
Fig.5 Welding transformer terminal board
NOTE! Inadequately dimensioned electrical installations can lead to serious
damage. The mains lead and its fuse protection must correspond to the mains
voltage and the power source current input (see technical data)
Checking Vario-
Star 1500/2500/
3100 mains
voltage
1. Remove the right side panel from the
power source
2. Compare the terminal board and
printed circuit diagram for the welding
transformer and change jumpers if
required (delta connection for 230 V
and star connection for 400 V).
Fig.6 Control transformer terminal board
3. Compare connecting terminal plate
and printed connection diagram for
the control transformer The cable
marked with a cable tie must be
connected according to the mains
voltage
4. Attach the right side panel to the
power source
Checking the mains voltage
General remarks
Fig.7 Welding transformer terminal board VST
2500 CSA
Checking Vario-
Star 2500 CSA/
3100 CSA mains
voltage
Fig.8 Welding transformer connecting terminal
plate VST 3100 CSA
1. Remove the right side panel from the power source
2. Compare the terminal board and printed connection diagram for the welding trans-
former and if necessary change the connection or jumper according to the circuit
diagram.