Basic Sound Chamber Tests 85
5. Use [F5] to choose the DIG SPEECH signal source. It will now have the
ICRA speech weighting. See Figure 3.5.2 for a comparison of an aid tested
with the ANSI and ICRA speech weightings.
5. Use [F5] to choose the DIG SPEECH signal source. It will now have the
ICRA speech weighting. See Figure 3.5.2 for a comparison of an aid tested
with the ANSI and ICRA speech weightings.
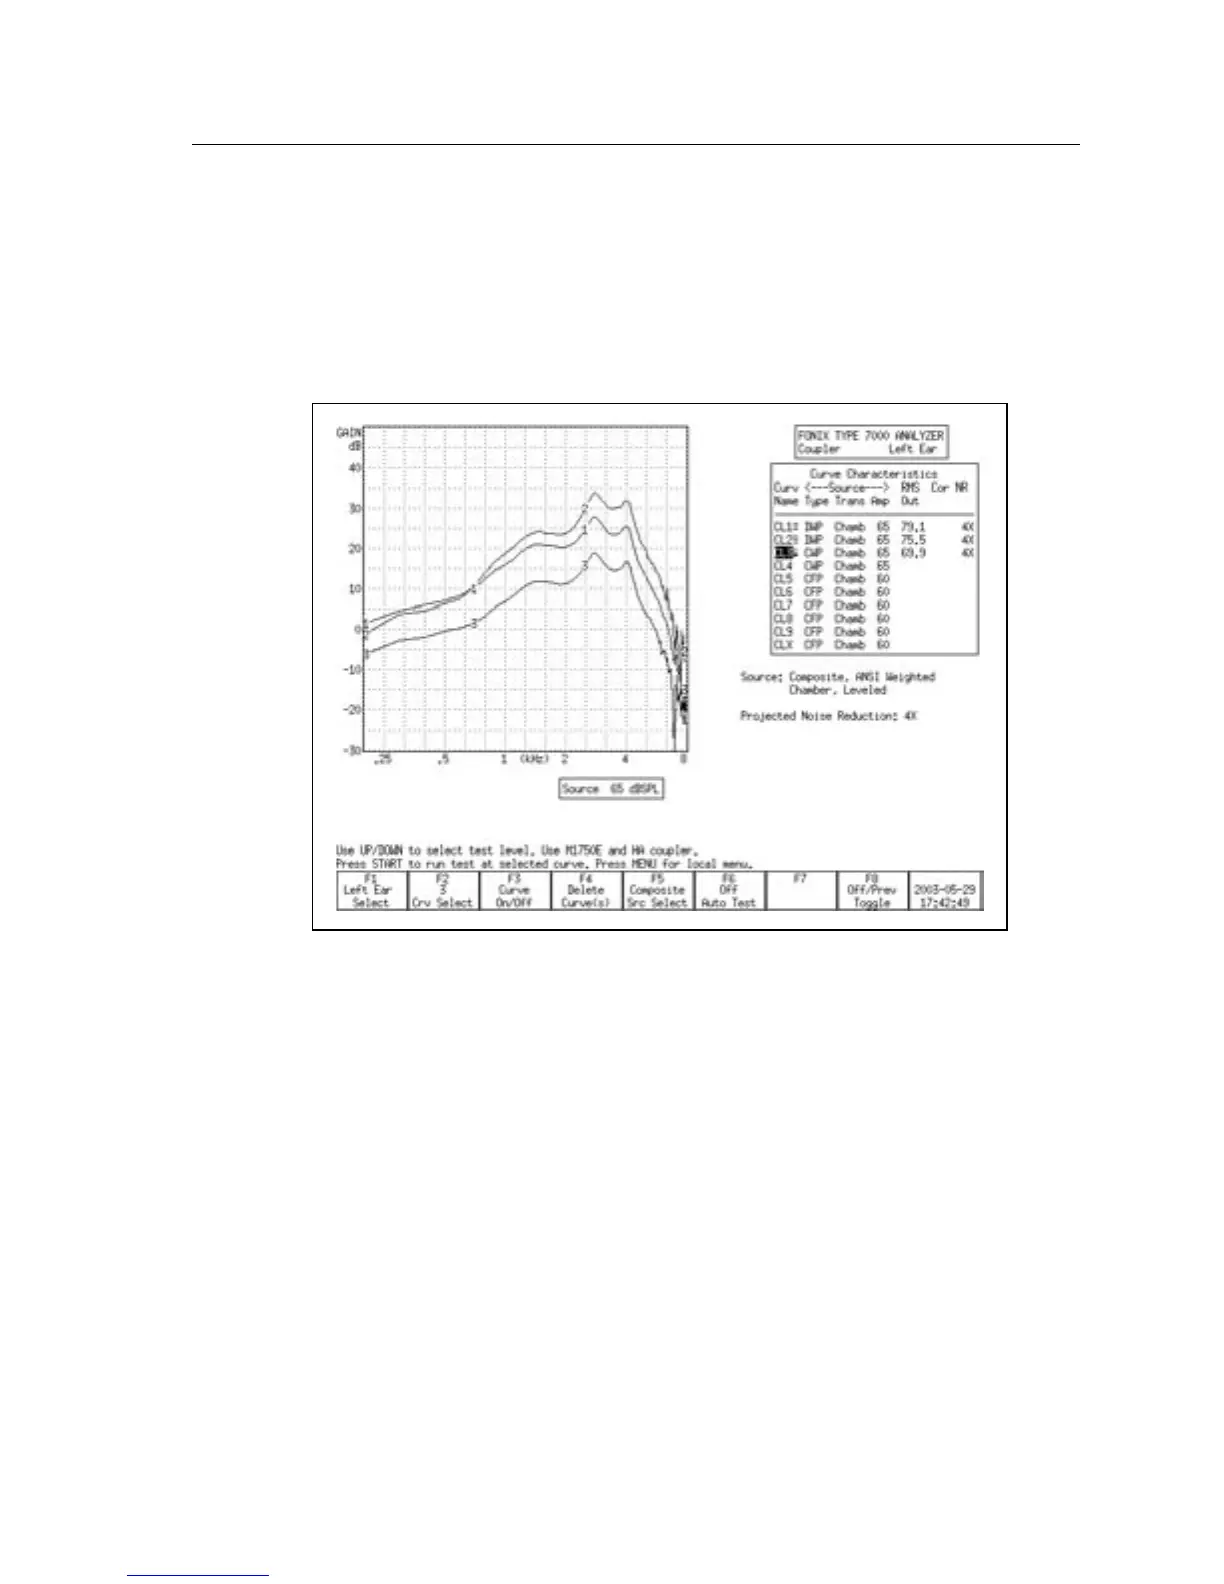
Figure 3.5.2—Comparison of a digital aid tested with Digital Speech ICRA (CRV1), Digital
Speech ANSI (CRV2), and the Composite signal (CRV3).
3.5.3 Testing with Bias Signals
You can add a pure-tone bias signal to the Digital Speech signal, creating a con-
tinuous signal at the frequency of your choice. This will allow you to see how
the aid reacts to the presence of noise at different frequencies. To add a bias sig
-
nal:
1. Select the DIG SPEECH signal with [F5] in the Coupler screen.
2. Press [MENU] to enter the local menu.
3. Use [∨, ∧] to select Bias Tone under Source Settings. Use the [START] key to
skip ahead sections, if necessary.
4. Use [<, >] to select the bias amplitude.
5. Press [EXIT] to return to the Coupler screen.
6. Press [START] to start the frequency response measurement. The Digital
Speech signal will include a bias signal at the amplitude you specified in
Step 4.