General Operation 45
• Init failed 0: No memory available for the converted screen buffer
• Init failed 1: No memory available for the label bitmap
• Init failed 2: Printer driver unresponsive
• Init failed 3: Version number from printer board is unreadable
Errors that occur when actually printing have the following error codes:
• Print failed 0: Switching from internal to external printer failed
• Print failed 1: Copying the label bitmap to the printer board has failed
• Print failed 2: Converting of the screen to printable version has failed
• Print failed 3: Copying the converted screen bitmap to the printer
board has failed
• Print failed 4: Preparing to print; printer board is busy
• Disconnected: External printer is disconnected.
• No power: Internal or external printer is not powered.
• Offline External printer is offline.
• Head up: Internal printer has head raised.
If you are having a problem with the 7000 printer, contact the factory (Section
1.7.4) and be ready to provide the Frye technician with the error code. The
printer software version, available in the help menu of the Opening screen, will
also be helpful.
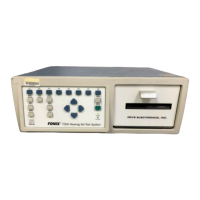
2.4.4 Loading the thermal paper
Please read the entire instructions before loading paper. Refer to Fig. 2.4.4A for
printer features.
Step I: Installing the paper into the printer assembly
1. Open the printer door.
2. Remove the white plastic paper roller from the printer mechanism. If you
are replacing an empty paper roll, remove and discard the paper spool from
the printer mechanism, but do not discard the plastic roller. The spring-
loaded (white plastic) back tension rod, located directly behind the paper
roller is not a removable part.
3. Insert the plastic roller into a new paper roll.
4. Install the plastic roller and paper roll into the printer mechanism, with
paper feeding from the top of the roll. The paper roller will fit into the slots
on the left and right side of the printer mechanism. The paper roller should
drop into position without additional adjustment.