SS1807-N002 Checkup, Replacement and Adjustment - 53/137
1.1.18 Power Supply PCB
Caution
・
There is a risk of electrical shock since there might be electric charges in the power board
right after turning OFF the power, do not touch the terminals and the metal portion of the
power board.
■ Removal Procedures
(1) Remove the top cover following the procedures (1) to (3) of “1.1.1 Top Cover”.
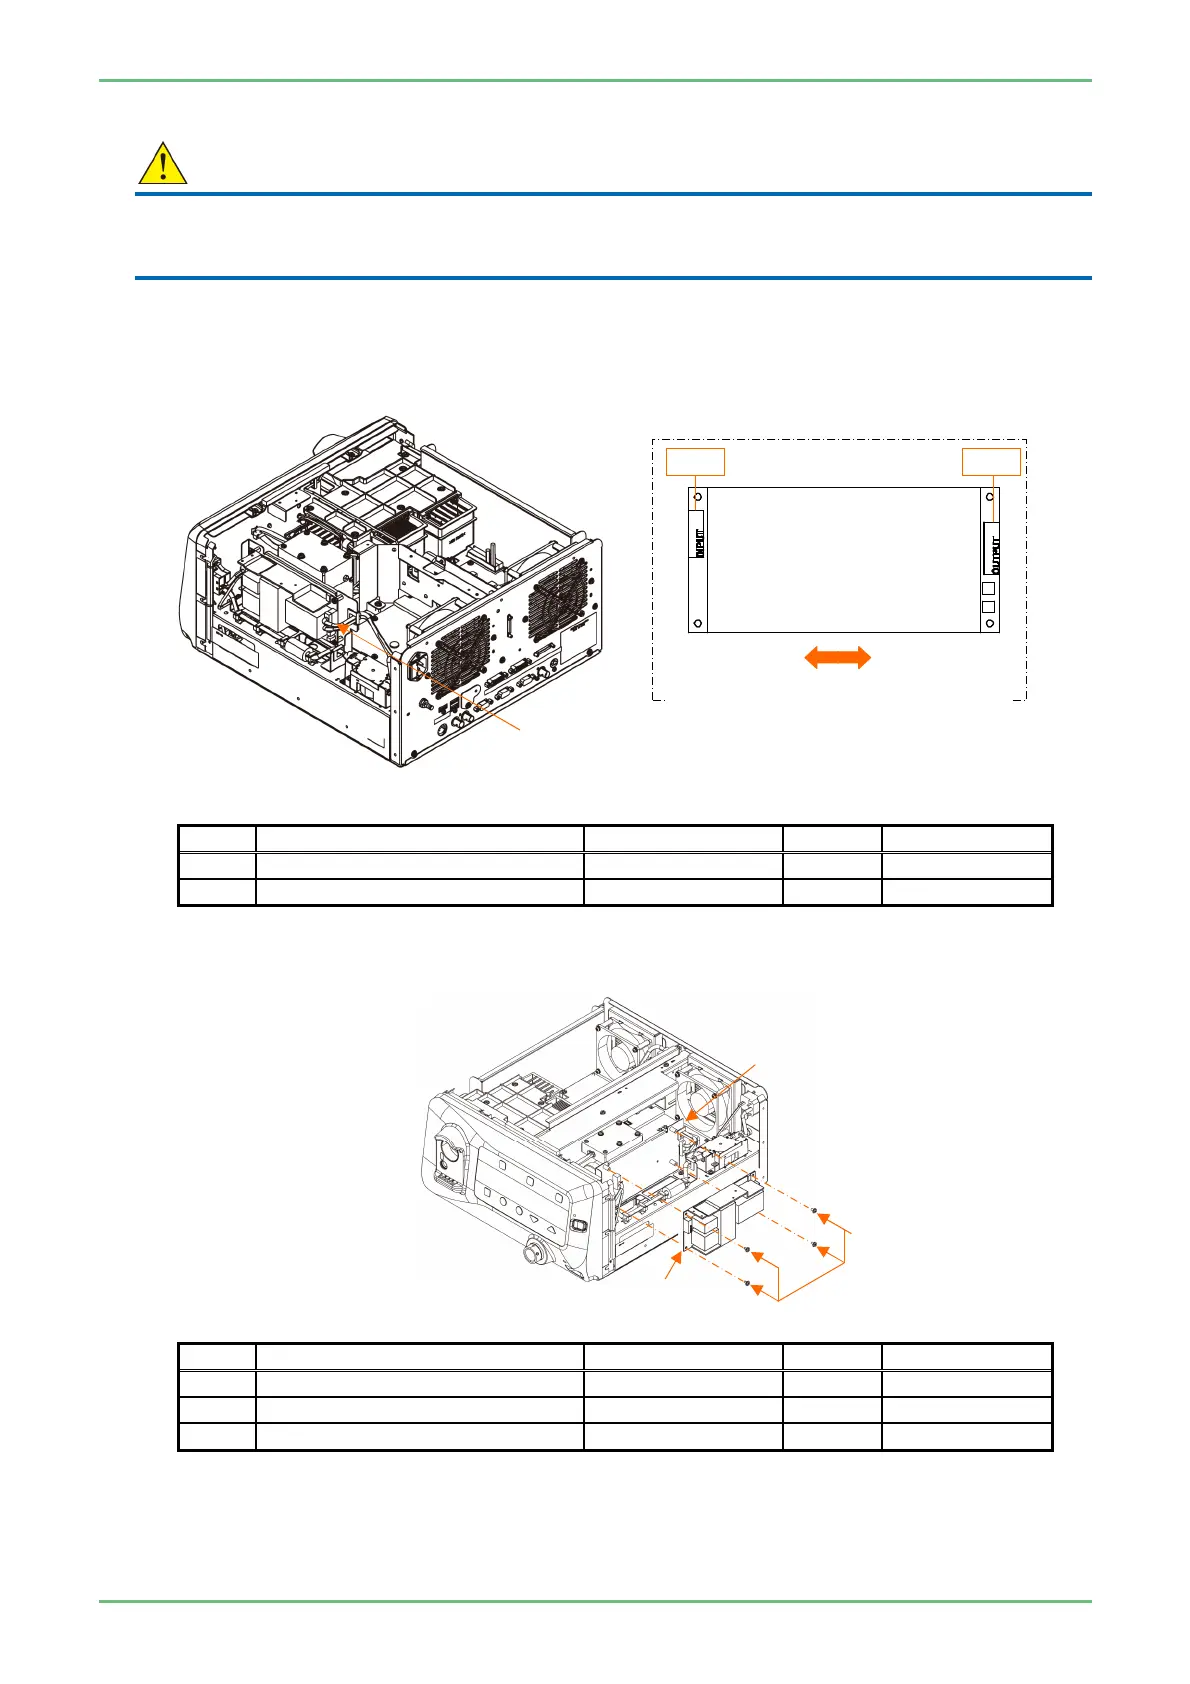
(2) Remove the connector of [1] power switch assy from the CN1 of power supply PCB.
(3) Remove the connector of [2] harness PS-ELC from the CN8 of power supply PCB.
Key Name ID Q’ty Note
1 Power Switch Assy 128Y200063* 1 CN1
2 Harness PS-ELC 136Y200451* 1 CN8
(4) Remove [3] screw x 4, then remove [5] power supply PCB from [4] power supply bracket assy.
Key Name ID Q’ty Note
3 Screw 308S0414* 4 60Ncm
4 Power Supply Bracket Assy Not Supply Parts 1
5 Power Supply PCB 125N120017* 1
[4]
[5]
[3]
[2]
PS12V PCB CN Configuration
[1]
CN1
Front
Back
CN8
[2]


 To Next Page