Removing and installing components during servicing
Removing and installing the battery
i
For how to remove and fit a battery, see "
Working with the notebook", section "Removing
and installing the battery
".
Installing and removing the hard disk
Removing the hard disk
► Switch the notebook off and pull the power plug out of the mains socket.
► Close the LCD screen so that it locks into place.
► Disconnect all cables connected to the notebook.
► Turn your notebook over and place it on a sturdy, flat surface.
► Remove the battery (see "
Removing the battery").
When removing the hard disk, ensure that the contacts in the hard disk compartment do
not bend or become damaged.
!
Pull the hard disk straight out of the hard disk compartment.
Please observe the notes in the operating instructions for the hard disk.
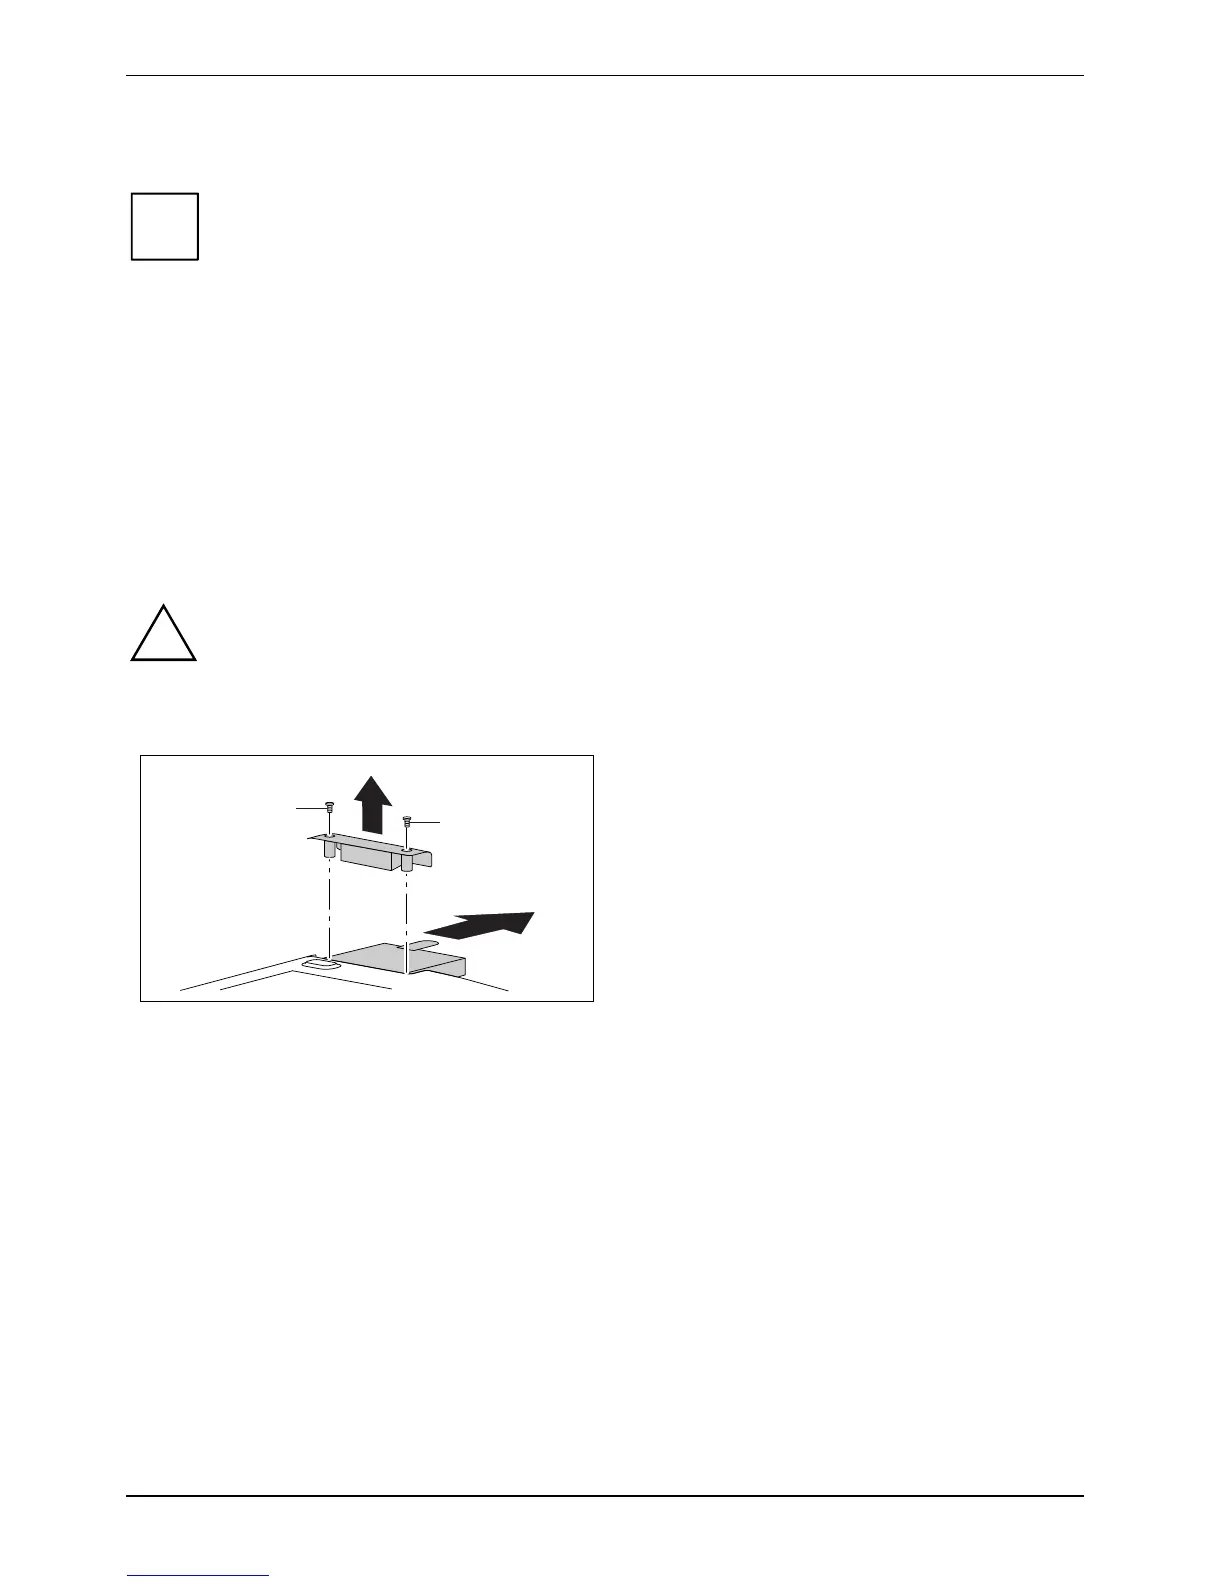
► Remove the 2 screws (1).
3
2
1
1
► Lift the cover off the notebook in the
direction of the arrow (2).
► Pull the hard disk out of the hard disk
compartment in a straight line (3) along the
guide rail.
► Remove the screws on the hard disk frame.
► Pull the hard disk out of the frame.
50 10600718714, edition 1
 Loading...