Removing and installing components
during servicing
Removing and installing the har
ddisk
Depending on the particular variant of notebook you have, it may have
a shared compartment for m emory and hard disk, or these components
may be housed in two separate compartments.
Devices with a joint compartment for memory and hard disk
Removing the hard disk
► Remove the memory cover (see "Removing the memory cover", "Devices with a
joint compartment for memory and hard disk", P age 65).
1
1
a
2
3
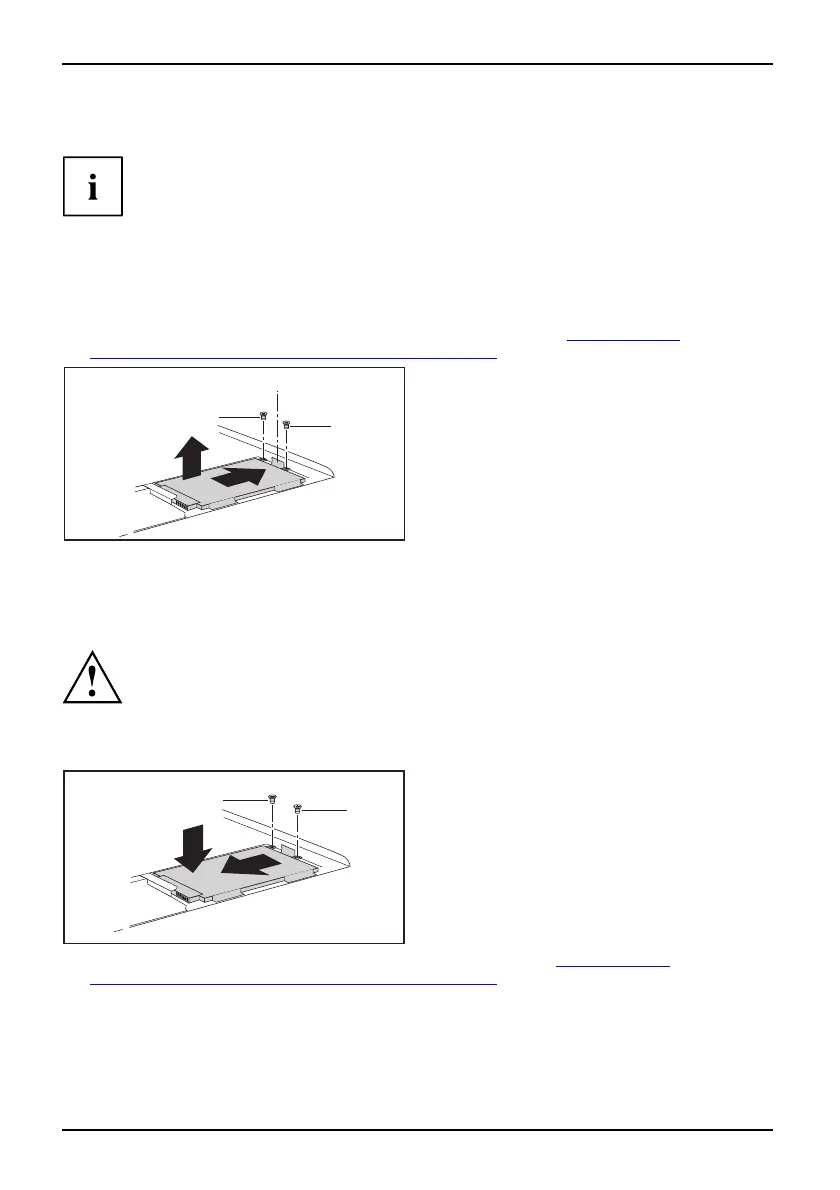
► Remove the screws (1) from the
frame of the hard disk.
► Pull the hard disk by the pulling aid (a) in a
straight dire ction (2) towards the right.
► Remove the hard disk with the frame (3)
from the hard disk c ompartment.
► Remove the 4 screws from t he frame of the hard disk.
► Pull the hard disk out of
the frame.
Installing the hard disk
When installing the ha
rd d isk, ensure that the contacts in the hard disk
compartment do not ben
d or become damage d.
Harddisk
► Slide the hard disk into the frame.
► Secure the hard disk to the frame using the 4 screws.
3
3
2
1
► Working in the direction of the arrow (1),
insert the hard disk with the frame in to
the hard disk compartm ent.
► Slide the hard disk in a straight direction
(2) to the left until the contacts engage.
If necessary, use a finger to guide the
left-hand edge of the hard disk along.
► Secure the frame with the screws (3).
► Fasten the memory cover (see "Fastening the memory cover", "
Devices with a
joint compartment for memory and hard disk", P age 66).
68 A26391-K90-Z200-1-7619, edition 1