PC Specialist's Handbook ErgoPro m664-series
Edition 1 - Release 1 - March 1998 Page 1-7
Removing and installing the System board
There are two ways to remove the System board, primary and optional ways.
Primary:
1. Remove the system unit cover (see page 1-6)
2. Disconnect all data, fan and power cables from System board.
3. Disconnect all cables from additional adapter cards.
4. Remove all additional adapter cards from expansion slots (see page 1-10).
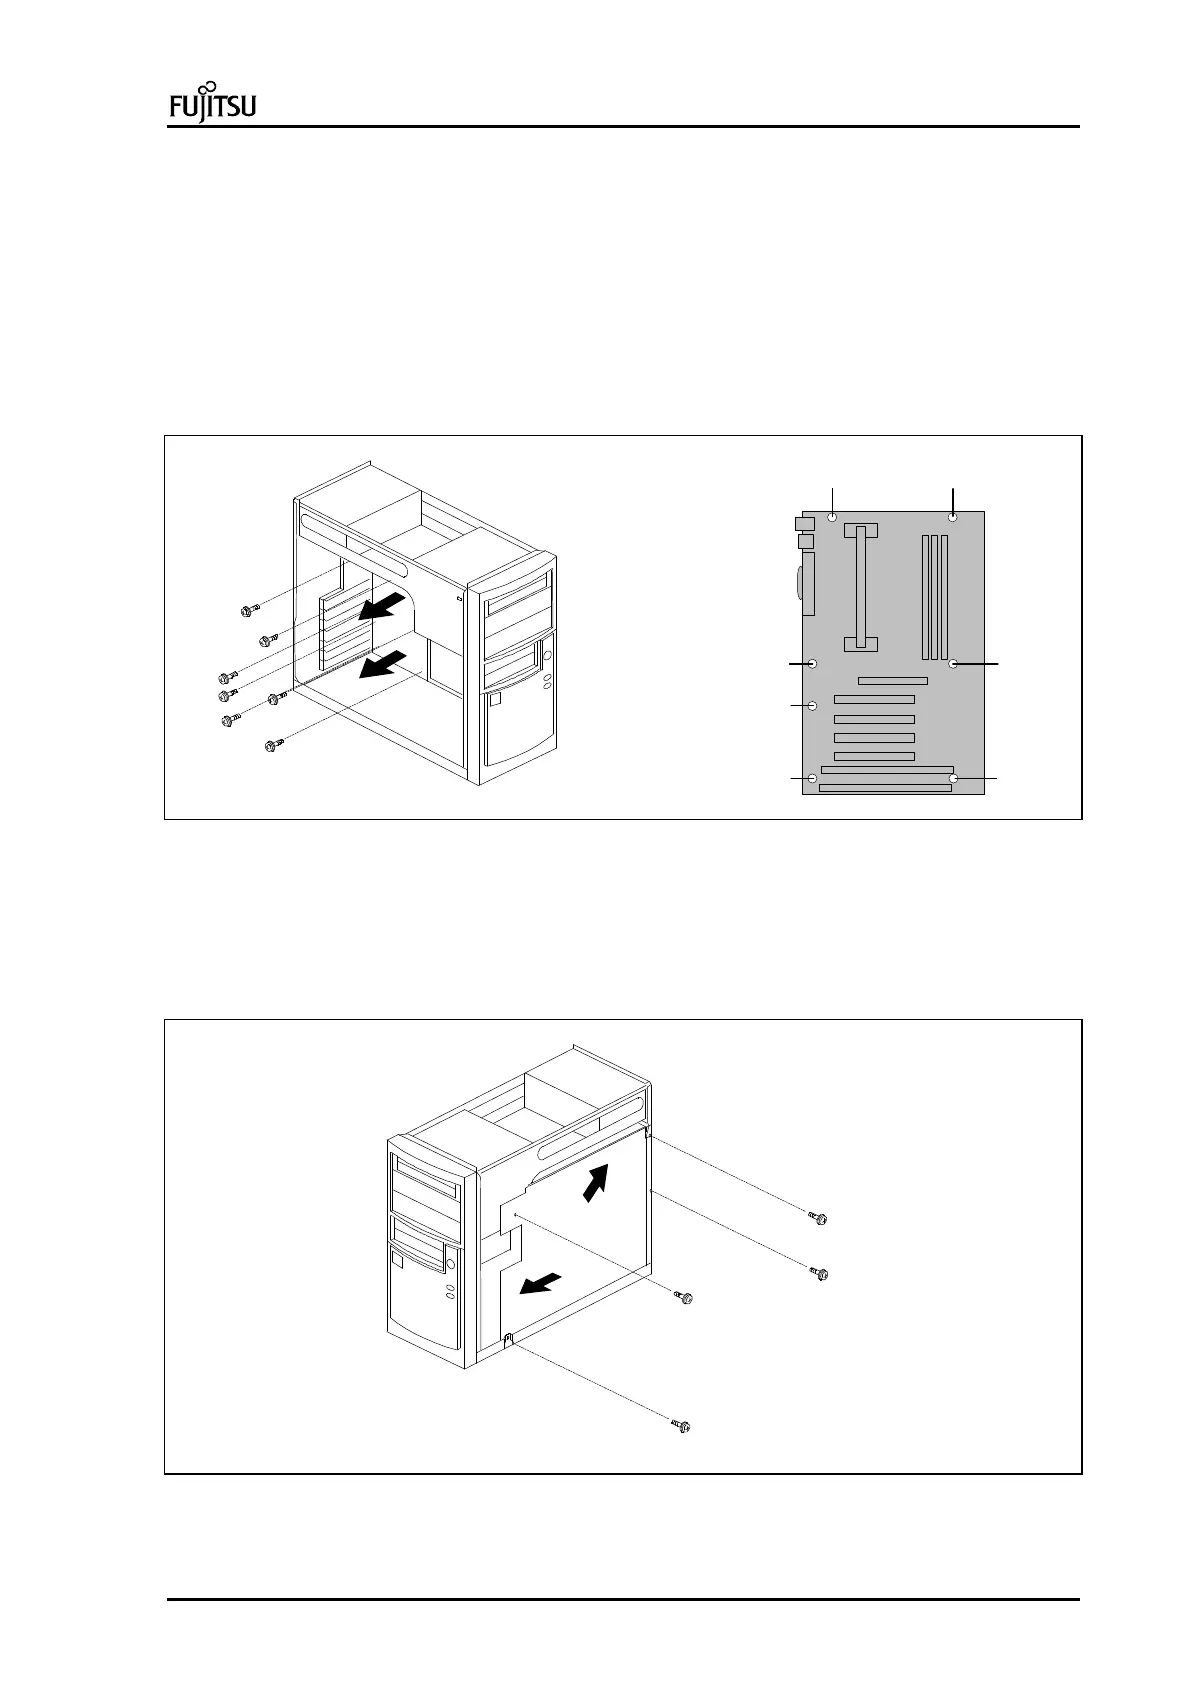
5. Remove 7 screws (See picture for location) that holds System board on backplate (A).
6. Take System board out of the chassis with care (B).
A
B
B
7
6
5
4
3
1 2
Picture 7 : Removing the System board
Optional:
1. Follow steps 1-4 as mentioned above.
2. Remove 4 screws from backplate of System board on the right side of the System unit (A).
3. Slide backplate about 20mm towards to the front panel of the System unit (B).
4. Lift backplate and take it out of the chassis with care (C).
5. Remove 7 screws that holds System board on backplate (see picture 4).
A
A
A
B
C
Picture 8 : Removing the System board
 Loading...