24
<Basic Operation>
*The frequencies which can be selected appear on the screen.
2. Select the frequency you want to use and
push the EDIT button.
$FRQ¿UPDWLRQPHVVDJHDSSHDUV
*When changing the frequency band, change the module
before turning on the power.
3. If the frequency is correct, push the EDIT
button.
*A screen which shows that frequency data is being sent
is displayed and the frequency data is sent to the receiver
together with a beep sound. (The frequency data can be
UHVHQWE\VHOHFWLQJ>5(75<@DQGSXVKLQJWKH(',7EXWWRQ
4. Turn on the receiver power while the new
frequency data above is displayed.
*When receiver frequency setting is complete, the receiver
PRQLWRU/('EOLQNVRQFHDQGWKH&+VHUYRVKXWWOHV
times across the neutral position.
*The new receiver frequency data uses very low power
whose frequency is different from that of the frequency
channel used. When setting the receiver frequency, bring the
transmitter and receiver as close together as possible.
*If the new data is not read correctly due to the ambient
conditions, extend the transmitter antenna and bring the
transmitter close to the receiver antenna and repeat steps 3
through 4.
*The frequency can also be changed by connecting the
transmitter and receiver directly with the DSC cord and
performing steps 3 through 4.
*When the receiver ID code is incorrect, the receiver monitor
/('ZLOOEOLQN5HWXUQWRWKHUHFHLYHU,'VHWXSVFUHHQDQG
reset the receiver ID.
5. When frequency setting is complete, move
the cursor to the [END] position and push the
EDIT button.
6.A confirmation message ("TRANSMIT?") is
displayed. To send on the new frequency,
select [YES] and push the EDIT button.
7RQRWWUDQVPLWVHOHFW>12@DQGSXVKWKH(',7EXWWRQ
In case of using PCM1024, PPM receivers
*Make sure that PCM1024 or PPM is set as a modulation
scheme. Then change the frequency as follows.
*For a description of the modulation scheme change, refer to
WKH)5(48(1&<IXQFWLRQS
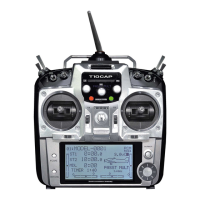
Frequency setup screen
7XUQRQWKHWUDQVPLWWHUSRZHU$FRQÀUPDWLRQ
message ("TRANSMIT?") is displayed. Since
you do not want to transmit, select [NO] and
then push the EDIT button.
2. Select the area that displays the frequency
on the home screen or [FREQUENCY] in the
linkage menu and push the EDIT button.
*The frequency setup screen appears.
How to change the frequency
3. When switching the frequency, select [BAND
NO.] and push the EDIT button.
*The frequencies which can be selected appear on the screen.
4. Select the frequency corresponding to your
receiver and push the EDIT button.
$FRQ¿UPDWLRQPHVVDJHDSSHDUV
5. If the frequency is correct, push the EDIT
button.
6.A confirmation message ("TRANSMIT?") is
displayed. To send on the new frequency,
select [YES] and push the EDIT button.
7RQRWVHQGVHOHFW>12@DQGSXVKWKH(',7EXWWRQ
Registration of the user's name
T12FG transmitter can register user's name.
User's name setup screen
1. Turn on the power of the transmitter.
2. Select [USER NAME] in the system menu and
push the EDIT button.
*The user name set up screen appears.
Current user name Input Box
Changing the user name
1. Change the user name as described below:
[Moving cursor in input box]
6HOHFW>ł@RU>ń@DQGSXVKWKH(',7EXWWRQ
[Deleting a character]
When [DELETE] is selected and the EDIT
button is pushed, the character immediately
after the cursor is deleted.
[Adding a character]
When a candidate character is selected
from the character list and the EDIT button
is pushed, that character is added at the
position immediately after the cursor.
*A name of up to 12 characters long can be entered as the
user name. (A space is also counted as 1 character.)
2. At the end of input, select [ENTER] and push
the EDIT button. (To terminate input and
return to the original state, select [CANCEL]
and push the EDIT button.)