How to turn transmitter power ON/OFF
For safety reasons, the radio will be emmiting
only after confirming when turning on the power.
Please follow the instructions for turning on/off the
transmitter.
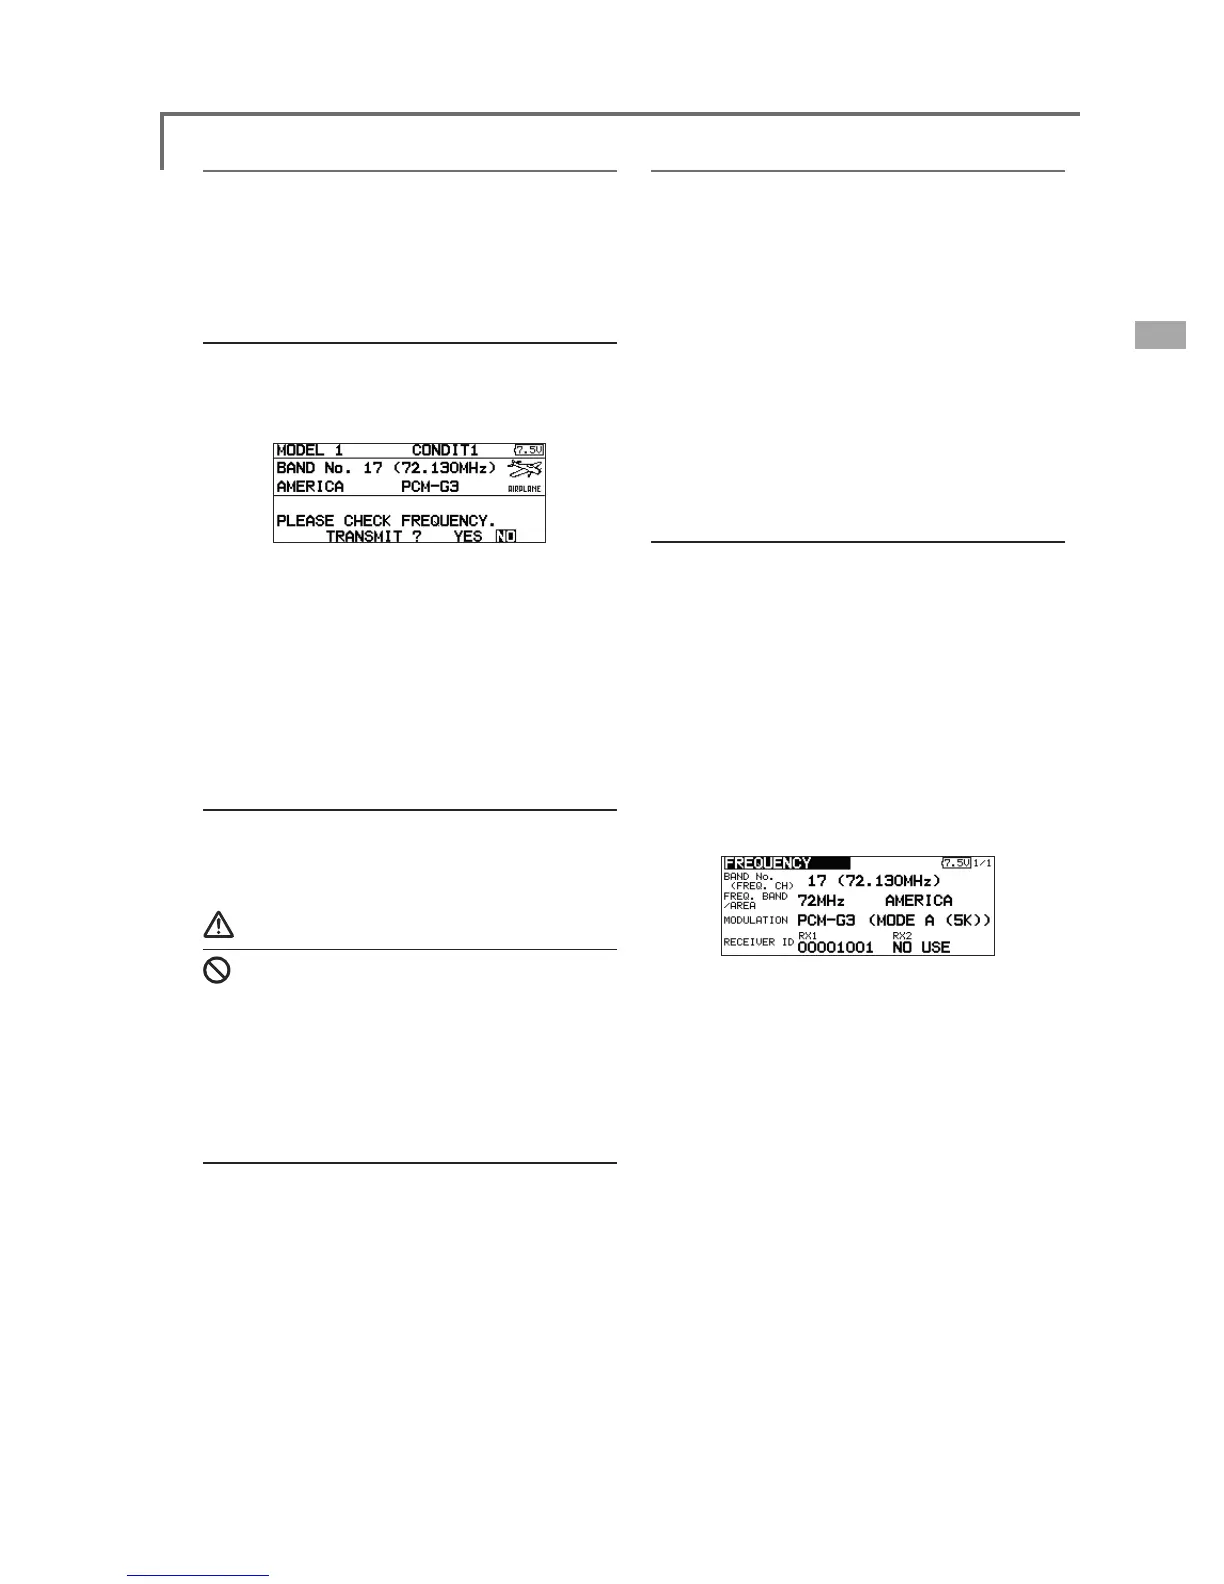
When turning on the power of the transmitter
1. Turn on the power switch of the transmitter.
*After initialization of the transmitter is over, the frequency
FRQ¿UPDWLRQVFUHHQSRSVXSDQGWKHUHG/('PRQLWRUWXUQV
on.
2. Check the frequency shown on the screen.
If it is OK, then select [YES] and push the EDIT
button.
7KHJUHHQ/('PRQLWRUWXUQVRQDQGWKHWUDQVPLWWHUEHJLQV
to emit radio waves.
7RQRWWUDQVPLWVHOHFW>12@DQGSXVK(',7EXWWRQ
3. Then, you will see the home screen and you
will be able to set conditions.
How to stop the transmitter
Turn off the power switch of the transmitter. The
internal circuit of the transmitter starts the shut
down process including saving the set-up data.
Warning
Once you turn off the power, never operate the
power switch until the power shutdown process
is fully completed. If you turn on the power
switch again while the transmitter is still in the
process of power shutdown, the transmitter
power does not start.
Radio wave auto shut-down
If you do not operate the transmitter (stick, knob,
switch or digital trim) for 30 minutes, the radio
ZDYHLVVWRSSHGDQGWKHPHVVDJH3/($6(7851
2))32:(56:,7&+LVGLVSOD\HGZLWKWKH
alarm sound.
1. Turn off the transmitter power and turn on it
again
How to change the frequency/How to set ID
The T12FG system has employed the frequency
synthesizer scheme. The T12FG transmitter will set
the frequency of the R5114DPS (PCMG3 receiver)
by the wireless data transmission. When you are
using a new PCMG3 receiver and changing the
frequency, set ID or frequency using the following
instructions.
Note: Receiver ID setting is not performed at the
time of purchase. Always perform the following
receiver ID setting before use.
*The frequency cannot be changed if the receiver ID and
transmitter settings are different.
In case of using PCMG3 receivers
*Make sure that PCM-G3 is set as a modulation scheme.
Then change the frequency by the following instruction.
*For a description of the modulation scheme change, refer to
WKH)5(48(1&<IXQFWLRQS
Frequency setup screen
7XUQRQWKHWUDQVPLWWHUSRZHU$FRQÀUPDWLRQ
message ("TRANSMIT?") is displayed. Since
you do not want to transmit, select [NO] and
then push the EDIT button.
2. Select the area that displays the frequency
on the home screen or [FREQUENCY] in the
linkage menu and push the EDIT button.
*The frequency setup screen appears.
How to set ID
1. Select [RECEIVER ID](RX1) and push the EDIT
button.
*The receiver ID code input screen appears.
2. Input the 8-digit ID code stuck to the receiver
case. If the inputted ID code is correct, select
[ENTER] and then push the EDIT button.
6HOHFWWKHILJXUHZLWKWKH(',7GLDODQGSXVKWKH(',7
button for each digit.
8VH>%$&.63$&(@WRPRYHEDFNGLJLWE\GLJLWIRU
correction if you made a mistake. When you want to stop
ID code change, move to the function name at the top of the
VFUHHQDQGSXVKWKH(',7EXWWRQWRUHWXUQWRWKHRULJLQDO
screen.
*Once the receiver ID code is set, it does not have to be reset
as long as the receiver is not changed.
*When you use two receivers with a large aircraft, input the
ID of each receiver.
How to change the frequency
1. When switching the frequency, select [BAND
NO.] and push the EDIT button.