166
Chapter 7: Adding or Replacing Components
www.gateway.com
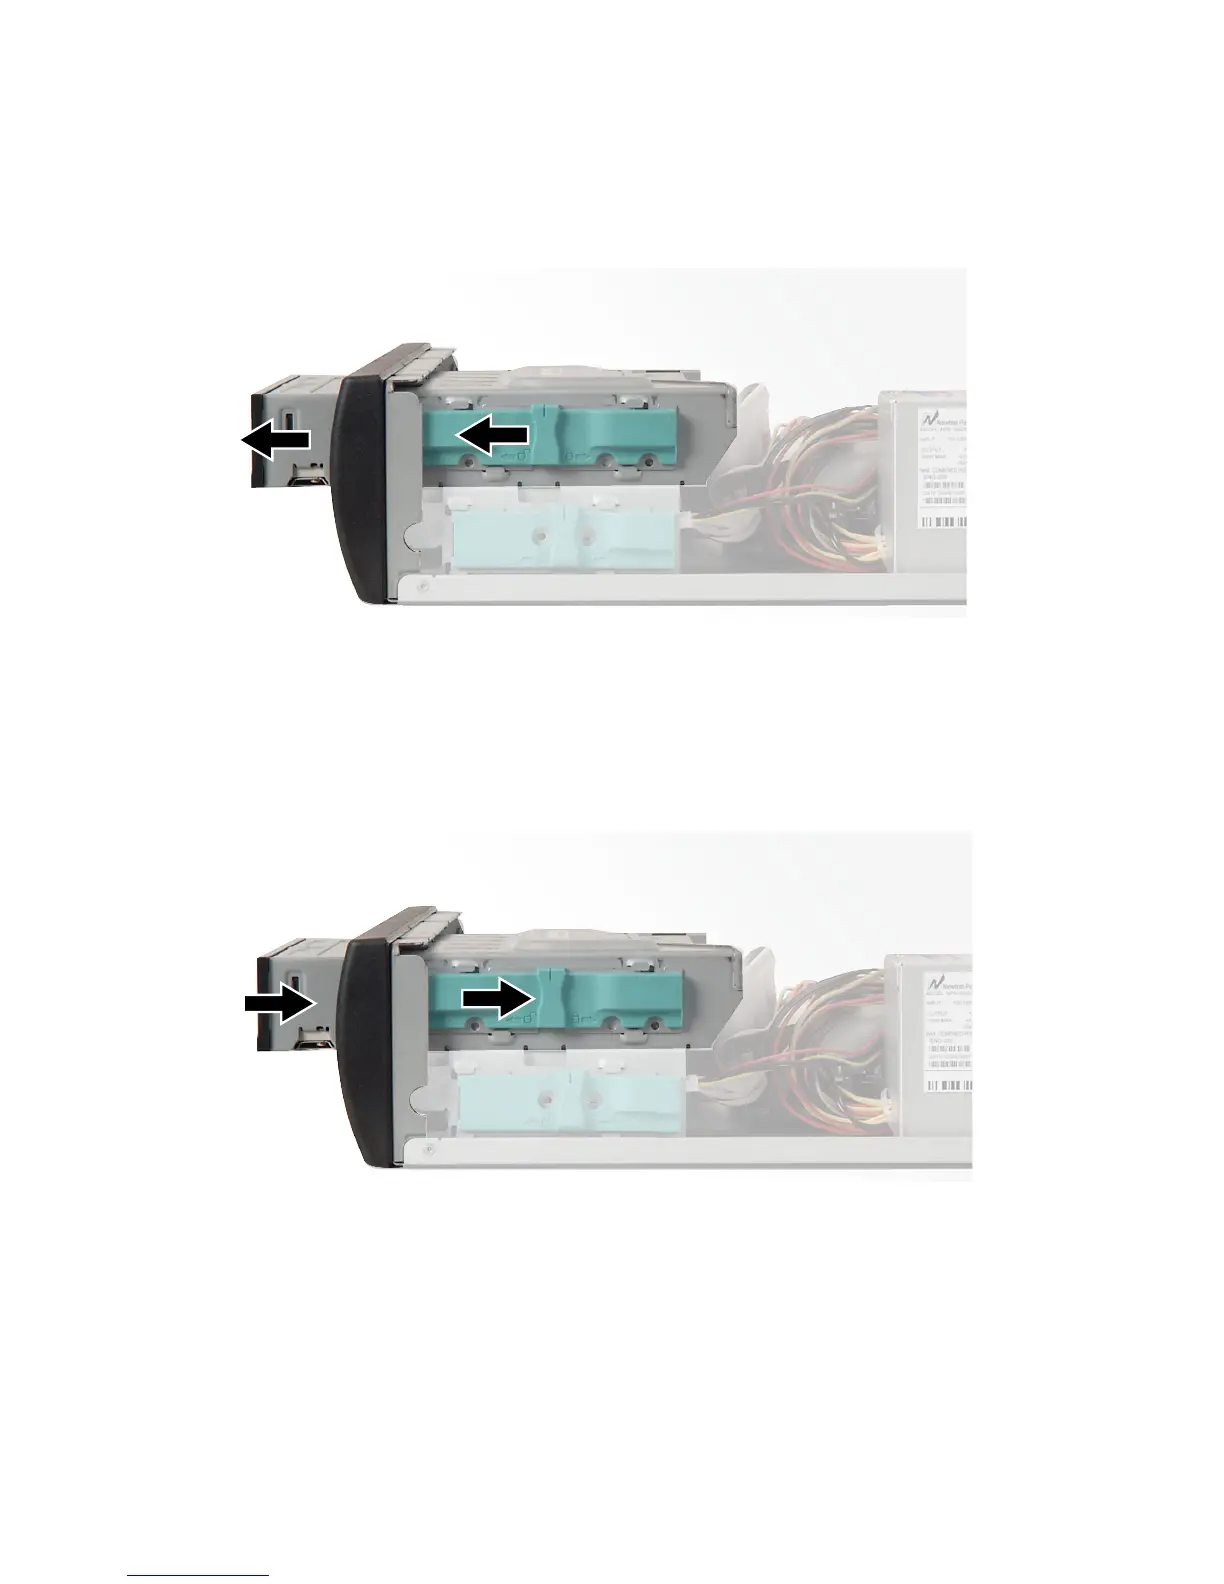
4 If there is a shipping screw next to the release lever, remove the screw, slide
the lever toward the front of the case, then remove the drive.
5 Set any jumpers on the new drive to match the old drive. See the drive
documentation for further instructions.
6 Slide the new drive into the drive bay until it settles into the indentation,
then slide the release lever toward the back of the case.
7 If you removed a shipping screw, reinstall the screw.

 Loading...


