5) If the built-in SmartBox is available, remove the working table by removing the 4 thumbscrews
towards the sides and place the rotary attachment on the bottom tray. Under this condition,
we can use either the small or big conical xtures (for working with bigger objects with diameters
0.5"-1.9" or 3.7"-5.0" respectively).
6) Line up the rotary attachment to the left hand side of the working area and towards the
mid-section of the working area.
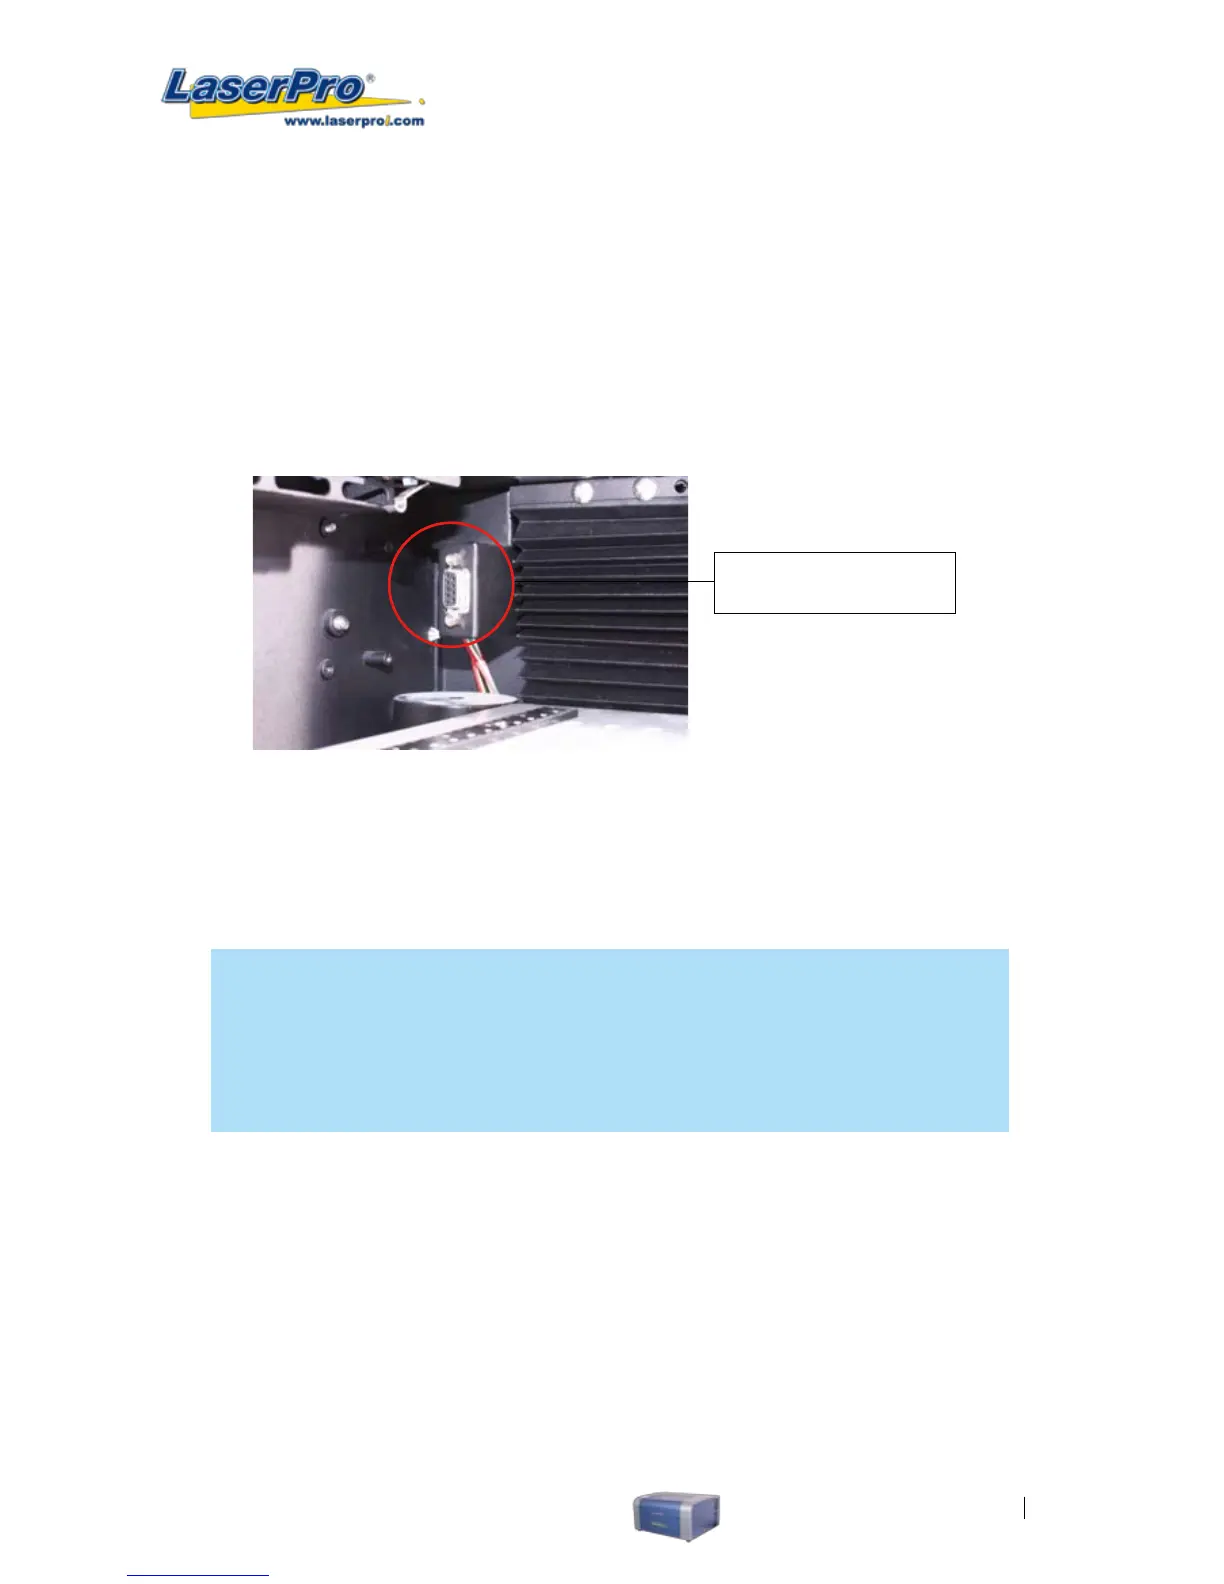
7) Connect the rotary attachment cable to the rotary attachment port located inside the
LaserPro C180’s (shown in the picture below).
8) Turn on the machine.
Rotary Attachment Port
9) Close the front panel.
10) The rotary attachment is now properly installed. Power on the LaserPro C180 and the rotary
attachment will be automatically detected and the engraving table will automatically move to
its lowest position.
NOTE
For machines without the built-in SmartBox, the rotary attachment is positioned on the
working table and the max. diameter of the object is 0.5"-1.9". For machines with built-in
Smartbox, the rotary attachment can be placed on the base of the SmartBox and used with
the large conical xtures to engrave objects with larger diameter up to 3.7"-5.0".
OPERATION:
1) Use a ruler to measure the diameter (at the point on the work piece you will be engraving) and
length of the work piece you will be engraving. Make a record of this.
2) Load the work piece onto the rotary attachment by rst listing the lever on the rotary attachment,
unlocking the adjustable end of the rotary attachment. Slide the adjustable end to accommodate
the length of the work piece. Load the working piece by centering the open end of the work
piece against the rubber wheel and slide the adjustable end to t the bottom of work piece
rmly. Now simply lower the lever to secure the work piece with the rotary attachment.