Chapter 2: Installation
10 Concord 4 Installation Manual
Mounting the panel
Mount the panel to the wall or wall studs.
Caution: Make sure you are free of static electricity whenever you work on the panel
with the cover open. To discharge any static, first touch the metal panel chassis, and
then stay in contact with the chassis when touching the circuit board. We
recommend using a grounding strap.
To mount the panel:
1. Remove the panel door and remove the necessary wiring knockouts. Be careful
not to damage the circuit board.
2. Feed all wires through wiring knockouts and place the panel in position against
the wall.
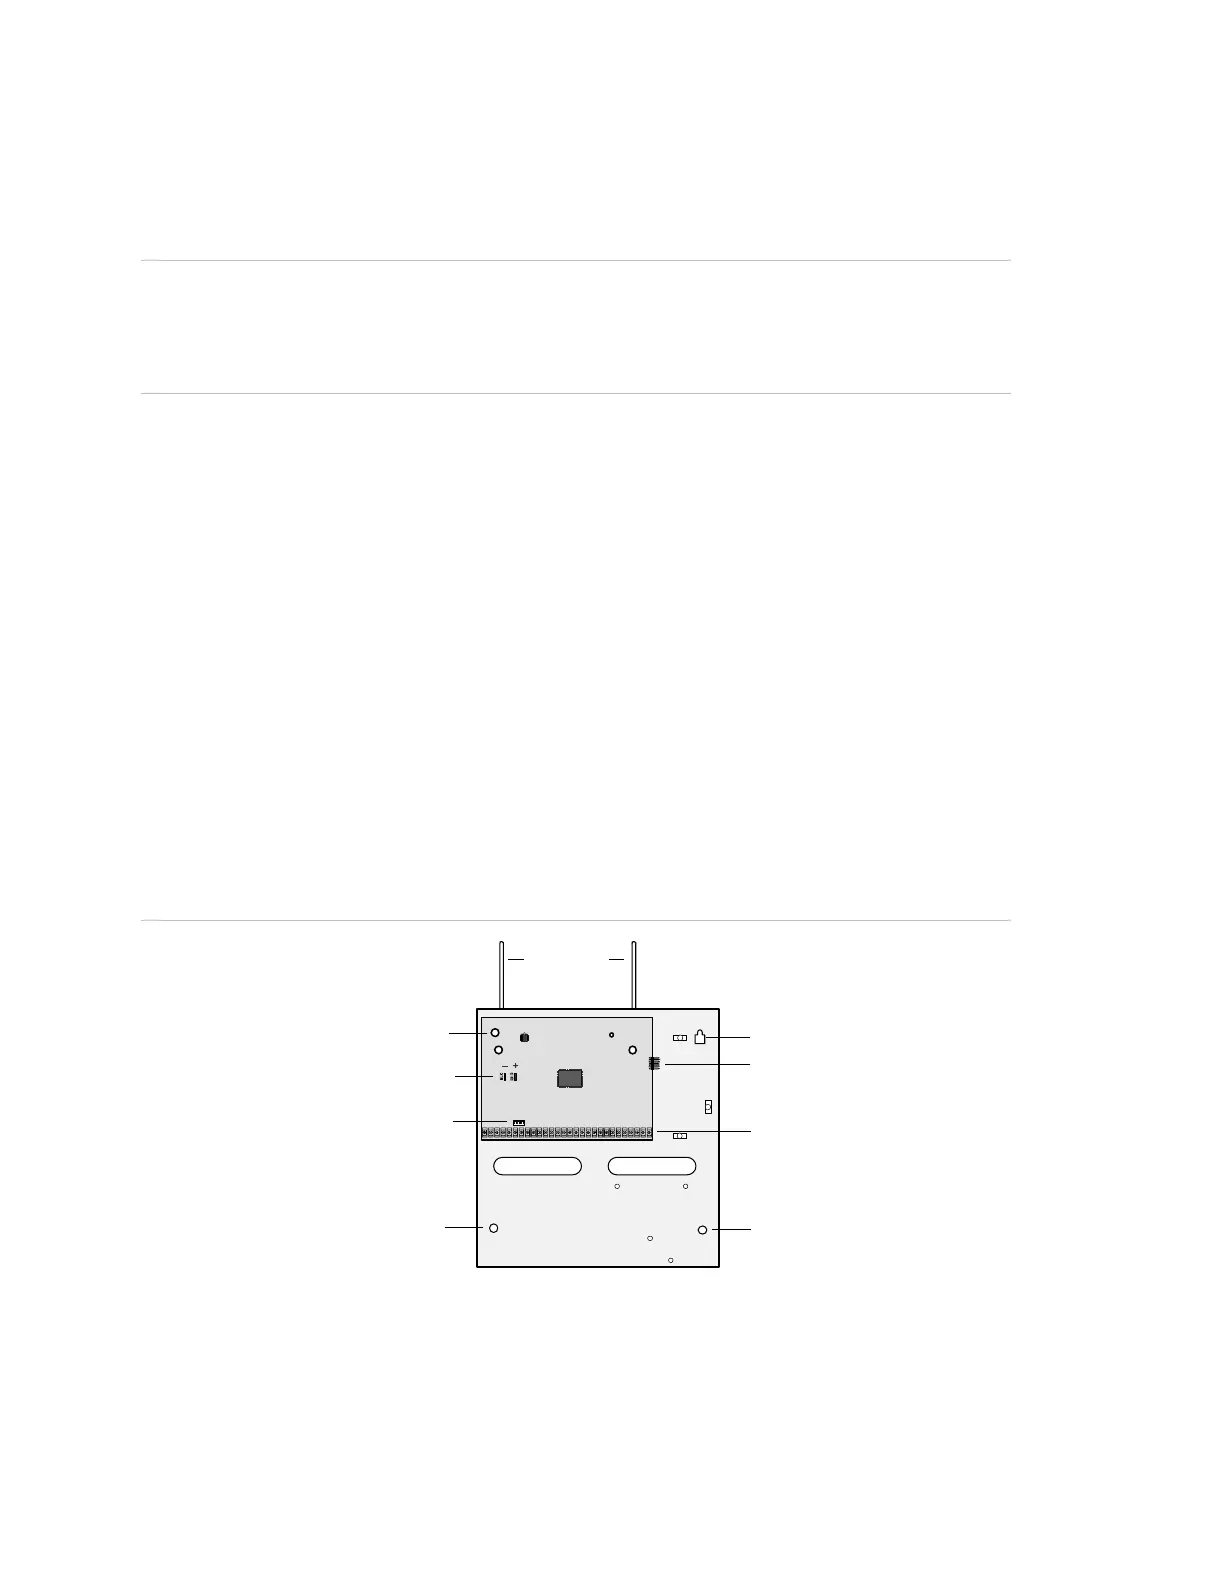
3. Level the panel and mark the top and bottom mounting holes (see Figure 2
below).
4. Install anchors where studs are not present.
5. Partially insert screws into the two top mounting hole locations, then hang the
panel on the two screws.
6. Recheck for level, insert the two lower screws, and tighten all four mounting
screws.
Figure 2: Panel components and mounting holes
Mounting hole
Backup battery terminals
Programming
touchpad header
Mounting hole
Antennas
Mounting hole
Snapcard connector
Processor
Terminal strip
Mounting hole

 Loading...