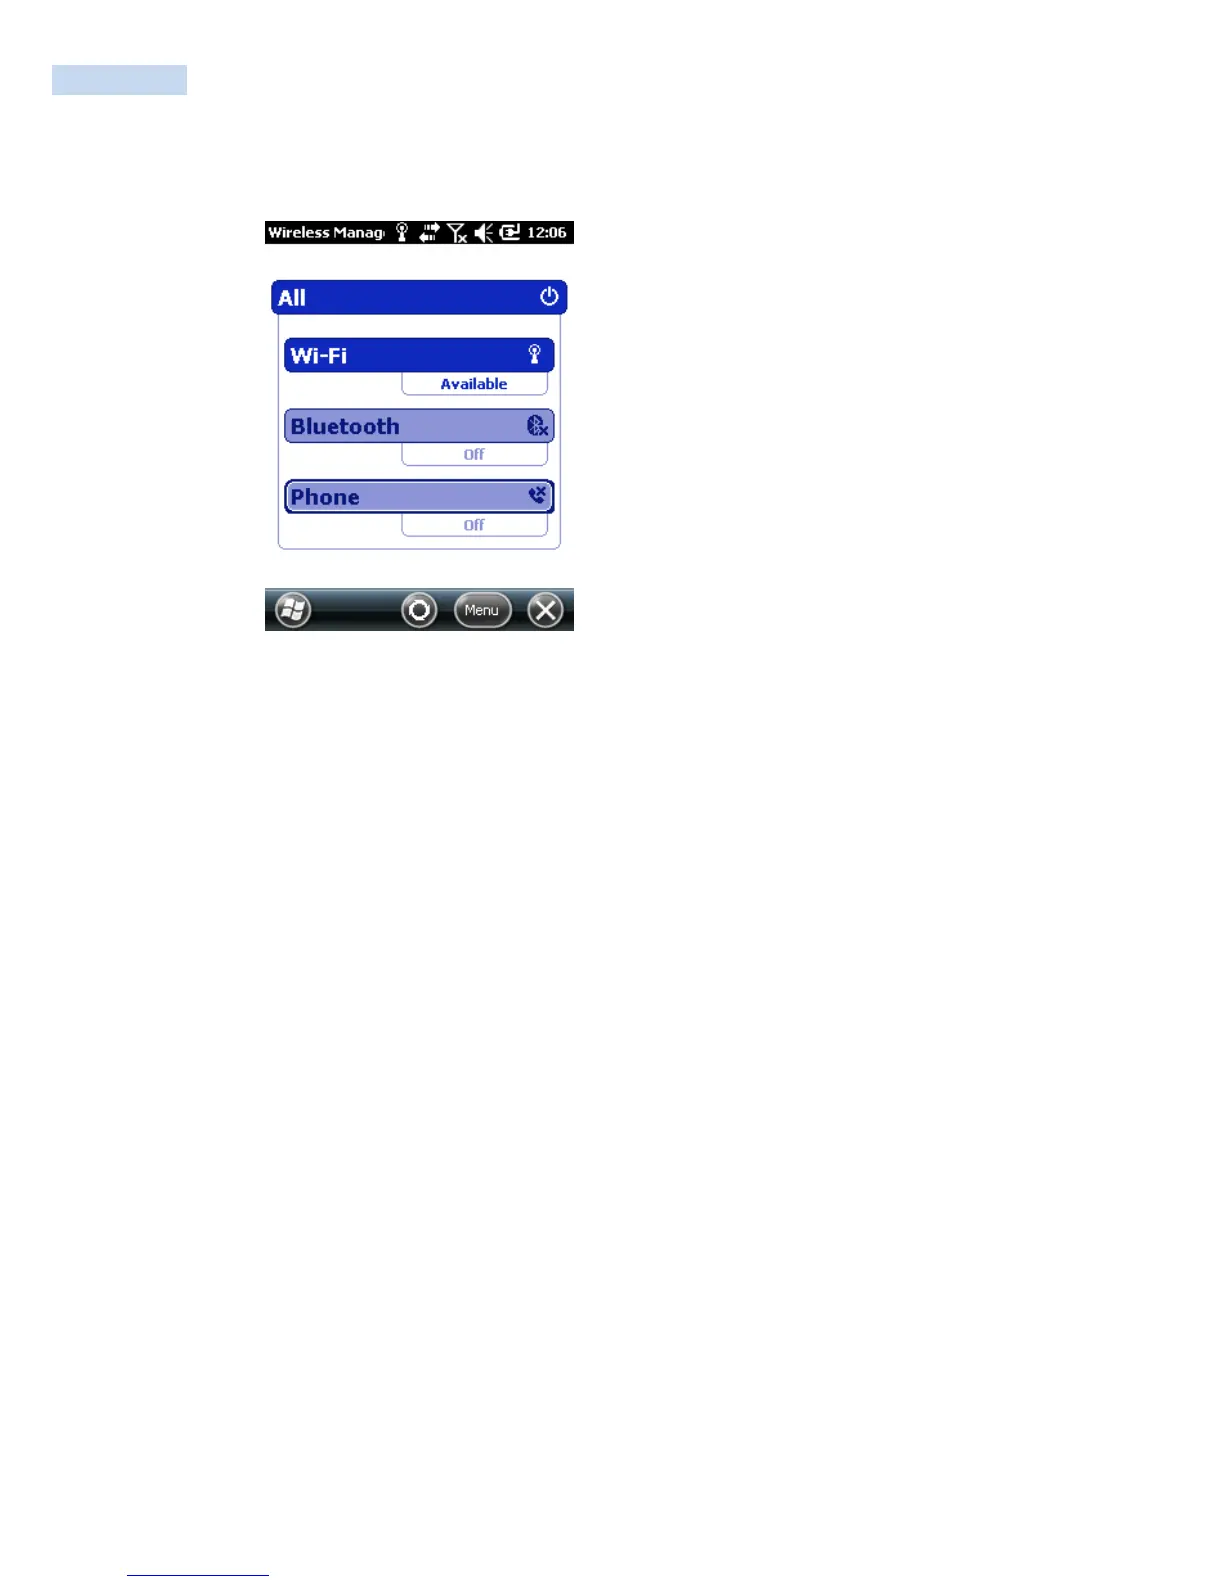
To configure 802.11 radio parameters
1. Tap Start > Settings > Connections > Wireless Manager > WI-FI status is changed to ON.
2. Menu > Wi-Fi Settings. The Configure Wireless Networks page appears.
3. If the Network you want to connect to is available in the wireless networks list, tap the network
name and proceed to Step 4.
If the Network you want to connect to is not in the wireless networks list:
Tap Add New.
In the Network Name field, type in the name of your network and then tap Next. The Configure
Network Authentication page appears.
4. From the Authentication list, choose either Open, Shared, WPA, WPA-PSK, WPA2, or WPA-PSK.
• If you choose Open or Shared, Data Encryption is automatically set to WEP and the key is
automatically provided.
• If you choose WPA, Data Encryption is automatically set to TKIP.
• If you choose WPA2, Data Encryption should be set to AES.
• If you choose WPA-PSK, Data Encryption is automatically set to TKIP and you need to enter a
Network key.
• If you choose WPA2-PSK, Data Encryption should be set to AES and you need to enter a
Network key.
5. Tap Next.
6. For EAP type, select either PEAP or Smart Card or Certificate from the list and tap Finish. You
return to the Configure Wireless Networks page.
7. Tap Connect. The RP1100 prompts you to enter this network information:
User name