1 INTRODUCTION
This guide provides complete step-by-step instructions for preparing the Zenith60 GNSS series
for measuring work. The instructions cover all of the required installation tasks for the Zenith60
GNSS receiver.
The latest versions of GeoMax documents and software referred to in this document are
available from the Technical Library of the GeoMax Partner Area in the Zenith60 folder at:
www.geomax-positioning.com/partner-area
Only the tasks required for the initial setup of a new Zenith60 system are described in this
document. For further information regarding the operation of the Zenith60 components, please
refer to the User Manual.
• The Zenith60 Quick Guide is included with the container set. The comprehensive User Manual
for the GNSS receiver is available from the USB stick that is included in the container set. Both
the Quick Guide and the User Manual are also accessible from the Technical Library in the
Zenith60 folder at www.geomax-positioning.com/partner-area
• The appropriate uses of the included accessories are described in the User Manual.
2 BATTERY CHARGING
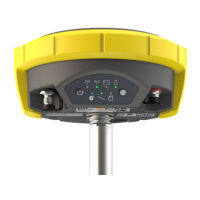
2.1 Zenith60 Receiver
Before using the instrument, the included batteries should be charged. Insert the batteries into
the charger and plug the adapter into an AC power supply. Once the batteries are fully charged,
the charger LED will change from red to green and pushing the button on the battery will show
all four power level LEDs as solid green. Once fully charged, insert the batteries into the battery
compartments of the Zenith60 instrument and switch it on.
2.2 Field Controller
The Field Controller, if it is purchased, is supplied in a cardboard box which includes the device,
battery, and charging adapter. Insert the supplied battery into the battery compartment of the
device. Charge the internal battery with the supplied adapter. Do not disconnect from power
until the battery is fully charged.
 Loading...