10.2 Adjusting the Self-Levelling Accuracy
In Adjustment Mode the X-axis LED indicates changes
to the X-axis.
The Y-axis LED indicates changes to the Y-axis.
1. Turn off the power.
2. Put the Zone60 DG in an upright position.
3. Press and hold both the Up and Down arrow buttons.
4. Press the Power button. The X-axis calibration screen appears. The Zone60 DG is
now in calibration mode.
☞
In calibration mode, the LED does not blink and the laser head continues to rotate.
An hour-glass indicates that the Zone60 DG is levelling.
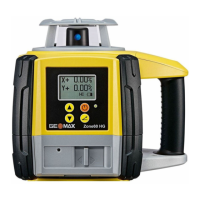
When entering Calibration mode, the X-axis calibration screen appears:
1. When the hour glass has disappeared, indicating that the Zone60 DG has levelled,
check both sides of the X-axis.
2. Press the Up and Down arrow buttons to bring the plane of laser light to the spe-
cified level position.
☞
Each step represents approximately 2 arc seconds of change. Therefore, 5 steps
equal approximately 1.5 mm at 30 m (1/16" at 100’).
3. Press the Grade button to accept the adjusted position and to switch to the Y-axis
calibration screen.
Description
Entering calibration mode
step-by-step
Calibrating the X-axis
step-by-step
Accuracy Adjustment 55