information, please refer to section Alarms or Flow Fail.
Changing Between Parameters
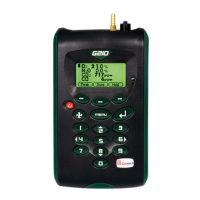
By default, the instrument displays the ‘Main Read Screen’ (for gas measurement). The instrument
will return to this screen after power on or when returning from the menus. The ‘Scroll’ keys can be
used to switch to another measurement screen. Continue to press the ‘Scroll’ keys to return to the
‘Main Read Screen’.
Memory
The memory should not be used as a permanent storage medium and any important data should be
transferred to a more permanent storage medium as soon as possible. The instrument should not be
stored for prolonged periods with valuable data in its memory.
Storage
When not in use the instrument should be kept in a clean, dry and warm environment, such as an
office. It should be stored flat with the stand folded away which helps prolong the life of the O
2
cell.
Warning and Error Codes
When switched on the instrument will perform a predetermined self-test sequence taking
approximately ten seconds. During this time many of the instrument’s working parameters and
settings are checked. If any operational parameters are out of specification or if the pre-programmed
recommended calibration/service date has passed, errors or warnings may be displayed.
Note: For further information please refer to section Problem Solving.
Battery/Charging
Note: Fully charge the unit before use when the instrument is first received or if the instrument has
been in storage for six months or more.
The battery used in the instrument is a 2.6 Ah Lithium-Ion cell. The instrument must be charged using
the power supply supplied with your instrument. The power supply supplied is intended for indoor
use only. Please ensure adequate ventilation whilst charging.
Note: The instrument cannot be powered or charged via the USB connector.
Note: When plugged into the power supply the instrument will power on and display charging.
When complete the display will change to show that the instrument is charged. To switch the
instrument ON whilst charging or charged is displayed, the operator will need to press and hold the
power key briefly.
Note: Once the instrument is fully charged, the power supply should be disconnected from the
instrument.