4
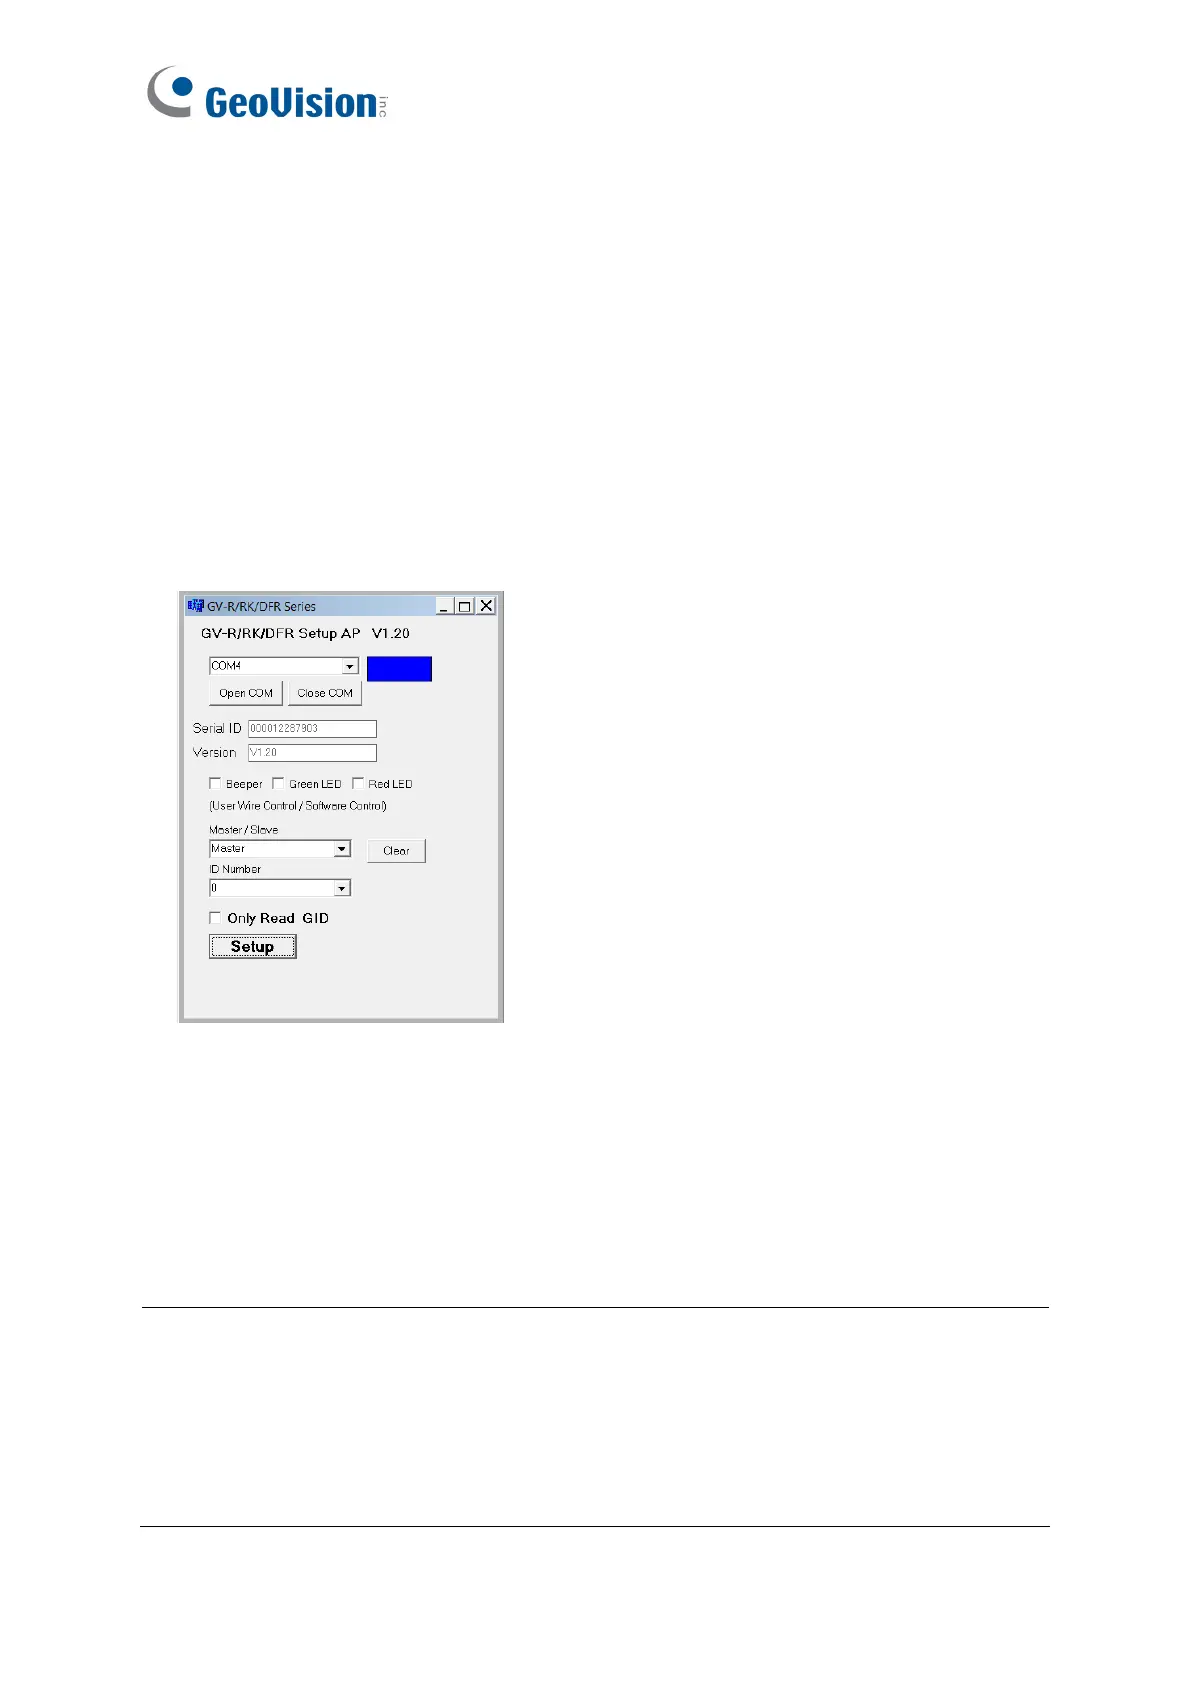
1.2.3 Defining the ID Number of GV-SR1251 by Using GV-Reader
Config Utility
Through a single RS-485 cable, you can connect up to 8 GV-Reader1251 / 1352 V2 /
SR1251 to a GV-AS Controller. To form a daisy chain connection, follow the steps below to
define each reader’s ID number by using GV-Config Utility.
1. Install and download GV-Reader Config Utility. For details, see 2.4 Installing GV-
R/RK/DFR Config AP.
2. Run GV-R/RK/DFR Config AP.
3. Select the COM port that is connected to the reader and click Open COM. The red
square next to the COM port box should change to blue to indicate the COM port is
correct.
4. Select an ID number for the reader. The ID number ranges from 0 to 7.
5. Click Setup. The serial number and firmware version of the reader will be automatically
detected. The settings are sent to the reader.
Note:
1. To define the ID number of GV-Reader1251 / 1352 V2, use the switches at the back of
the reader.
2. GV-SR1251 only reads UID. Therefore, the Only Read GID option in the GV-
R/RK/DFR Series dialog box is not functional for GV-SR1251.
 Loading...