5
Adjustments
Adjusting the Valia spring arms
22 / 56
Maquet PowerLEDII
01810 EN 03
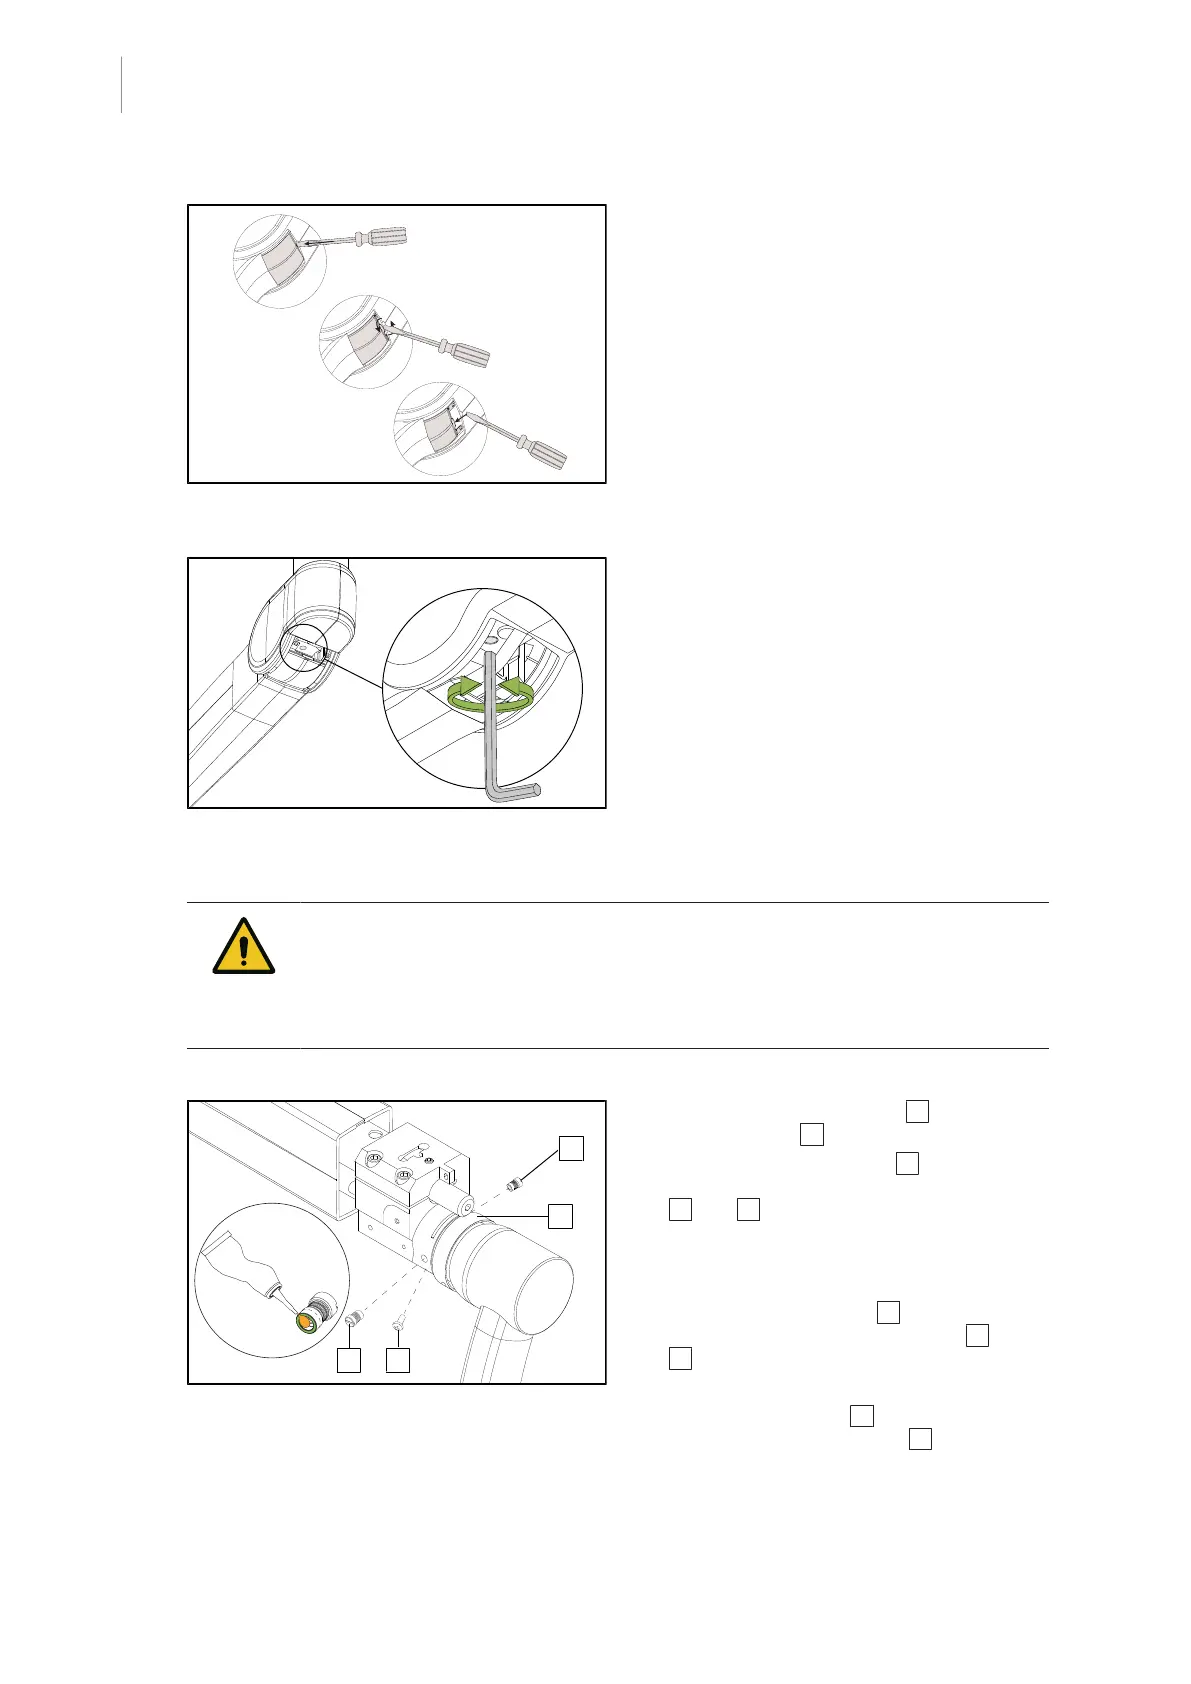
Fig.15: Opening the tabs
• Insert a flat head screwdriver into the
cover notch and tab.
• Rotate to release the stop from the tab.
• Push the tab back.
Fig.16: Adjusting the tension
• Position horizontally and push back the
tab halfway to access the adjustment
screw.
• Insert a 5-mm Allen key.
• Tighten to decrease the tension.
• Loosen to increase the tension.
WARNING!
Risk of injury
If a snap ring is missing or installed incorrectly, a component or part may fall
from the device.
Check that all snap rings are properly installed.
Fig.17: Adjusting the spring arm brakes
• Remove the M4x10 screw 1 and insert
the safety ring 2 .
• Remove the brake screw 3 , for the
LCH17 spring arm, or both brake screws
3 and 4 , for the LCH19 spring arm.
• Place a drop of paste, supplied with the
spring arm, on the wear area of the brake
screws.
• Adjust the brake screw 3 , for the LCH17
spring arm, or both brake screws 3 and
4 , for the LCH19 spring arm.
• Check that the snap ring is in place.
• Slide the safety ring 2 back in position
then refit the M4x10 screw 1 .
 Loading...