Removal
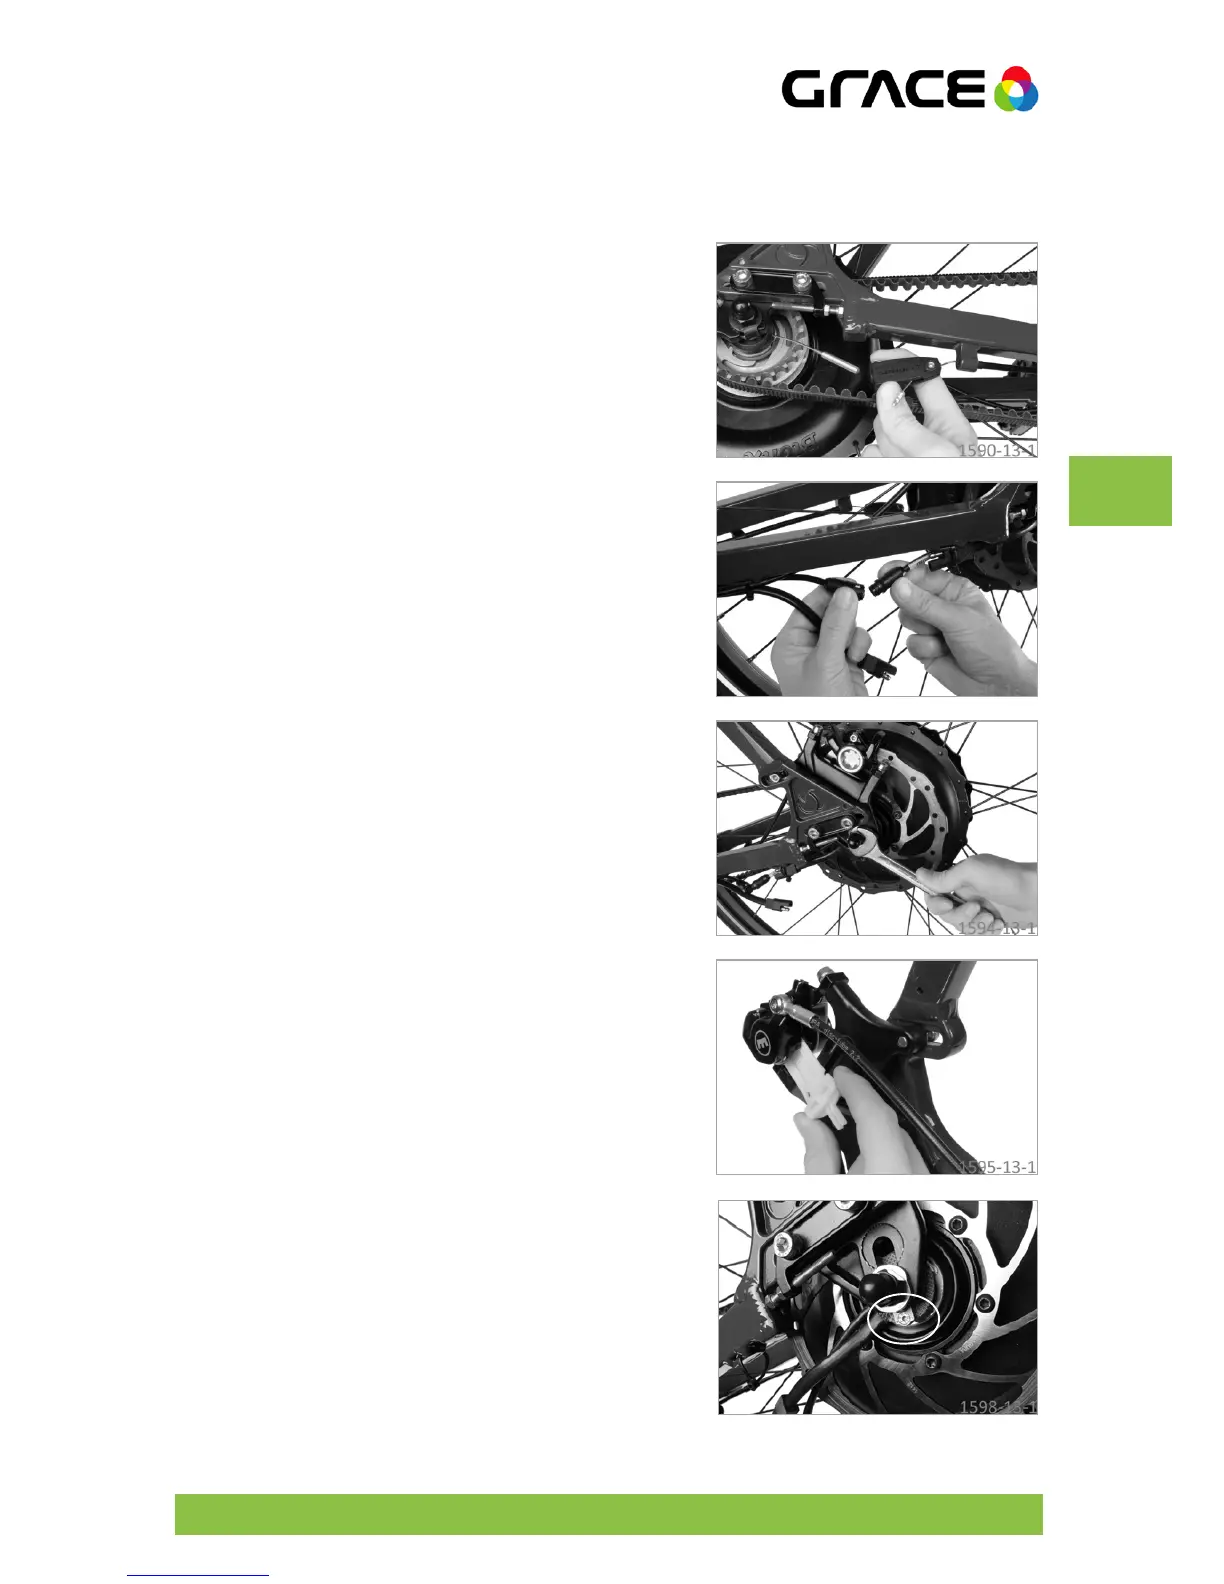
Shift the gears into first gear and undo the shift cable
from the rear wheel hub. To do so, press the locking
mechanism on the plastic sleeve on the right
dropout.
Disconnect the plug connections for the data cable
and power cable on the left dropout.
Undo the axle nuts with a hexagon socket SW15 (0.59
in). You can now remove the rear wheel.
Carefully remove the frame from the rear belt pulley
and insert the transport safety between the break
pads.
Installing
First of all, remove the transport safety from the
brake pads.
on the rear belt pulley and carefully
place the rear wheel into the dropouts. The rear
wheel must be positioned so that the torque arm can
slide into the left
Make sure that the brake disc slides between the
brake pads. The axle on the rear
wheel must sit
evenly in the two dropouts. The flanged lug of the
disc on the right
hand side of the axle must protrude
into the dropout.
Firmly tighten the two axle nuts in sequence and
alternately with a open end spanner SW15 (0,59 in)
fest (see torque
Connect the plug connections on the power cable,
data cable and shift cable and