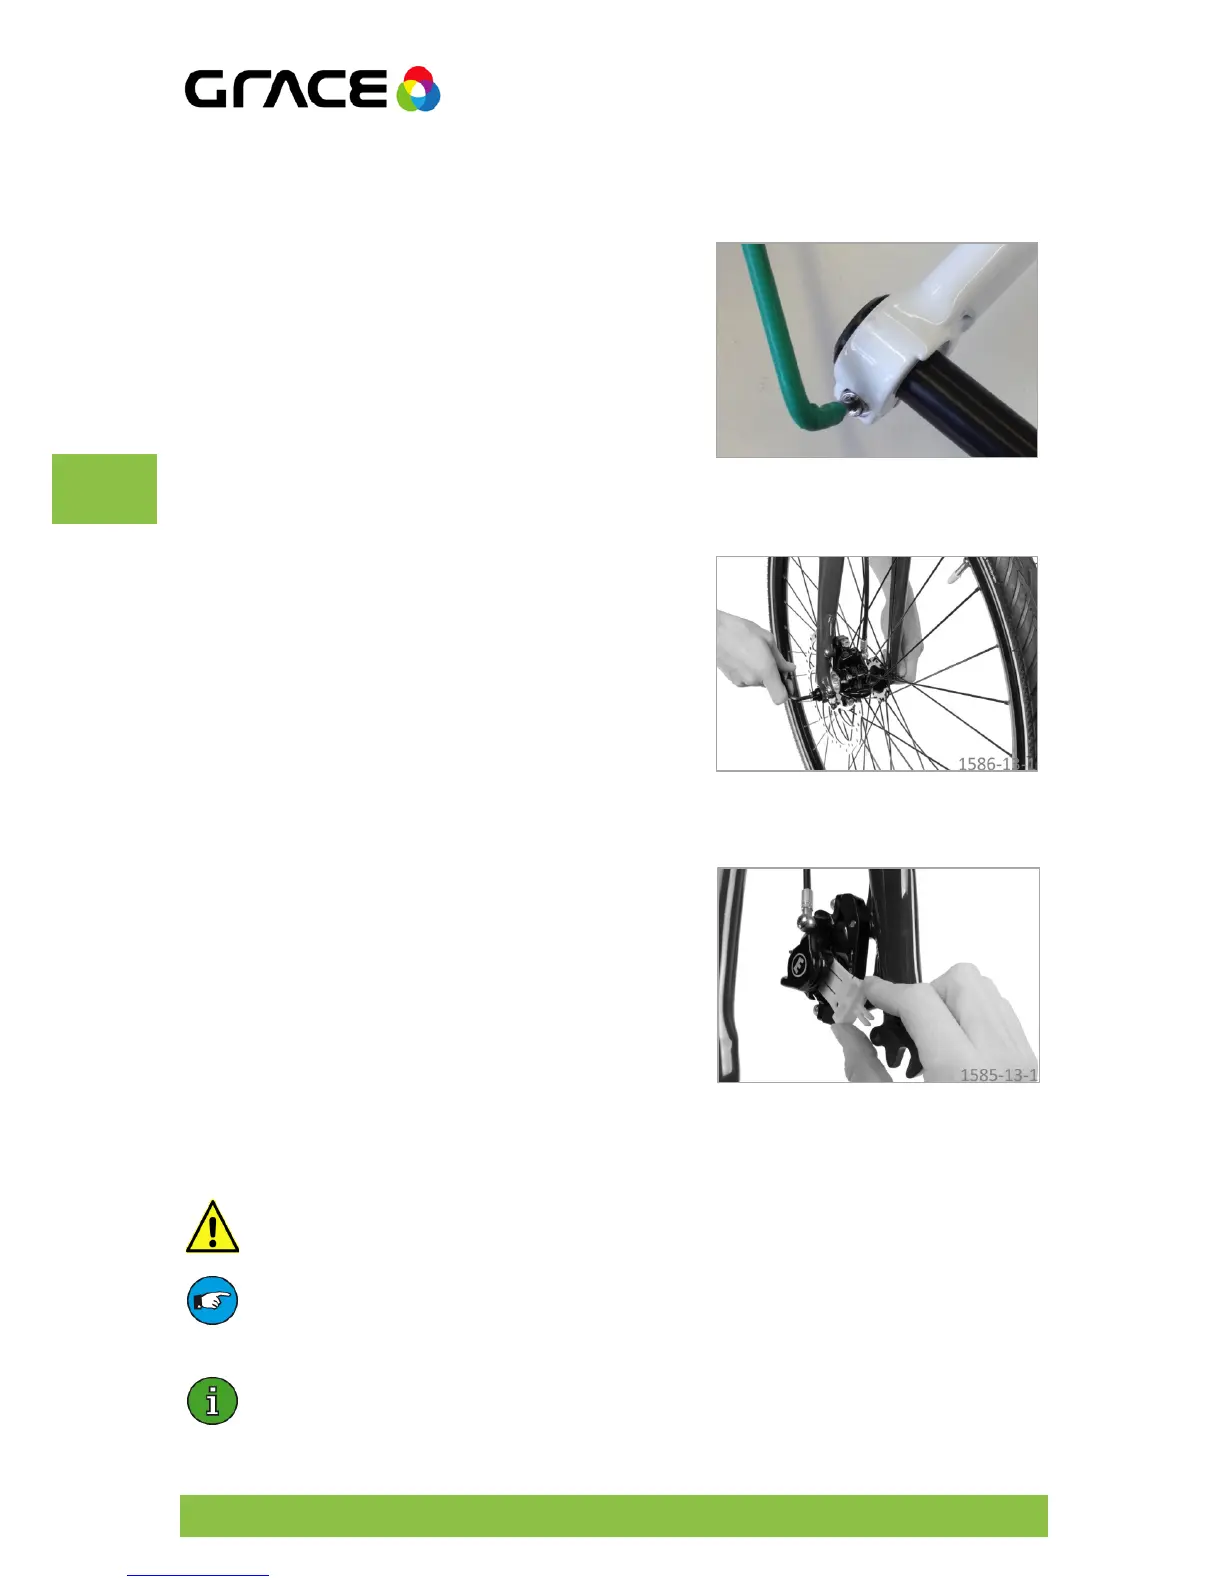
Undo the axle bolt with a hexagon
socket SW5 (0.2 in).
Undo the axle clambing with a
Afterwards undo the 15mm
axel with a hexagon socket SW 8.
Remove the front wheel from the fork and slide the
transport safety between the brake pads.
Installing
Remove the transport safety from the brake pads and
carefully position the front wheel into the dropouts
of the fork. Make sure that the brake disc slides
between the brake pads. The axle on the front wheel
must sit evenly in the two dropouts.
Tighten the axle with a hexagon
socket SW4 (0.16 in) (see torque table).
EASY MJ 2014:
with a hexagon
socket SW8.
Secure the axel against self turning with
the axel clamping and tighten the bolt with a
hexagon socket
5.3. Removing/installing the rear wheel
When working on the drive system and rear wheel, always remove the battery from
the frame first.
The hydraulic disc brakes must not be operated while the wheel is disassembled.
The brake pistons come together completely. Immediately after removing the
wheel, place the yellow transportation safety between the brake
Please follow the instructions on working with the drive belt in the chapter "Belt
drive"