12 307-378
Service
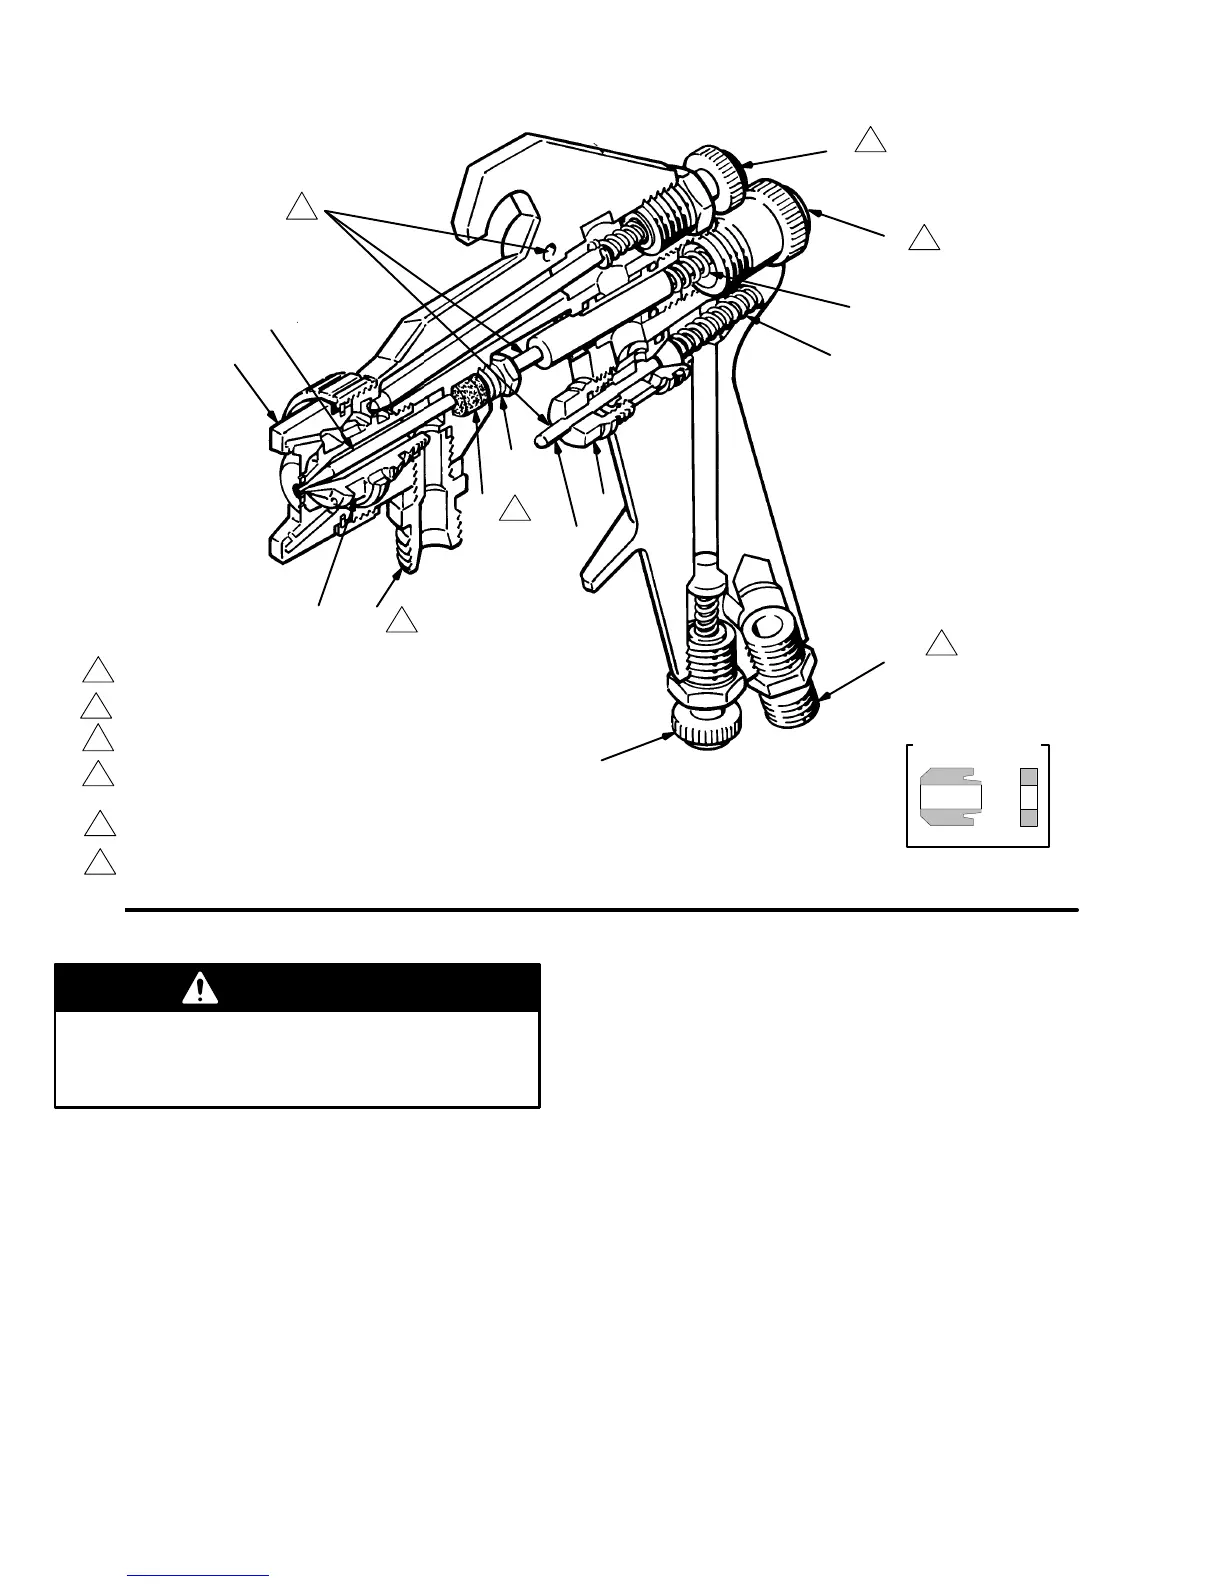
Fig.
3
1
4
2
7
11
13
12
9
2
DETAIL D
22
23
3
1
10
17
5
6
03704
1
Apply
Loctite
r
242 sealant or equivalent on
threads and torque to 20 ft-lb (27 N.m).
2
See Detail D.
5
3
T
urn counterclockwise to widen spray pattern. T
urn
clockwise to narrow spray pattern.
4
T
urn counterclockwise to increase fluid output.
T
urn clockwise to decrease fluid output.
5
Apply Loctite
r
PST pipe sealant or equivalent on threads.
3
Lubricate daily with light oil.
6
6
WARNING
To
reduce the risk of serious injury whenever you
are instructed to relieve pressure, always follow the
Pressure Relief Procedure
on page 8.
Relieve pressure
before you check or service any
system equipment.
NOTE:
The fluid needle spring (7) and the air valve
spring (1
1) are not interchangeable. The air valve
spring (1
1) is slightly larger in diameter and will not fit
properly into the fluid valve cavity. See Fig. 3.
Air
V
alve Service
1. If
there is air leakage at the air valve needle (12),
remove the trigger and unscrew the air valve as
-
sembly
. See Fig. 3.
2.
Clean and inspect the needle (12), spring (1
1) and
air valve (13) for wear or damage. Replace if
needed.
3.
Apply a few drops of lightweight machine oil to the
air valve needle (12) and reassemble the air valve.