Connecting and Setting Up the GRP261X/GRP2624/GRP2634/GRP2670/GRP2650
The GRP261X/GRP2624/GRP2634/GRP2670/GRP2650 phones can be installed on the desktop using the phone stand or attached to the wa
using the slots for wall mounting.
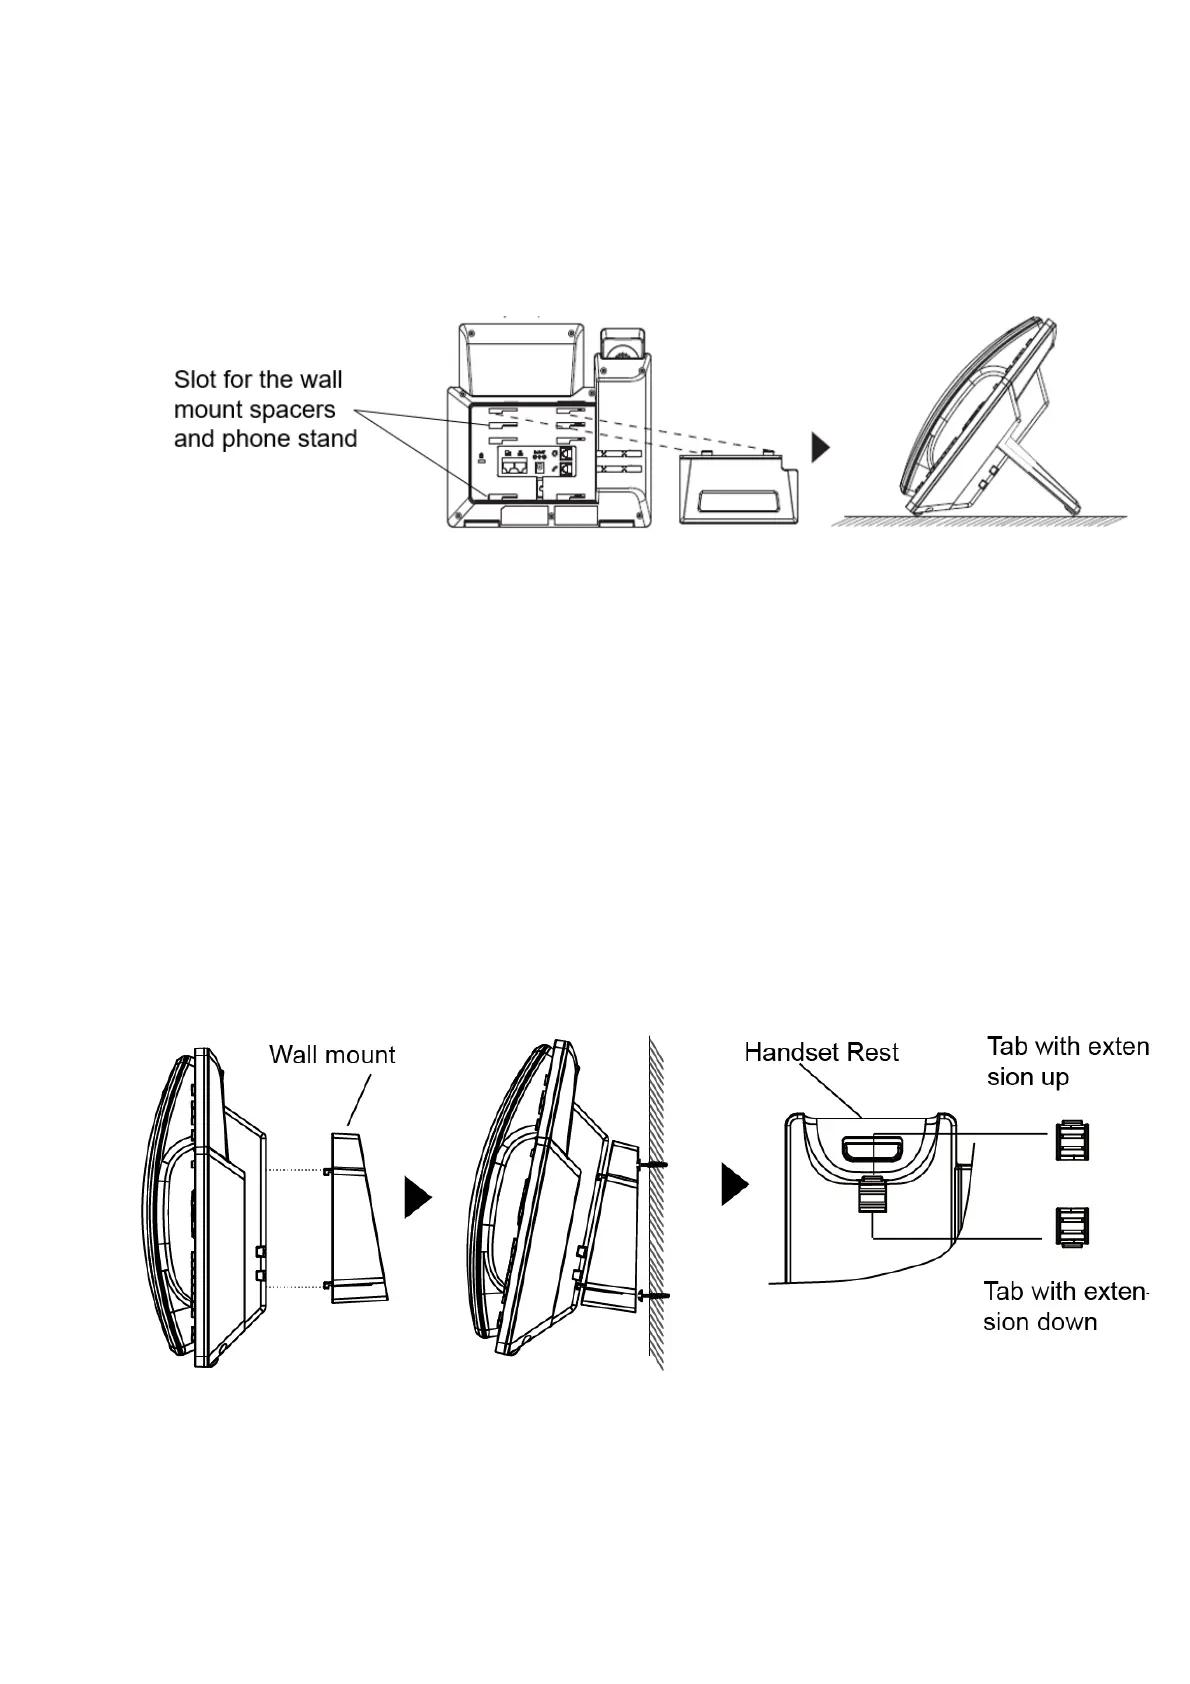
Figure 2: Phone Stand and Mounting Slots on the GRP261X/GRP2624/GRP2634/GRP2670/GRP2650
Using the Phone Stand
To install the phone on the table with the phone stand, attach the phone stand to the bottom of the phone through the phone stand slot.
(Upper half, bottom part).
Using the Slots for Wall Mounting
1. Attach the wall mount spacers to the slot for wall mount spacers on the back of the phone.
2. Attach the phone to the wall via the wall mount hole.
3. Pull out the tab from the handset cradle (See figure below).
4. Rotate the tab and plug it back into the slot with the extension up to hold the handset while the phone is mounted on the wall (see figur
below).
Figure 3: Tab on the Handset Cradle
Connecting the GRP261X/GRP2624/GRP2634/GRP2670/GRP2650
To set up the GRP261X/GRP2624/GRP2634/GRP2670/GRP2650, follow the steps below:
1. Connect the handset and main phone case with the phone cord.
2. Connect the LAN port of the phone to the RJ-45 socket of a hub/switch or a router (LAN side of the router) using the Ethernet cable.
Note
Check the package before installation. If you find anything missing, contact your system administrator.
 Loading...