1. Go to Web GUI🡪Gateway Settings🡪Interface Settings🡪Digital Hardware to configure port type and channels.
2. Go to Web GUI🡪Trunks🡪Digital Trunks to add and edit the digital trunks.
3. Go to Web GUI🡪 Trunks🡪Outbound Routes and Inbound Routes to configure outbound and inbound rules for the digital trunk.
Digital Hardware Configuration
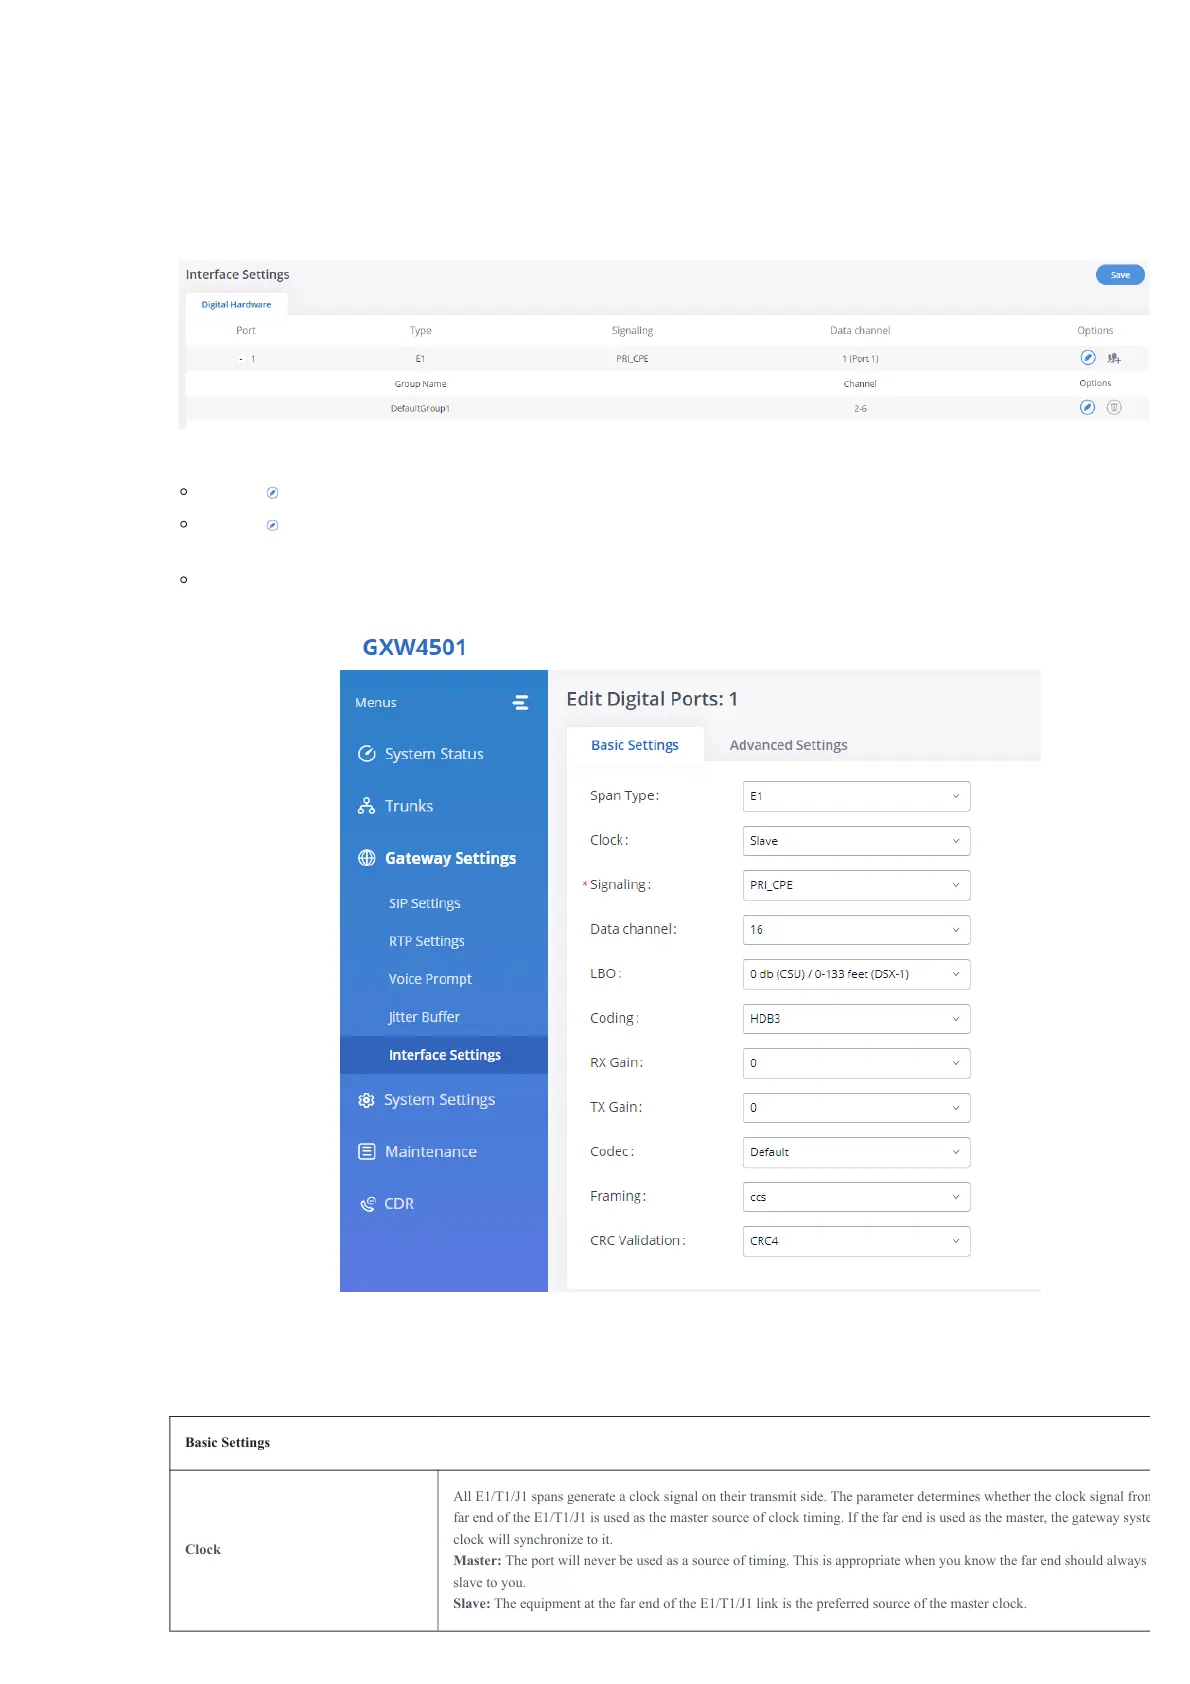
Go to Web GUI🡪 Gateway Settings🡪Interface Settings🡪Digital Hardware page and configure the following:
Figure 45: Digital Hardware Configuration
Click on to edit digital ports. Please see configuration parameters in the tables below:
Click on to edit group. This assigns channels to be used for the digital port. For E1, 30 B channels can be assigned to the default group; fo
23 B channels can be assigned to the default group.
If fewer than 30 B channels for E1 or 23 B channels for T1/J1 are assigned in the default group, users can click on to add more groups. This is
necessary in most cases and only the default group is needed.
Figure 46: Digital Port Configuration
The GXW450X currently supports E1, T1, and J1 digital hardware types. When different signaling is selected for E1, T1, or J1, the settings in basic o
and advanced options will be different. The following tables list all the settings to configure digital ports when selecting each signaling.
Basic Settings
Clock
All E1/T1/J1 spans generate a clock signal on their transmit side. The parameter determines whether the clock signal from
far end of the E1/T1/J1 is used as the master source of clock timing. If the far end is used as the master, the gateway syste
clock will synchronize to it.
Master: The port will never be used as a source of timing. This is appropriate when you know the far end should always
slave to you.
Slave: The equipment at the far end of the E1/T1/J1 link is the preferred source of the master clock.
 Loading...