UCM6510 Basic Configuration Guide Page 14 of 29
Figure 13: Provisioning with Zero Config - Auto Discovery
EXTENSION ASSIGNMENT
In the Auto Provision settings, users have the option to enable “Automatically Assign Extension”. If
enabled, an extension will be created and assigned to the new device detected. This is a great feature if
specific extension assignment isn’t required, but for our setup we’ll work on manually assigning an
extension to a discovered device.
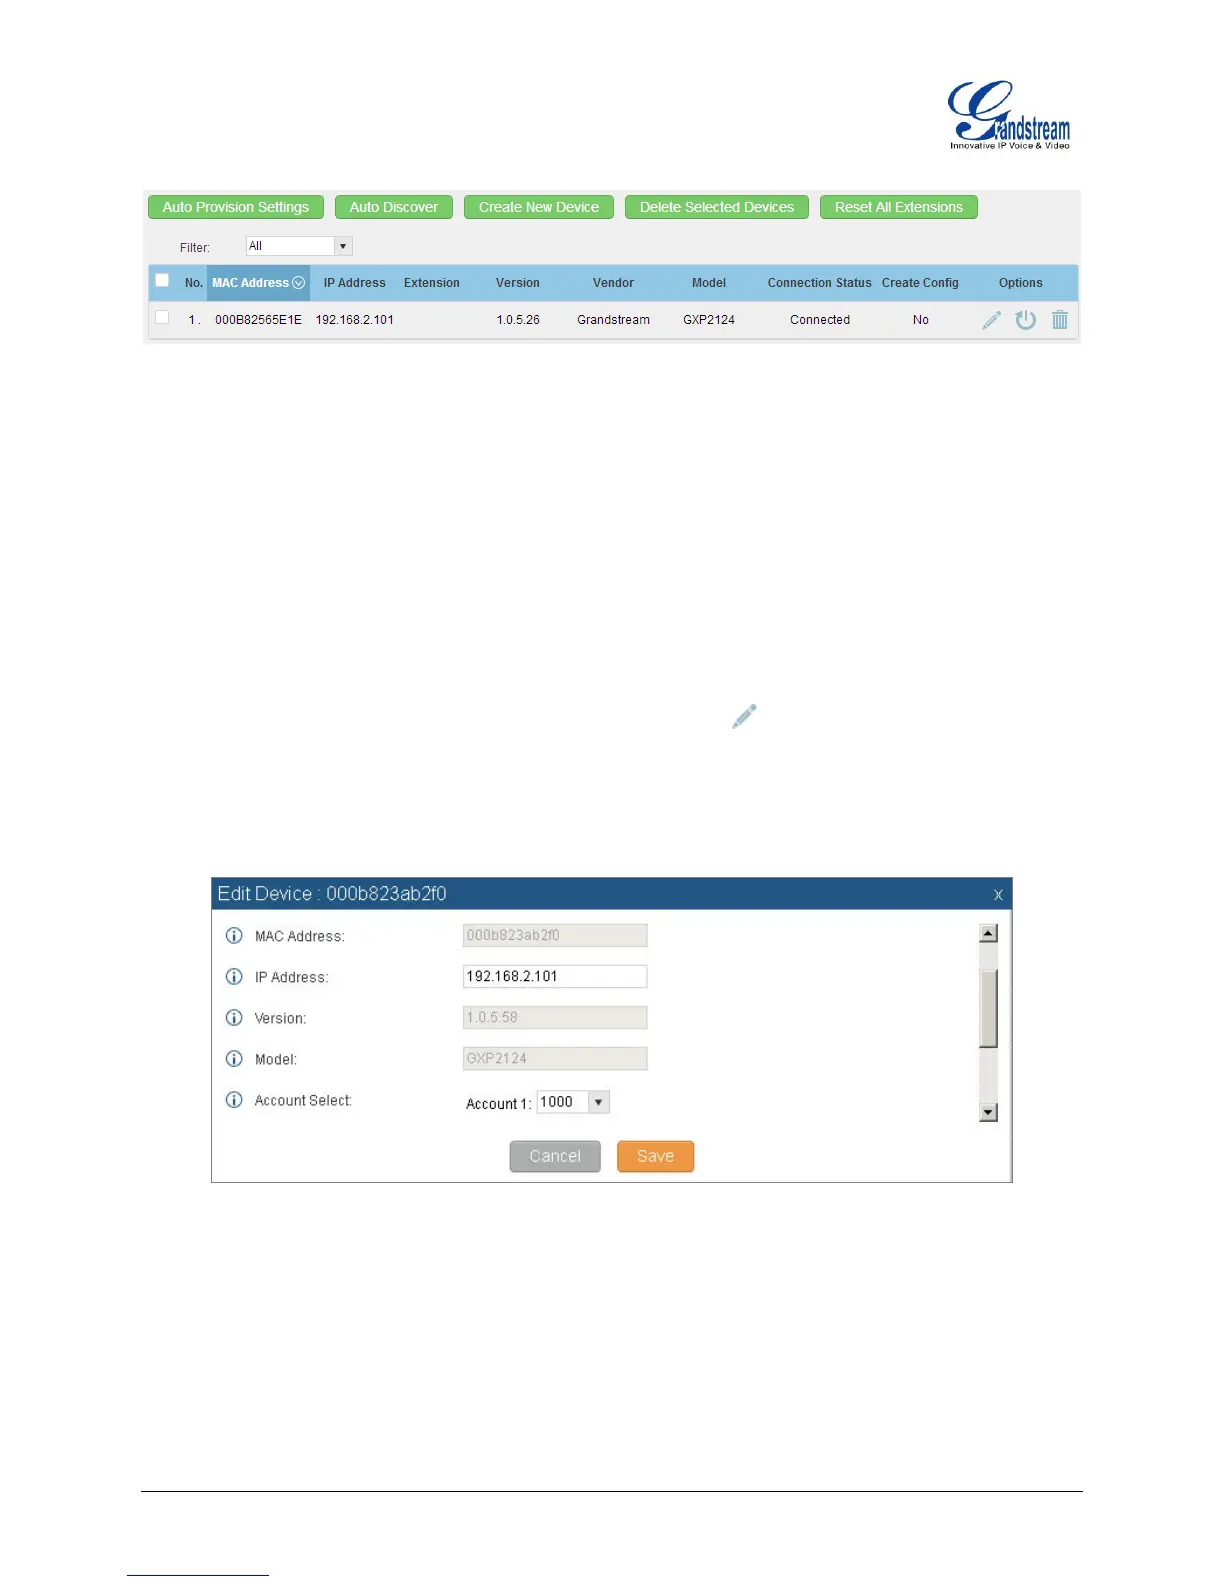
Navigate to PBX->Basic/Call Routes->Zero Config and click on for the discovered device.
The next screen provides details of the device and also allows a user to assign an extension. Since the
GXP2124 is a 4 line phone, the UCM6510 gives us the option to assign 4 extensions to the phone.
Figure 14: Provisioning with Zero Config - Extension Assignment
Click on the Account 1 and select the desired extension, then click “Save”. Now the Zero Config page
displays the device with an extension assigned to it on Account 1.
 Loading...