36
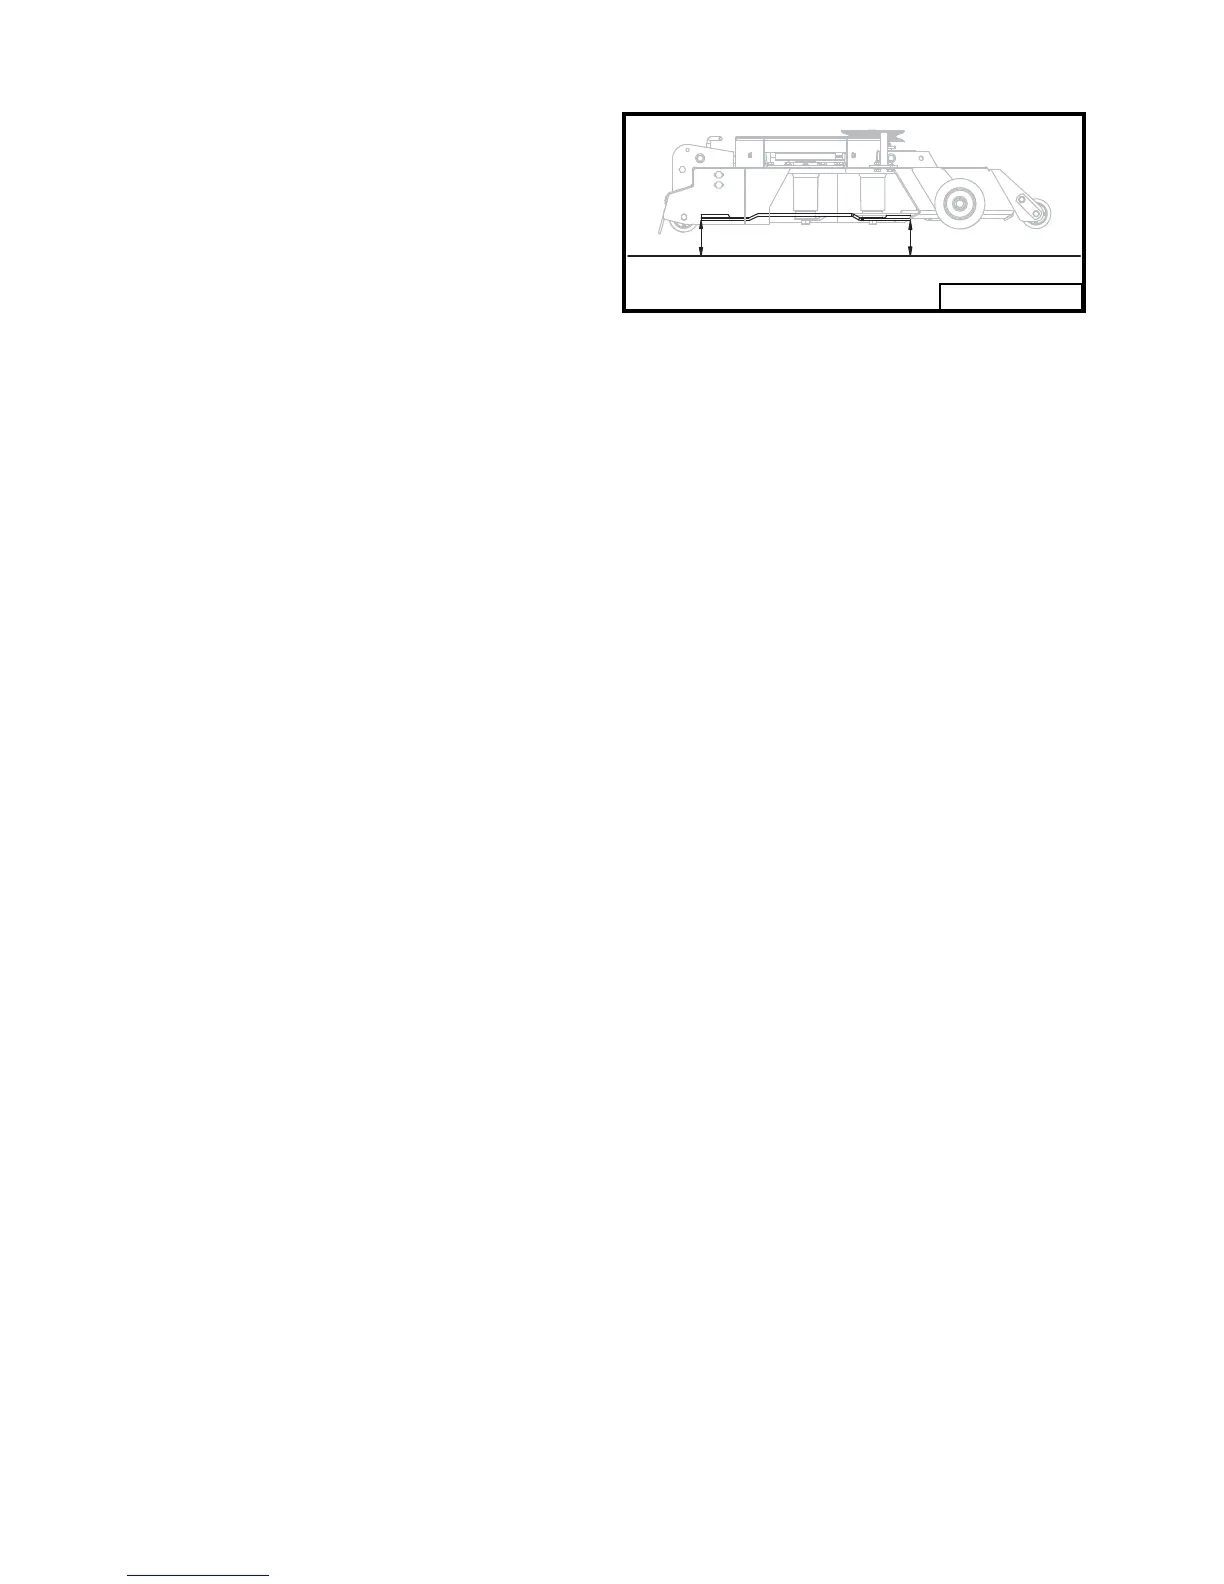
Fig. 18
Level Surface
AA + .125 to .25
99103
.438 chain bolt (C) securely.
11. Position left blade in the front to rear position.
Measure from the left front blade tip to the
level surface. With the blade in the same
position, measure from the left rear blade tip
to the level surface.
12. The distance measured at the rear blade tip
should be .125 to .25 inch (3mm to 6mm)
higher than at the front blade tip (Refer to
Fig. 18).
13. If the front to rear adjustment is not within
the given tolerance, then either adjustment is
necessary or the left blade may be bent.
14. Check to see if the left blade is bent by
turning it 180° and measure from the left
rear blade tip to level surface again. If the
result is different by more than .125 inch
(3mm), the left blade is bent and should be
replaced.
15. If the blade is straight and adjustment is
necessary, locate the level adjust screw on
the left front mower deck hanger.
16. Slightly loosen the .438 chain bolt on the left
front mower deck hanger and level adjust
bracket.
17. Adjust the left front of the mower deck up
or down by turning the level adjust screw
clockwise to raise and counter-clockwise to
lower until the front blade tip is .125 to .25 inch
(3mm to 6mm) higher than the rear blade tip.
18. Tighten the .438 chain bolt securely.
19. Repeat steps 11 through 18 above on the right
side.
20. Check that each of the mower deck hanger
chains (D) are tight and are carrying weight. If
a chain is loose, adjust as necessary.
MOWER DECK CUT HEIGHT
SETTING ADJUSTMENT
NOTE: Adjust side to side and front to rear
mower level before adjusting cut height.
1. Check air pressure on all four tires and adjust to
the correct pressure if necessary.
2. With foot pedal, set the cut height at the notch
marked 3.
3. Position left blade in the side to side position
and measure from the outside blade tip to the
level surface (refer to Fig. 18).
4. Position right blade in the side to side position
and measure from the outside blade tip to the
level surface.
5. If the difference between both measurements
is greater than .125 inch (3mm), side to side
adjustment is necessary (see previous section).
6. If both measurements are between 2.875 inches
(73mm) and 3.125 inches (79mm), adjustment
is not necessary.
7. If both measurements are less than 2.875 inches
(73mm) or greater than 3.125 inch (79mm),
adjustment is necessary.
8. To adjust the cut height, place blocks under
both sides of the deck so there is slack in the
hanger chains. The actual cut height is .5"
(13mm) above the sides of the deck.
9. Loosen the 2 bolts that secure the cut height
indicator.(Refer to page 23, Fig 5)
10. If the deck cut height needs raised, slide the
cut height indicator forward.
11. If the deck cut height needs lowered, slide
the cut height indicator back.
12. With blade cut height correct, securely
tighten the bolts.
13. Make sure foot pedal still engages in upper
most position.