-20-
Model G0654 (Mfg. Since 9/07)
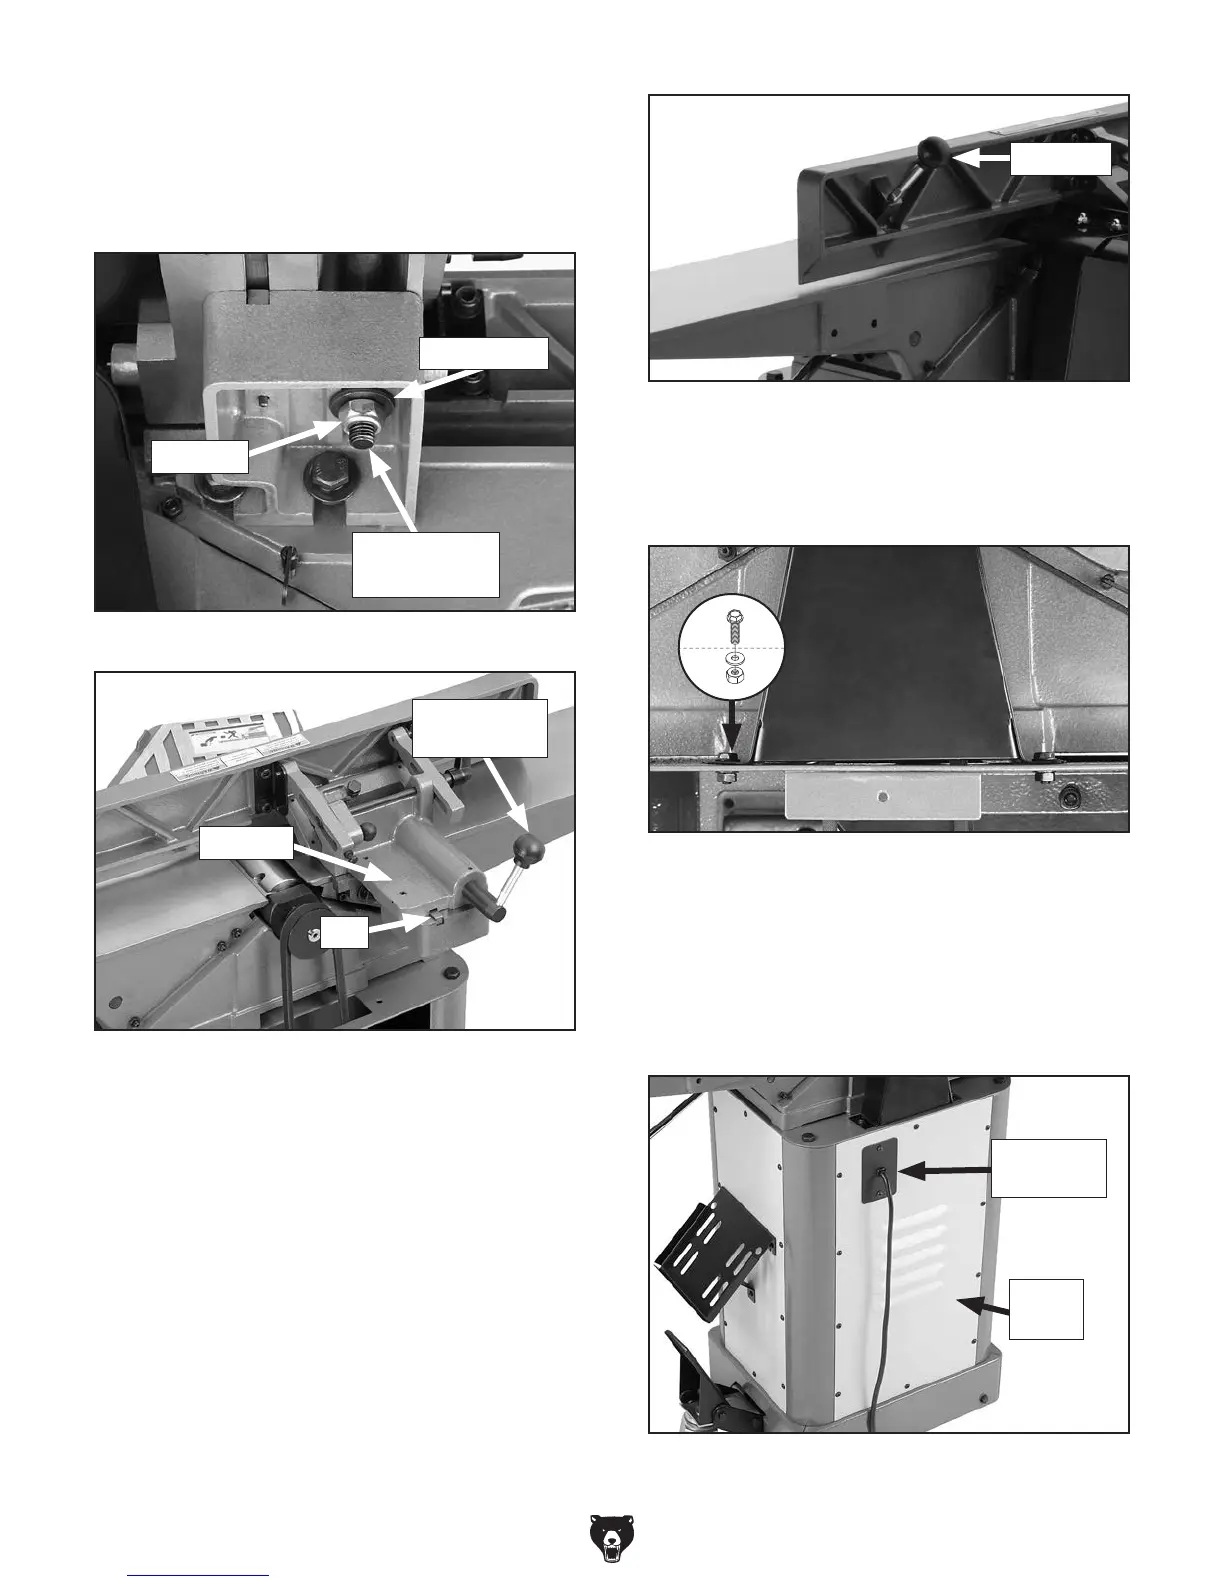
23. Remove the lock nut and flat washer (Figure
23) from the fence lock handle bolt, place
the fence on the jointer, and insert the bolt
through the slot in the carriage, making sure
the carriage fits over the key (see Figure 24).
Figure 23. Fence lock nut and washer.
Figure 24. Fence mounted to jointer.
24. Slide the fence lock handle bolt as close to
the machine as possible.
25. Secure the fence lock handle bolt with the
lock nut and flat washer removed in Step 23.
26. Install the fence tilt lever (see Figure 25).
Key
Fence Lock
Handle
Carriage
Lock Nut
Flat Washer
Fence Lock
Handle Bolt
Figure 25. Fence tilt lever installed.
27. Install the belt guard on the cabinet with the
(2) M6-1 x 12 flange bolts, 6mm flat washers,
and M6-1 hex nuts, as shown in Figure 26.
Figure 26. Belt guard installed.
28. Insert the motor cord and motor cord plate
through the rectangular slot on the rear
panel, and fasten the plate to the rear panel
with (2) #10-24 x
3
⁄8" flange screws. Secure
the rear panel to the cabinet with (10) #10-24
x
3
⁄8" flange screws (see Figure 27).
Figure 27. Rear panel and motor cord plate
installed.
Motor
Cord Plate
Rear
Panel
x 2
Tilt Lever
 Loading...