-66-
Model G0771Z (Mfd. Since 01/21)
Adjusting Fence
There are three main adjustments for the fence:
(1) square, (2) height, and (3) clamping pressure.
Keep in mind that these adjustments are intercon-
nected and some trial-and-error may be needed
to achieve satisfactory results.
Tools Needed Qty
Wrench 19mm ................................................... 1
Hex Wrench 6mm .............................................. 1
Machinist's Square ............................................ 1
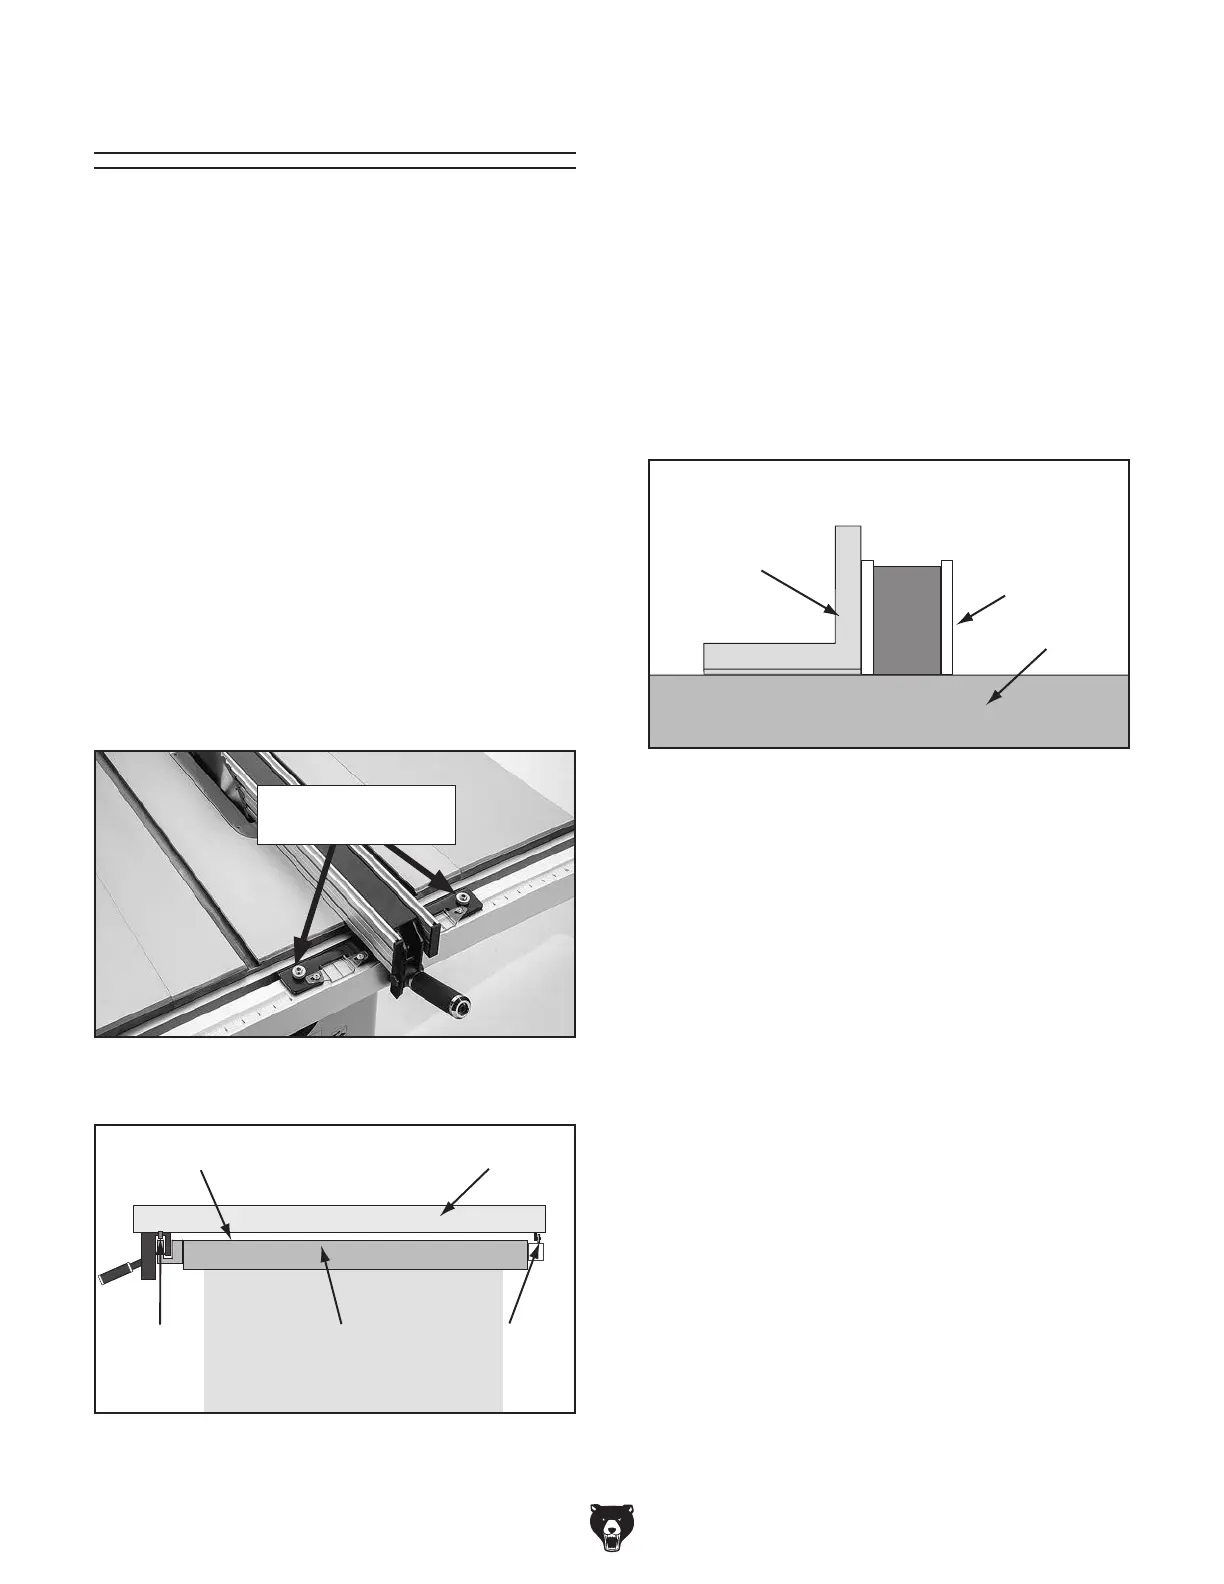
Figure 117. Location of lock nuts and set screws
for adjusting fence squareness and height.
Knurled Lock Nuts
and Set Screws
Fence Squareness and Height
The fence face must be square to the table in
order to produce accurate cuts. The fence is
adjustable with two set screws where the fence
slot sits in the front rail (see Figure 117).
Also, the fence should be adjusted evenly above
the table to ensure it does not drag across the
surface as shown in Figure 118.
1
/
16
" Gap
Fence
(Side View)
Table
Front Set
Screws
(1 of 2)
Rear
Bearing
Shaft
Figure 118. Fence height is adjusted by two
front set screws and rear bearing shaft.
3. Loosen knurled lock nuts and adjust set
screws (Figure 117) on top of fence bracket
to ensure fence face is 90° to table. Tighten
lock nuts when fence is square to table.
90° Square
Fence
Table
Figure 119. Example of checking fence
squareness to table.
To check/adjust fence squareness and height
to table:
1. DISCONNECT SAW FROM POWER!
2. Place square on table against face of fence
(Figure 119) to check if fence is square to
table.
— If fence is not square to table, proceed to
Step 3.
— If fence is square to table, skip to Step 4.


 To Next Page