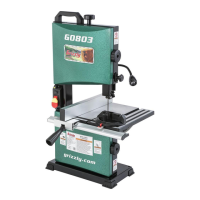
G0803 (Mfd. Since 09/15)
-25-
4. Use fine ruler to measure distance between
straightedge and miter slot at front and back
of table (see Figure 29 on Page 24).
— If the distances are the same, no further
adjustments are required.
— If the distances are different, continue with
Step 6.
5. Loosen the four cap screws securing table to
trunnion brackets (see Figure 30).
6. Position table so distances are equal between
straightedge and miter slot at front and back
of table.
7. Taking care not to move table, re-tighten cap
screws.
8. Verify setting and, if necessary, repeat this
procedure until you are satisfied with adjust-
ment.
Calibrating Fence
with Miter Slot
Figure 30. Location of trunnion bracket flange
bolts.
Cap Screws
(3 of 4)
To ensure accurate cutting when using the fence,
the face of the fence must be parallel to the table
miter slot and, thus, to the side of the blade.
Before beginning this procedure, make sure miter
slot is parallel with blade, as instructed in previous
Aligning Table procedure.
Tools Needed Qty
Hex Wrench 4mm .............................................. 1
To align fence parallel with miter slot:
1. DISCONNECT MACHINE FROM POWER!
2. Install fence on right side of blade, even with
edge of miter slot, then lock it in place.
— If the fence is parallel with the miter slot, no
additional adjustment is necessary.
— If the fence is not parallel with the miter
slot, proceed to Step 4.
3. Loosen two fence adjustment cap screws
shown in Figure 31, adjust fence parallel
with miter slot, then re-tighten cap screws to
secure setting.
Figure 31. Location of the fence adjustment cap
screws.
Cap Screws
(Located Inside
Holes)