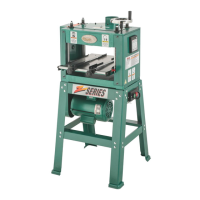
G1037Z 13" Planer/Moulder -19-
Starting the machine:
1. Read the entire instruction manual.
2. Make sure all tools and foreign objects have
been removed from the machine.
3. Plug the machine into the power source.
4. Press the ON button. Make sure that your
hand stays poised over the switch in case
you need to quickly turn the machine OFF.
5. Listen to and watch the planer/moulder for
abnormal noises or actions. The machine
should run smoothly with little or no vibration.
Strange or unnatural noises should be inves-
tigated and corrected before operating the
machine further—always unplug the
machine when investigating or correcting
any situation with the machine.
Loose hair and clothing
could get caught in
machinery causing seri-
ous personal injury.
Keep loose clothing
rolled up and long hair
tied up and away from
machinery.
Projectiles thrown from
the machine could cause
serious eye injury. Wear
safety glasses during
assembly and operation.
For your convenience, the adjustments listed
below have been performed at the factory and no
further setup is required to operate your machine.
However, because of the many variables
involved with shipping, we recommend that you
at least verify the following adjustments to ensure
the best possible results from your new machine.
Step-by-step instructions on verifying these
adjustments can be found in Section 8: Service
Adjustments.
Factory adjustments that should be verified:
1. Knife Setting (page 34)
2. Feed Roller Height (page 35)
3. Feed Roller Pressure (page 36)
4. Thickness Scale (page 36)
5. Chip Deflector (page 37)
Once the assembly is complete, you need to test
run the machine to check for any problems
If, during the test run, you cannot easily locate the
source of an unusual noise or vibration, feel free
to contact our service department for help.
Recommended
Adjustments
Test Run

 Loading...