EasyManua.ls Logo

Grizzly G9249 User Manual

Grizzly G9249
92 pages
To Next Page IconTo Next Page
Page #1 background imageLoading...
Page #1 background image
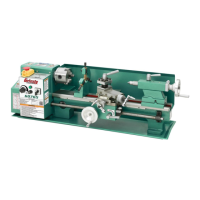
MODEL G9249
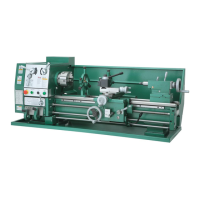
12" X 37" BELT DRIVE
GAP BED LATHE
OWNER'S MANUAL

WARNING: NO PORTION OF THIS MANUAL MAY BE REPRODUCED IN ANY SHAPE
OR FORM WITHOUT THE WRITTEN APPROVAL OF GRIZZLY INDUSTRIAL, INC.


Table of Contents

Question and Answer IconNeed help?

Do you have a question about the Grizzly G9249 and is the answer not in the manual?

Grizzly G9249 Specifications

General IconGeneral
BrandGrizzly
ModelG9249
CategoryLathe
LanguageEnglish

Summary

SECTION 1: SAFETY

General Safety Instructions

Essential safety rules for operating machinery.

Metal Lathe Specific Safety

Safety guidelines specific to metal lathes.

SECTION 2: CIRCUIT REQUIREMENTS

220V Operation Requirements

Electrical requirements for 220V operation.

Power Supply Requirements

Guidelines for connecting to the power supply.

SECTION 3: SETUP

Setup Safety Precautions

Safety measures during machine setup.

CLEAN UP

LATHE ASSEMBLY & PLACEMENT

Assembly Steps

Procedures for assembling the lathe.

CHECK GEARBOX OIL

Lubrication Check

Critical step to check gearbox oil before operation.

TEST RUN

Test Run Procedure

Steps to verify machine functionality after setup.

TEST RUN (continued)

SPINDLE BREAK-IN

Spindle Bearing Break-In

Steps for proper spindle bearing break-in.

RECOMMENDED ADJUSTMENTS

SECTION 4: OPERATIONS

Operation Safety

Safety guidelines for operating the lathe.

BASIC CONTROLS

Headstock Controls

Description of headstock controls.

Carriage Controls

Description of carriage controls.

Tailstock Controls

Description of tailstock controls.

CHUCK & FACEPLATE MOUNTING/REMOVAL

Removing Chuck or Faceplate

Steps to remove chuck or faceplate.

Mounting Chuck or Faceplate

Steps to mount chuck or faceplate.

MOUNTING A WORKPIECE

USING THE 3-JAW CHUCK

Mounting Workpiece in 3-Jaw Chuck

Steps for mounting workpieces.

USING THE 4-JAW CHUCK

Mounting Workpiece in 4-Jaw Chuck

Steps for mounting workpieces.

USING THE FACEPLATE

Mounting Workpiece on Faceplate

Steps for mounting workpieces.

CENTERS

TAILSTOCK

Installing Tapered Tool into Quill

Procedure for tool installation.

OFFSETTING TAILSTOCK

Setting Tailstock for Shallow Taper

Procedure for taper cutting setup.

ALIGNING TAILSTOCK

Aligning Tailstock with Headstock

Steps for proper alignment.

ALIGNING TAILSTOCK (continued)

DRILLING WITH TAILSTOCK

Setting Tailstock for Drilling

Procedure for drilling setup.

STEADY REST

Installing and Using Steady Rest

Steps for steady rest installation and use.

COMPOUND SLIDE

TOOL POSTS

SPINDLE SPEED

Calculating Correct Spindle RPM

Method for calculating spindle speed.

Configuring V-Belts and Back Gear

Steps for speed configuration.

POWER FEED

Engaging the Feed Rod

Steps to engage the feed rod.

SETTING FEED RATE

CHANGE GEARS

Re-configuring Change Gears

Procedure for changing gear configurations.

THREADING OPERATION

Cutting Threads Procedure

Step-by-step guide for thread cutting.

THREADING OPERATION (continued)

SECTION 6: MAINTENANCE

Maintenance Schedule

Schedule for regular maintenance.

Cleaning and Protecting Procedures

Steps for cleaning and protecting.

LUBRICATION

Spindle Bearing Oil Lubrication

Instructions for spindle bearing oil.

LUBRICATION (continued)

TENSIONING/REPLACING V-BELTS

TENSIONING/REPLACING V-BELTS (continued)

SECTION 7: SERVICE

Troubleshooting Guide

Guide to diagnose and resolve issues.

SECTION 7: SERVICE (continued)

Motor and Electrical Troubleshooting

Troubleshooting motor/electrical problems.

Operations Troubleshooting

Troubleshooting common operational issues.

SECTION 7: SERVICE (continued)

Adjusting Gibs

Guide to adjusting gibs.

Cross Slide Backlash Adjustment

Procedure to adjust cross slide backlash.

Adjusting Half-Nut Guide Bar

Procedure to adjust the half-nut guide bar.

Spindle Bearing Preload Adjustment

Procedure to adjust bearing preload.

SECTION 7: SERVICE (continued)

SECTION 8: WIRING

Electrical Safety Instructions

Important electrical safety precautions.

Circuit Requirements

Requirements for the machine's electrical circuit.

SECTION 8: WIRING (continued)

Wiring Overview

General overview of the machine's wiring.

CONTROL PANEL

SECTION 8: WIRING (continued)

Control Panel and Motor Wiring Diagrams

Wiring diagrams for panel and motor.

LABEL PLACEMENT

Related product manuals