4.3 Navigation
The meter contains a Settings menu, Reading Options menu, Calibration
Options menu and Calibration Verification Options menu to change
various options. Use the UP and DOWN keys to highlight different
options. Push the RIGHT key to select an option. There are two ways to
change options:
1. Select an option from a list: Use the UP and DOWN keys to select an
option. If check boxes are shown, more than one option can be
selected. Push the LEFT key under Select.
Note: To deselect check boxes, push the LEFT key under Deselect.
2. Enter an option value using the arrow keys:
Push the UP and DOWN keys to enter or change a value.
3. Push the RIGHT key to advance to the next space.
4. Push the RIGHT key under OK to accept the value.
Section 5 Startup
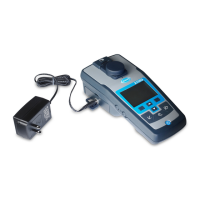
5.1 Turn the meter on and off
Push the ON/OFF key to turn on or turn off the meter. If the meter
does not turn on, make sure that the batteries, or the module, are
properly installed or that the AC power supply is properly connected to
an electrical outlet.
Note: The Auto-Shutoff option can also be used to turn off the meter. Refer to
Power management on page 13.
5.2 Change the language
There are three options to set the language:
• The display language is selected when the meter is powered on for
the first time.
• The display language is selected when the power key is pushed and
held.
• The language can be changed from the Settings menu.
1. Select a language from the list. Confirm with OK.
2. Push Done when the update is complete.
5.3 Change the date and time
The date and time can be changed from the Date & Time menu.
1. Push the SETTINGS key and select Date & Time.
2. Update the time and date information:
Option Description
Format Select one of the formats for the date and time:
yyyy-mm-dd 24h
yyyy-mm-dd 12h
dd-mm-yyyy 24h
dd-mm-yyyy 12h
mm/dd/yyyy 24h
mm/dd/yyyy 12h
Date Enter the current date
Time Enter the current time
The current date and time will be shown on the display.
After the date and time setup, the meter is ready to take a reading.
Section 6 Standard operation
6.1 Use a sample ID
The sample ID tag is used to associate readings with a particular sample
location. If assigned, stored data will include this ID.
English
9

 Loading...