• For limitations on transport velocity and maximum vertical lift, refer to Specifications on page 3.
5.3 Mechanical installation
5.3.1 Install the sampler in a manhole
Install the sampler above the sample water in a manhole. Install the sampler with a spanner bar or a
support bracket. Install the spanner bar inside the manhole. The spanner bar is supported by
pressure against the walls. The support bracket has the same width as the manhole cover. Install the
support bracket directly below the cover for support. For the accessories, refer to the expanded
manual on the manufacturer's website. Refer to the documentation supplied with the accessories to
install the sampler.
5.4 Prepare the sampler
5.4.1 Clean the sample bottles
Clean the sample bottles and caps with a brush, water and a mild detergent. Flush the sample
bottles with fresh water followed by a distilled water rinse.
5.4.2 Install a single bottle
When a single bottle is used to collect one composite sample, do the steps that follow. When multiple
bottles are used, refer to Install the first bottle for multiple sample collections on page 11.
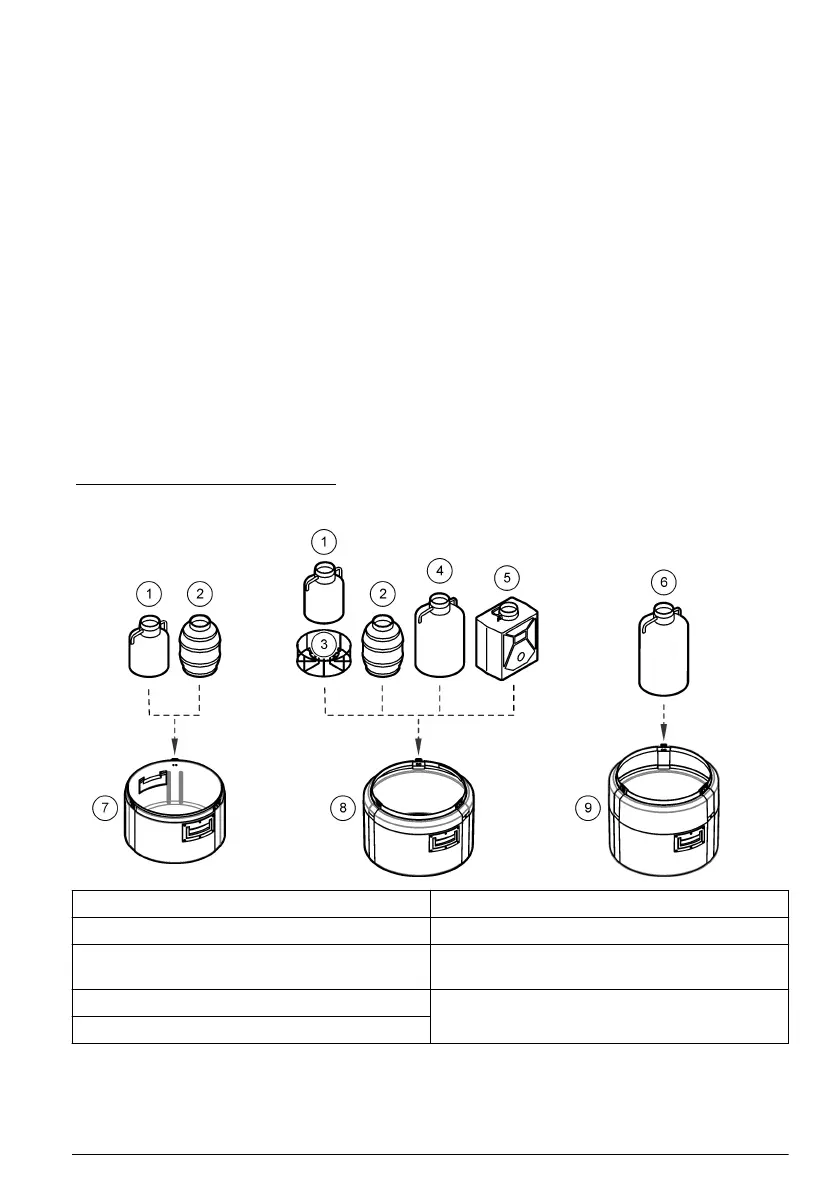
When the bottle is full, the full bottle shut-off stops the sample program. Install the sample bottle as
shown in Figure 4.
Figure 4 Single bottle installation
1 Polyethylene bottle, 10 L (2.6 gal) 6 Polyethylene bottle, 21 L (5.5 gal)
2 Glass bottle, 10 L (2.6 gal) 7 Compact base
3 Support for standard base and 10 L (2.6 gal)
glass bottle
8 Standard insulated base
4 Polyethylene bottle, 15 L (4 gal) 9 Composite insulated base for 21 L (5.5 gal)
bottle
5 Polyethylene bottle, 19 L (5 gal)
5.4.3 Install the first bottle for multiple sample collections
Use multiple bottles to collect samples into separate bottles or into more than one bottle. The
distributor moves the sample tube above each bottle. Install the bottles in the sampler base as shown
in Figure 5. Install the first sample bottle (number 1) below the label in the sampler base. Install the
English
11

 Loading...


