10
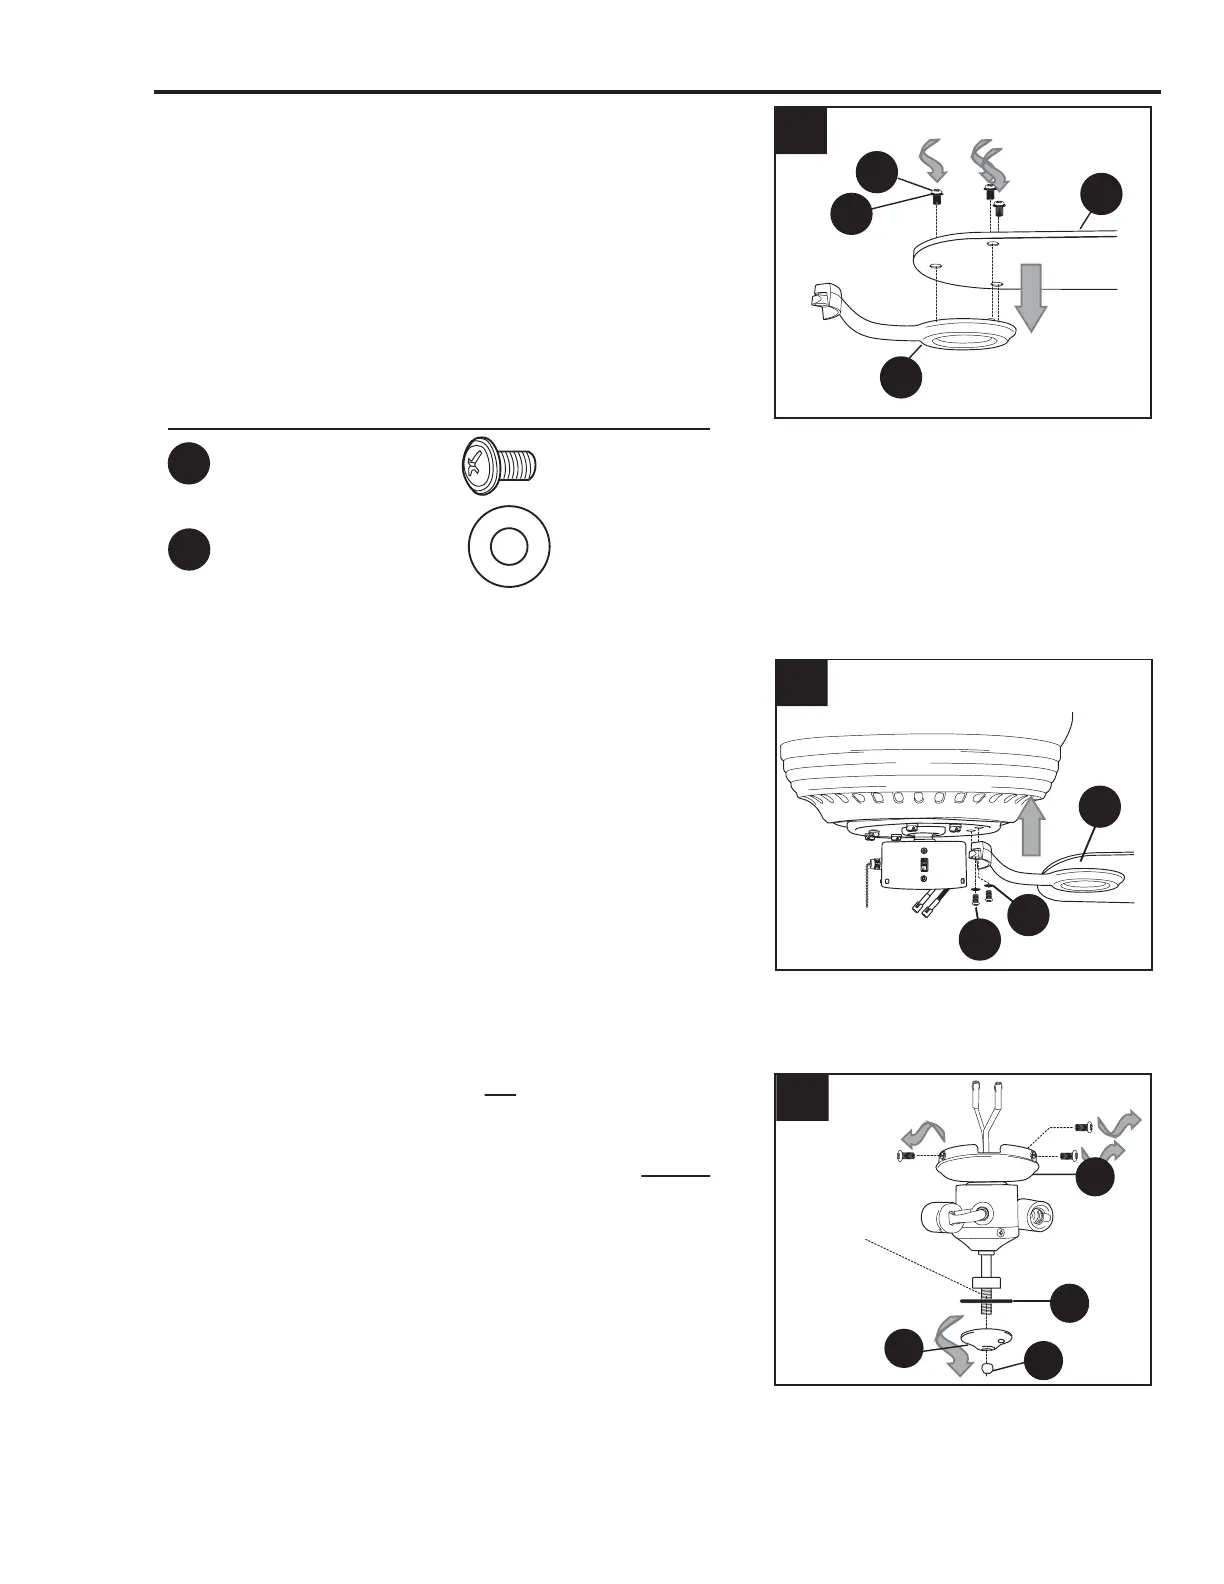
FINAL INSTALLATION
AA
Blade Screw x15
Fiber Blade Washer x15
BB
Partially insert three blade screws (AA), along with
three fiber blade washers (BB), into holes in blade
(G) to attach blade arm (J) to blade (G). Then,
tighten each blade screw (AA) starting with the one
in the middle. (Fig. 2) Repeat with remaining blades
(G).
Locate motor screws (N) and lock washers (O) that
were removed in Step 4 on page 6.
Insert two motor screws (N), along with lock washers
(O), through one blade arm (J) to attach blade arm (J)
to motor. Tighten motor screws (N) securely. (Fig. 3)
Repeat with remaining blade arms (J), making sure to
completely secure each blade arm (J) before
proceeding with the next.
2.
3.
Hardware Used
Remove three screws from top of light kit fitter (D).
If you wish to use the light kit, remove finial (I),
finial plate (H), and rubber washer (T) from bottom
of light kit fitter (D). (Fig. 4) Save finial (I), finial
plate (H), and rubber washer (T) for later use.
Continue to Step 5.
If you do NOT wish to use the light kit, please
go to section entitled “Installing Fan Without
Included Light Kit (Optional)” on page 12.
4.
2
3
HH
J
C
Threaded
Rod
4
T
H
I
D
Switch
Housing
Cap Screw
AA
BB
J
G
N
O
 Loading...