14
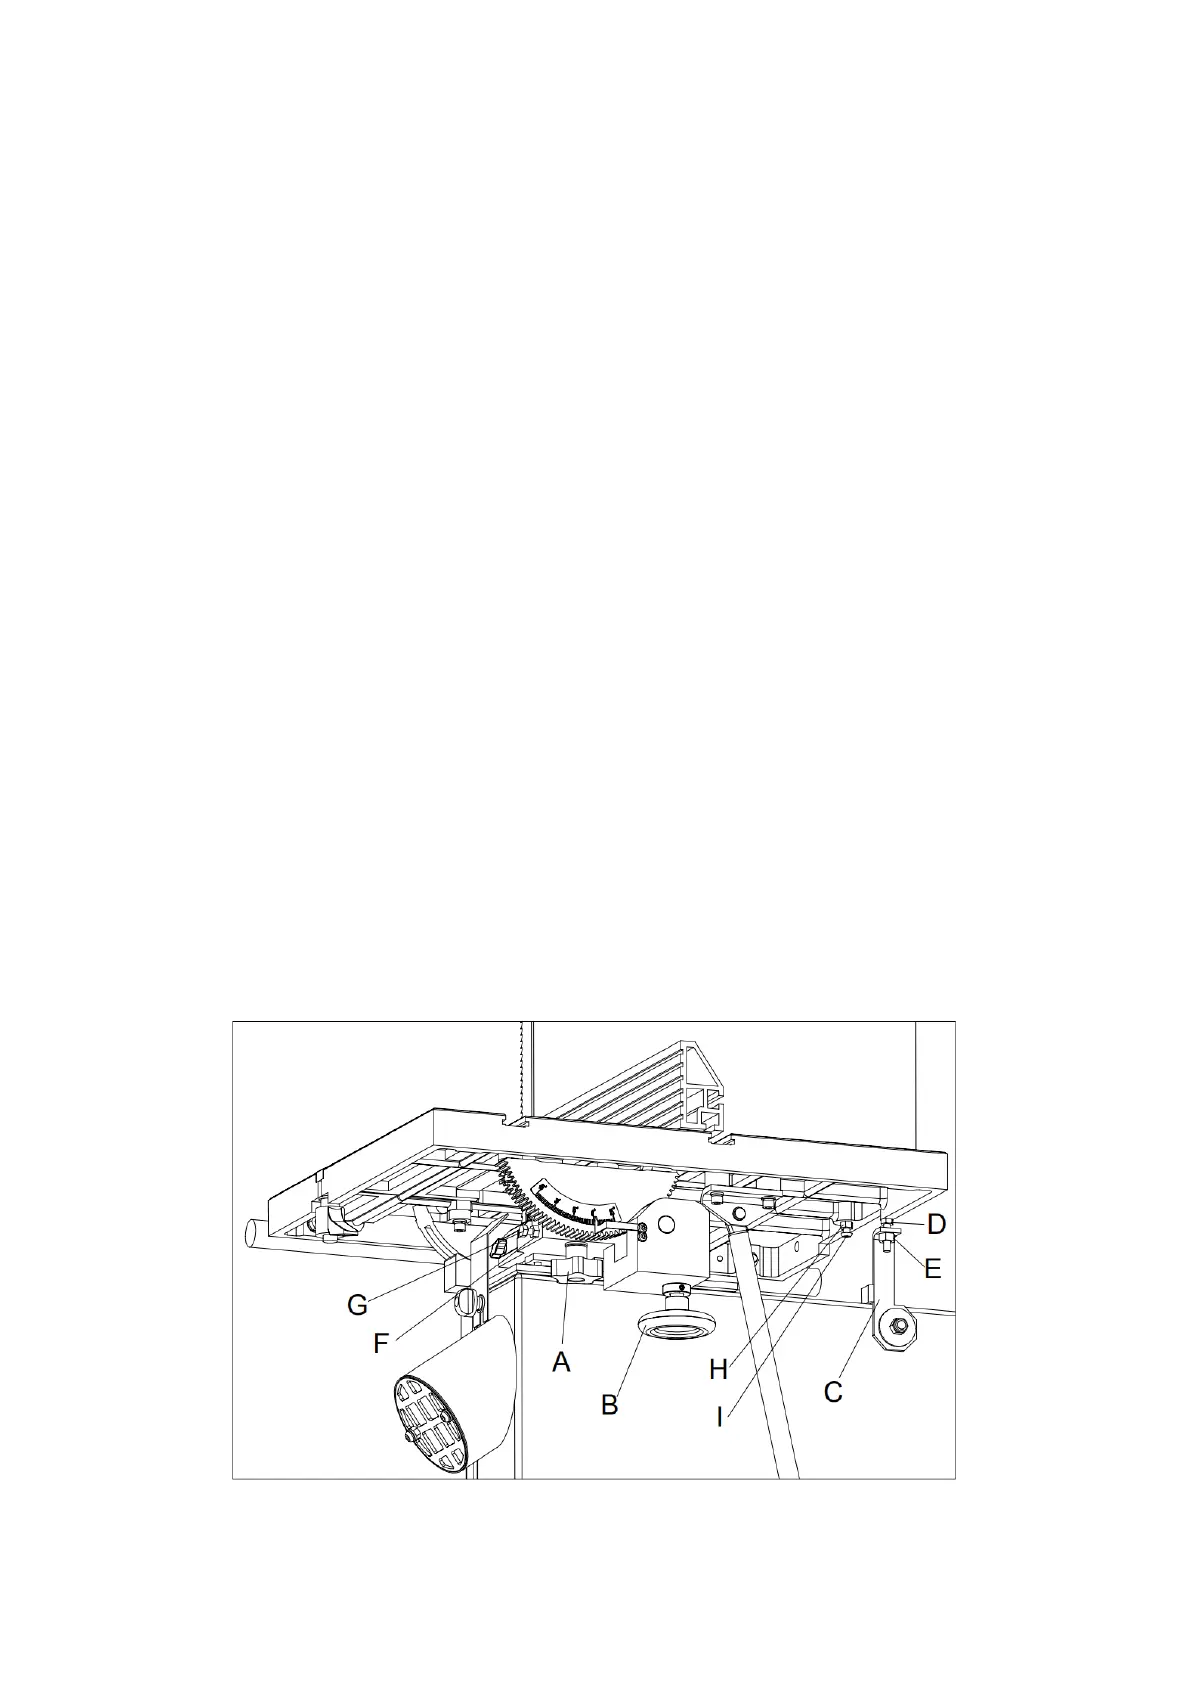
6.3 Work Table
6.3.1 Table Tilt (Refer to Figure 13.)
1. Disconnect the machine from the power source.
2. Loosen the table tilt locking handle (A).
3. To tilt the table right, rotate the table tilt hand wheel (B) to tilt the table up to 45°.
4. To tilt the table left, swing the table support (C) down, then rotate the hand wheel (B) to
tilt the table up to -15°.
5. Tighten the locking handle (A) to secure the setting.
6.3.2 Table Stop Set Up (Refer to Figure 13.)
Please follow the steps to setup the 90° stop:
1. Disconnect the machine from the power source.
2. Loosen the table tilt locking handle (A).
3. Swing the table support (C) out, then loosen the locking nut (D) and rotate the stop
screw (E) downward.
4. Rotate the hand wheel (B) to tilt the table until the blade is square with the table and use
a square to check it.
5. Tighten the locking handle (A).
6. Adjust the indicator to 0°. Swing the table support (C) back, reset the stop screw (E) until
it touches the bottom of the table and tighten the locking nut (C).
Please follow the steps to setup the 45° stop:
1. Loosen the table tilt locking handle (A).
2. Rotate the hand wheel (B) until the indicator points to 45°.
3. Adjust the stop screw (G) until it touches the table and lock the locking nut (F).
Please follow the steps to setup the -15° stop:
1. Loosen the table tilt locking handle (A) and swing the table support (C) down.
2. Rotate the hand wheel (B) until the indicator points to -15°.
3. Adjust the stop screw (I) until it touches the table, then lock the locking nut (H).
Fig. 13