8.
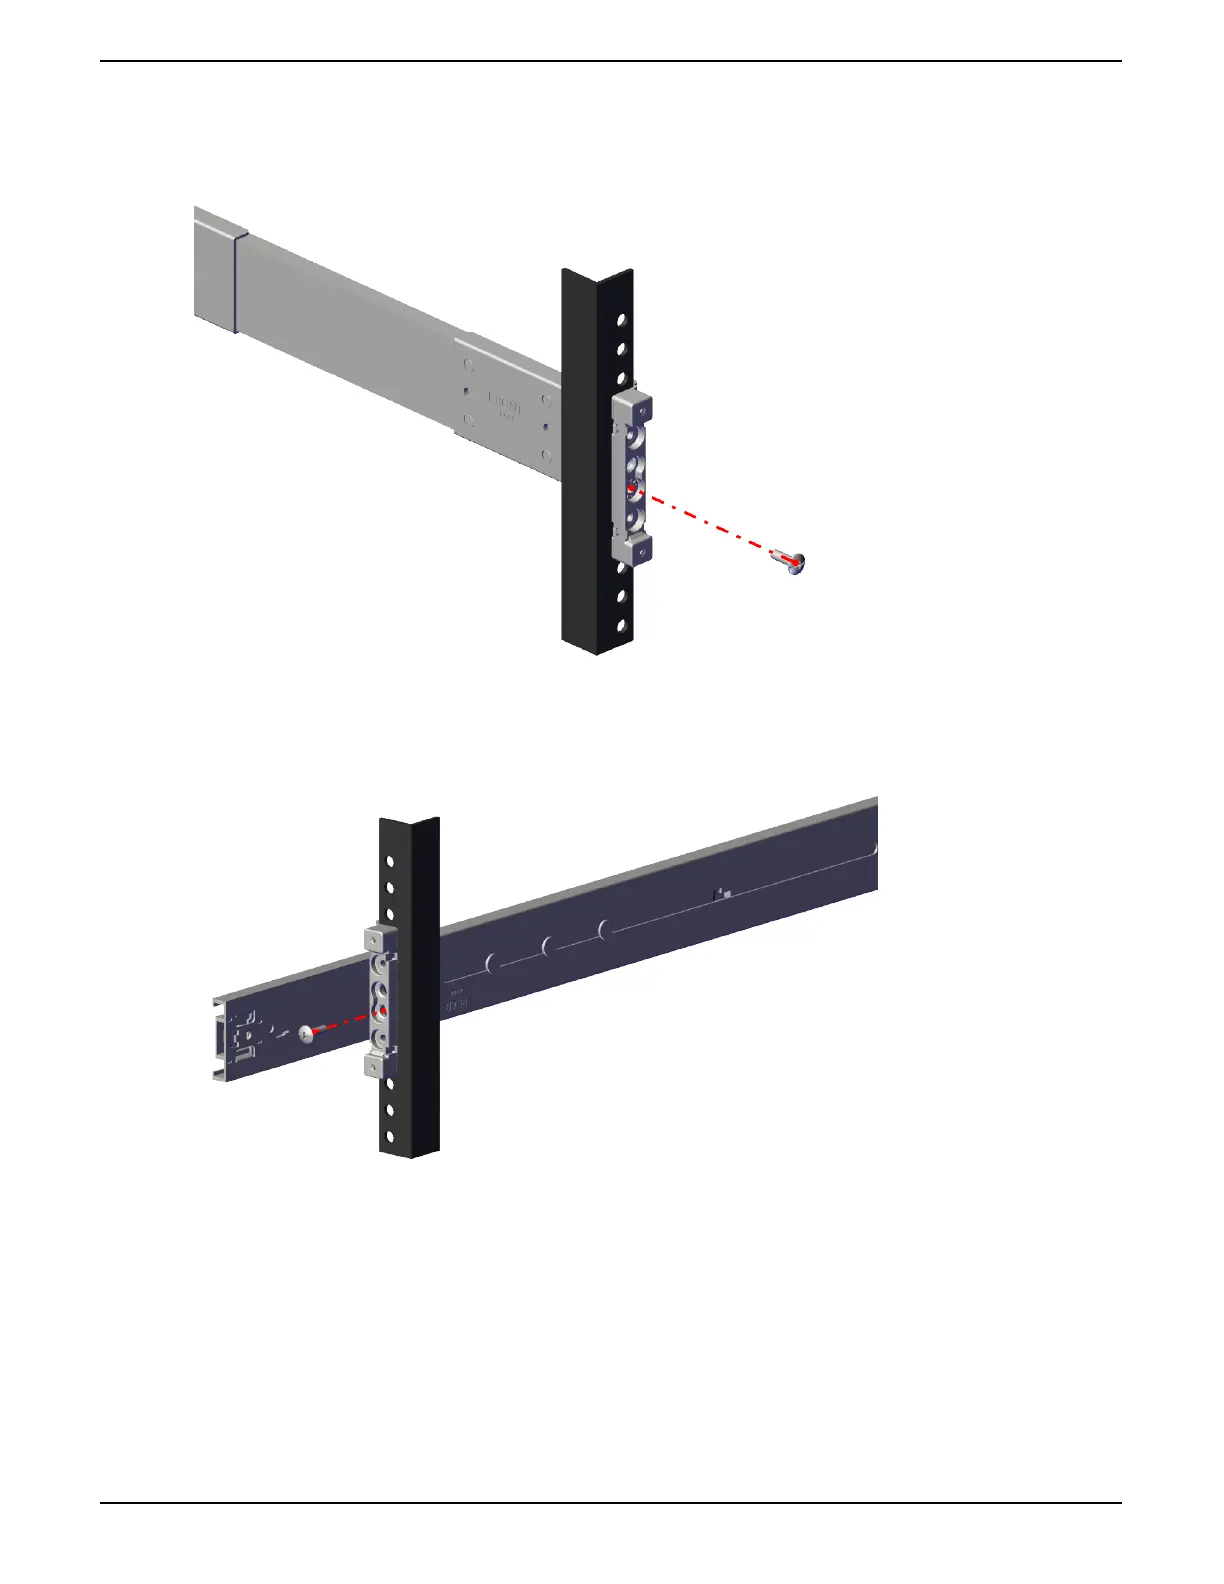
From the front of the rack, attach the rack mount rail into place using one Hex ange Phillips head screw.
Figure 8: Attaching the Rack Mount Rails (Front)
9.
From the rear of the rack, attach the rack mount rail into place using one Hex ange Phillips head screw.
Figure 9: Attaching the Rack Mount Rails (Rear)
10.
Using a level, verify that the rack mount rail is level.
11.
Verify that the screws have been tightened until snug.
12.
Follow the same procedure to install the remaining rack mount rail.
13.
From the outside of the rack mount rail, fully extend the inner rail.
33
Installation Guide 11 Installing the 4U60 Storage Enclosure
 Loading...