8.
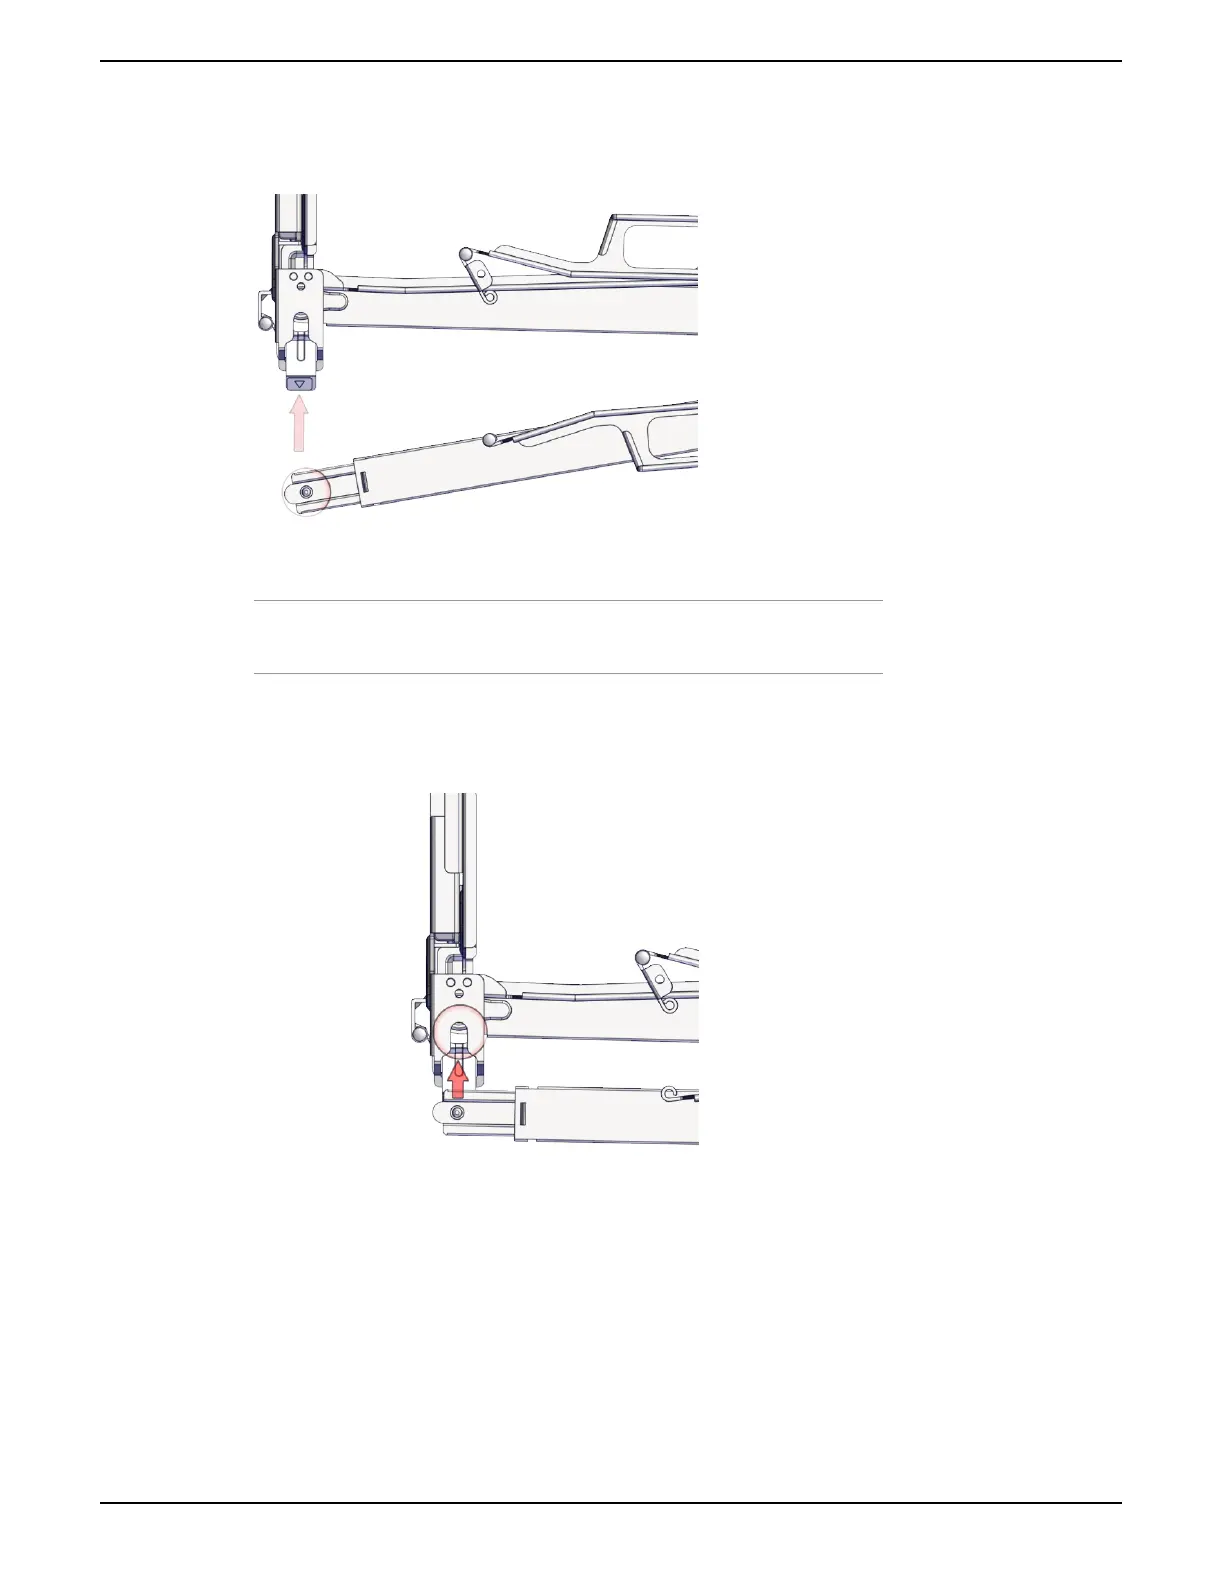
From the Upper CMA arm, line up the CMA handle with the CMA snap location.
Figure 35: Snapping the Upper CMA Handle into the Lower Snap Location
Note: The CMA snap location for the Upper arm is attached to the Lower CMA
arm.
9.
Press the CMA handle rmly into the snap location until you hear an audible click.
Figure 36: Securing the Upper CMA Handle within the Lower Snap Location
10.
Verify both arms are securely attached to the CMA bracket and rail kit.
11.
Verify both CMA handles are securely attached to the CMA snap locations.
11.8 Installing the Power Cords
To install the power cords, the following hardware is required:
49
Installation Guide 11 Installing the 4U60 Storage Enclosure
 Loading...