3.
Push the chassis until you hear an audible click.
The inner rails are locked into the rack mount rails.
4.
From the side of the rack mount rails, slide the blue button and push the chassis towards the rack.
Note:
• Ensure you slide the blue button on both rails.
• The blue button can be slid either towards the front or rear to unlock the rack
mount rails.
5.
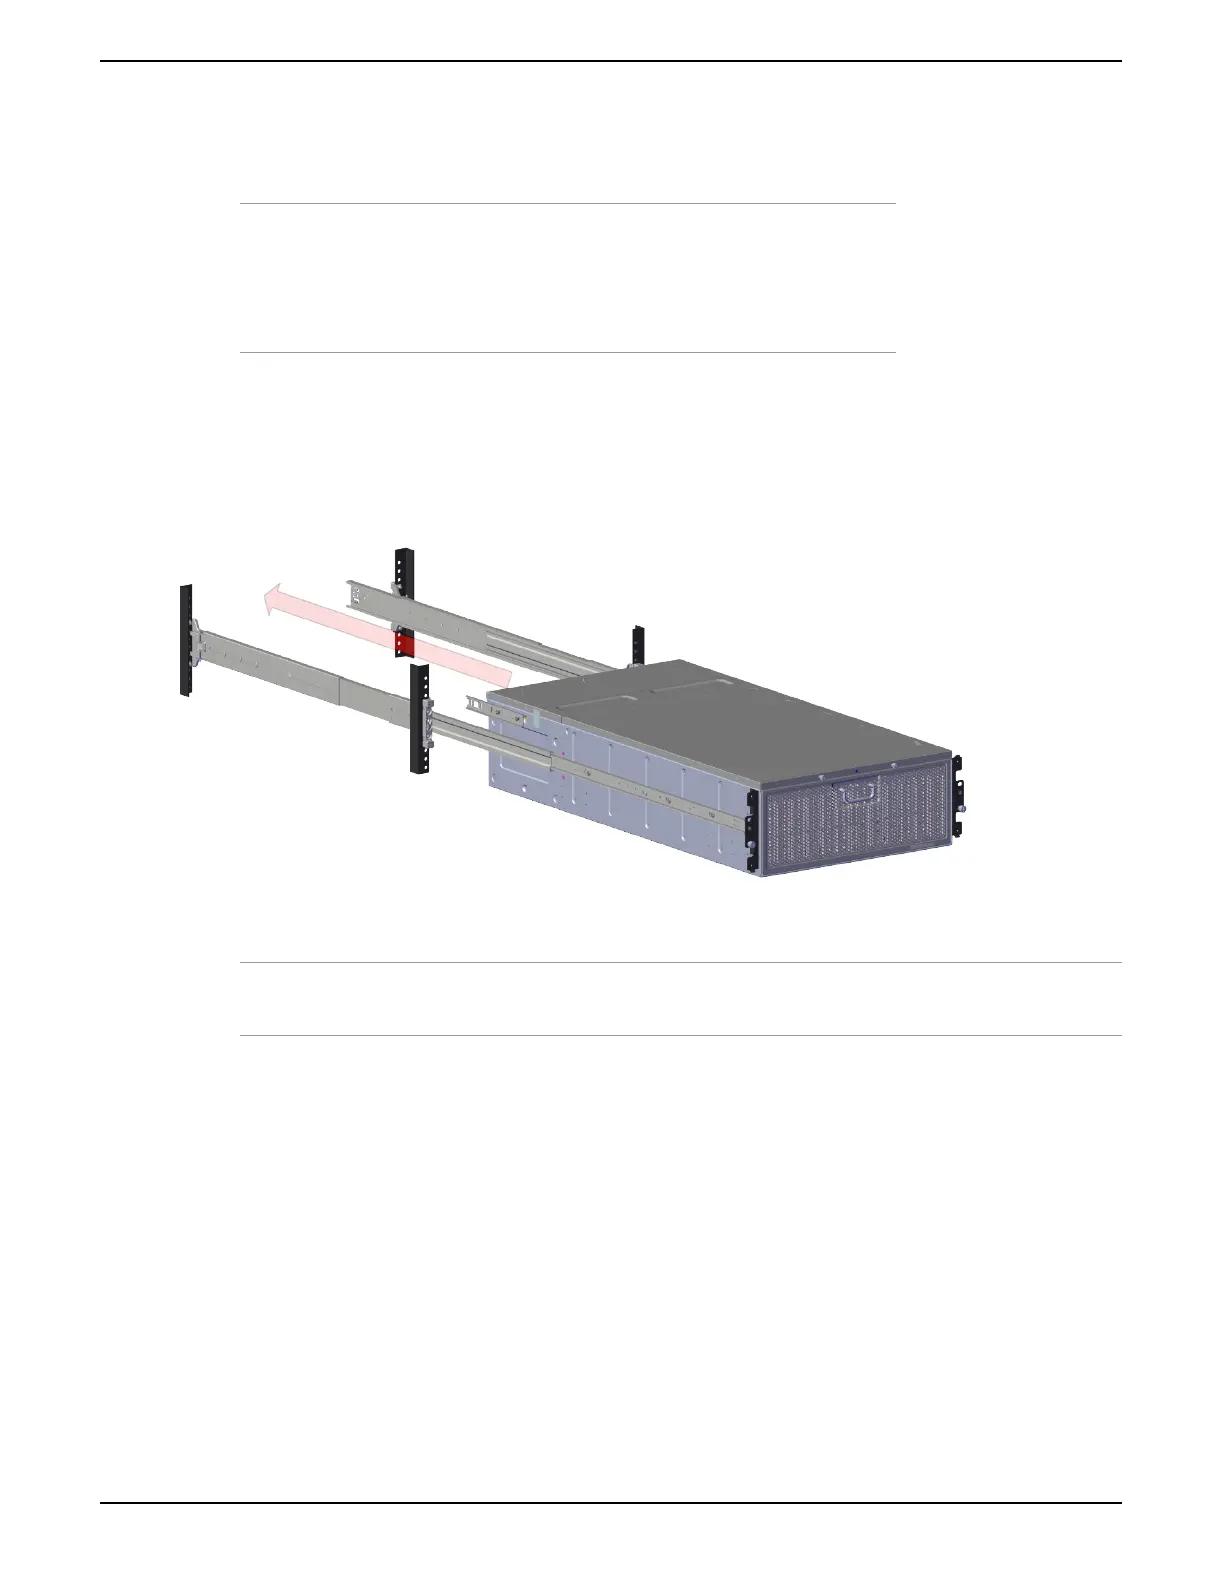
Push the chassis into the rack mount rails until the chassis is fully seated into the rack.
Figure 21: Sliding the Chassis into the Rack
Note: If you are met with any resistance while completing this step, verify that the slide rails and rack mount
rails are properly lined up.
41
Installation Guide 11 Installing the 4U60 Storage Enclosure
 Loading...