Page: 39
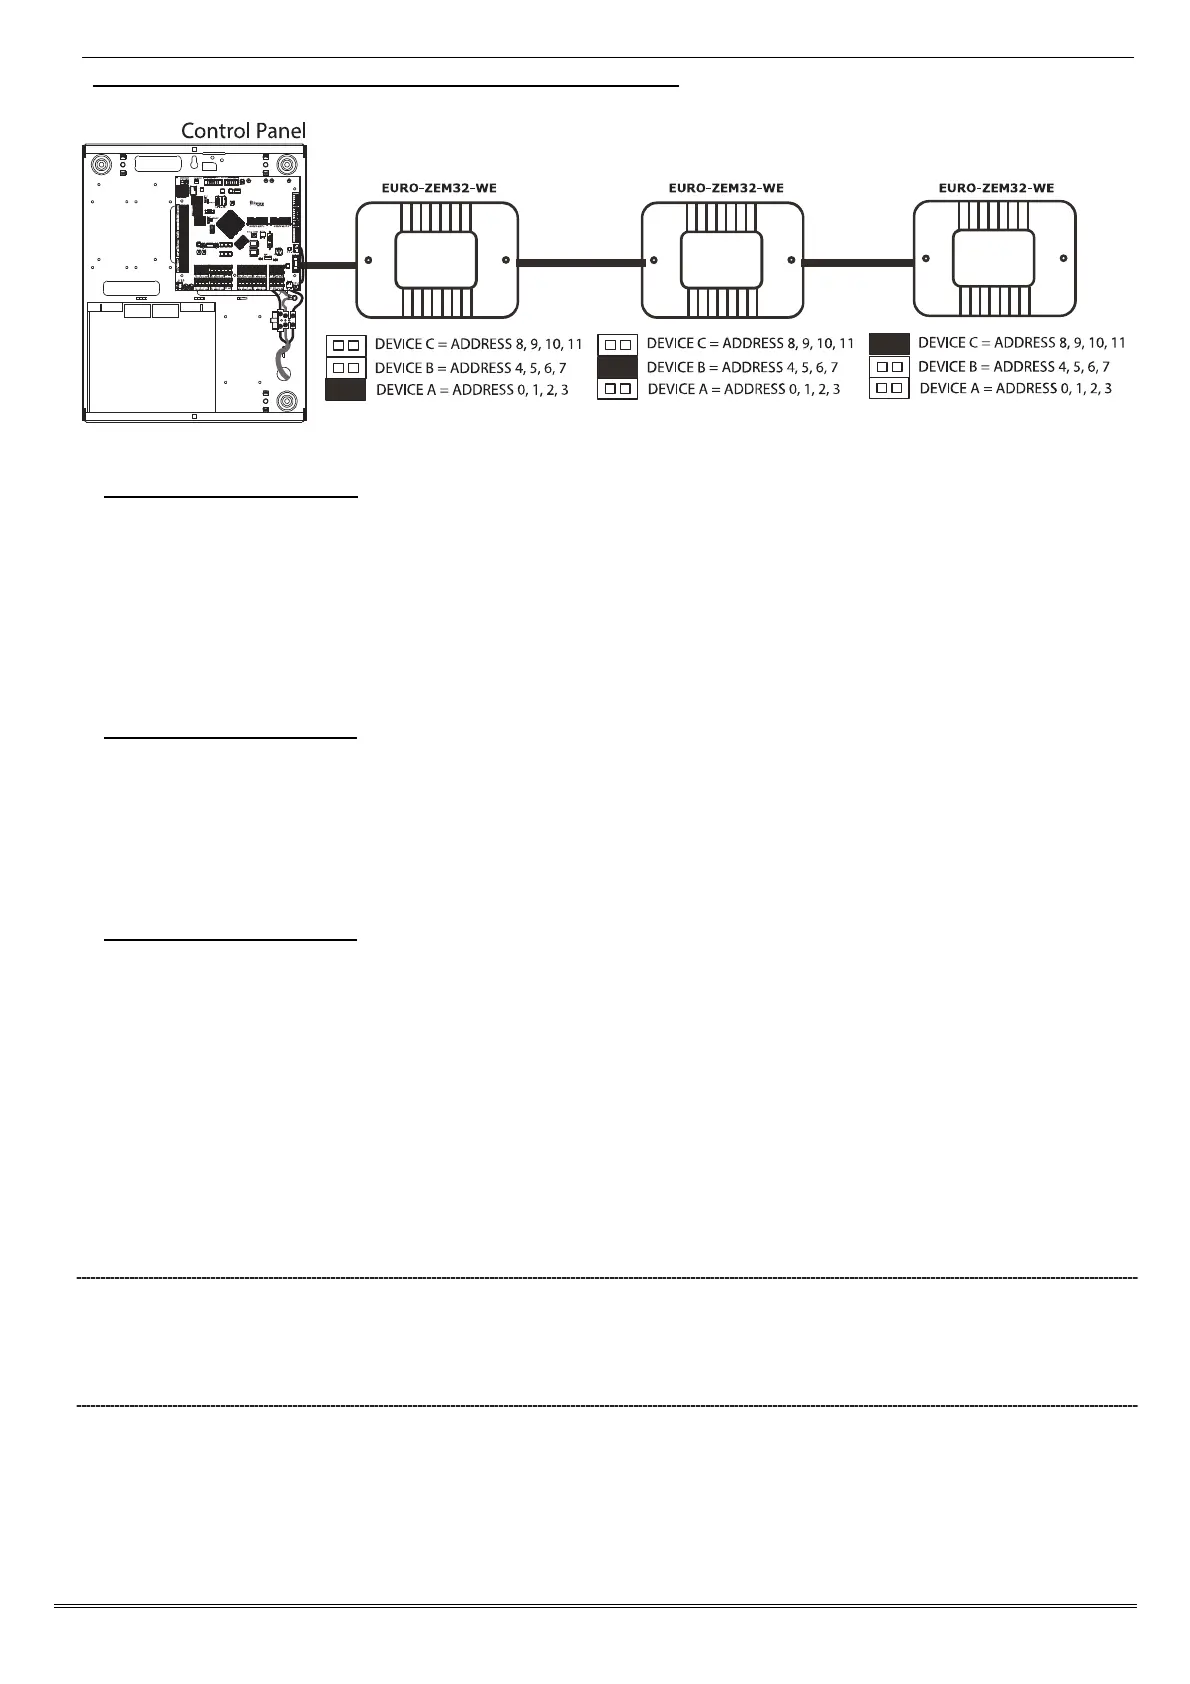
Addressing Example: Having 96 wireless inputs on the EURO 280
EURO-ZEM32-WE: DEVICE A
This expander will learn all 32 wireless keyfobs and 2 wireless bells (address 0).
Address 0 = 8 wireless inputs (Inputs 9-16)
Address 1 = 8 wireless inputs (Inputs 17-24)
Address 2 = 8 wireless inputs (Inputs 25-32)
Address 3 = 8 wireless inputs (Inputs 33-40)
EURO-ZEM32-WE: DEVICE B
Address 4 = 8 wireless inputs (Inputs 41-48)
Address 5 = 8 wireless inputs (Inputs 49-56)
Address 6 = 8 wireless inputs (Inputs 57-64)
Address 7 = 8 wireless inputs (Inputs 65-72)
EURO-ZEM32-WE: DEVICE C
Address 8 = 8 wireless inputs (Inputs 73-80)
Address 9 = 8 wireless inputs (Inputs 81-88)
Address 10 = 8 wireless inputs (Inputs 89-96)
Address 11 = 8 wireless inputs (Inputs 97-104)
Wired expanders may also be used in conjunction with wireless expanders. For example, if only 48 wireless inputs
are needed, wired input expanders can be addressed from Address 5.
6.7.3 Adding the EURO-ZEM32-WE (From the Engineer Menu)
Enter the engineer menu and scroll to 'INSTALL ZEMS' and press .
Please see the Programming Manual for more information.
6.7.4 Learning Wireless Devices
All wireless devices are learnt in the Engineer function 'WIRELESS DEVICE CONTROL'. Please see the programming
manual (for inputs, bells and arming stations) and user manual (for keyfobs) for more information.
 Loading...