3.1 The Initial Check
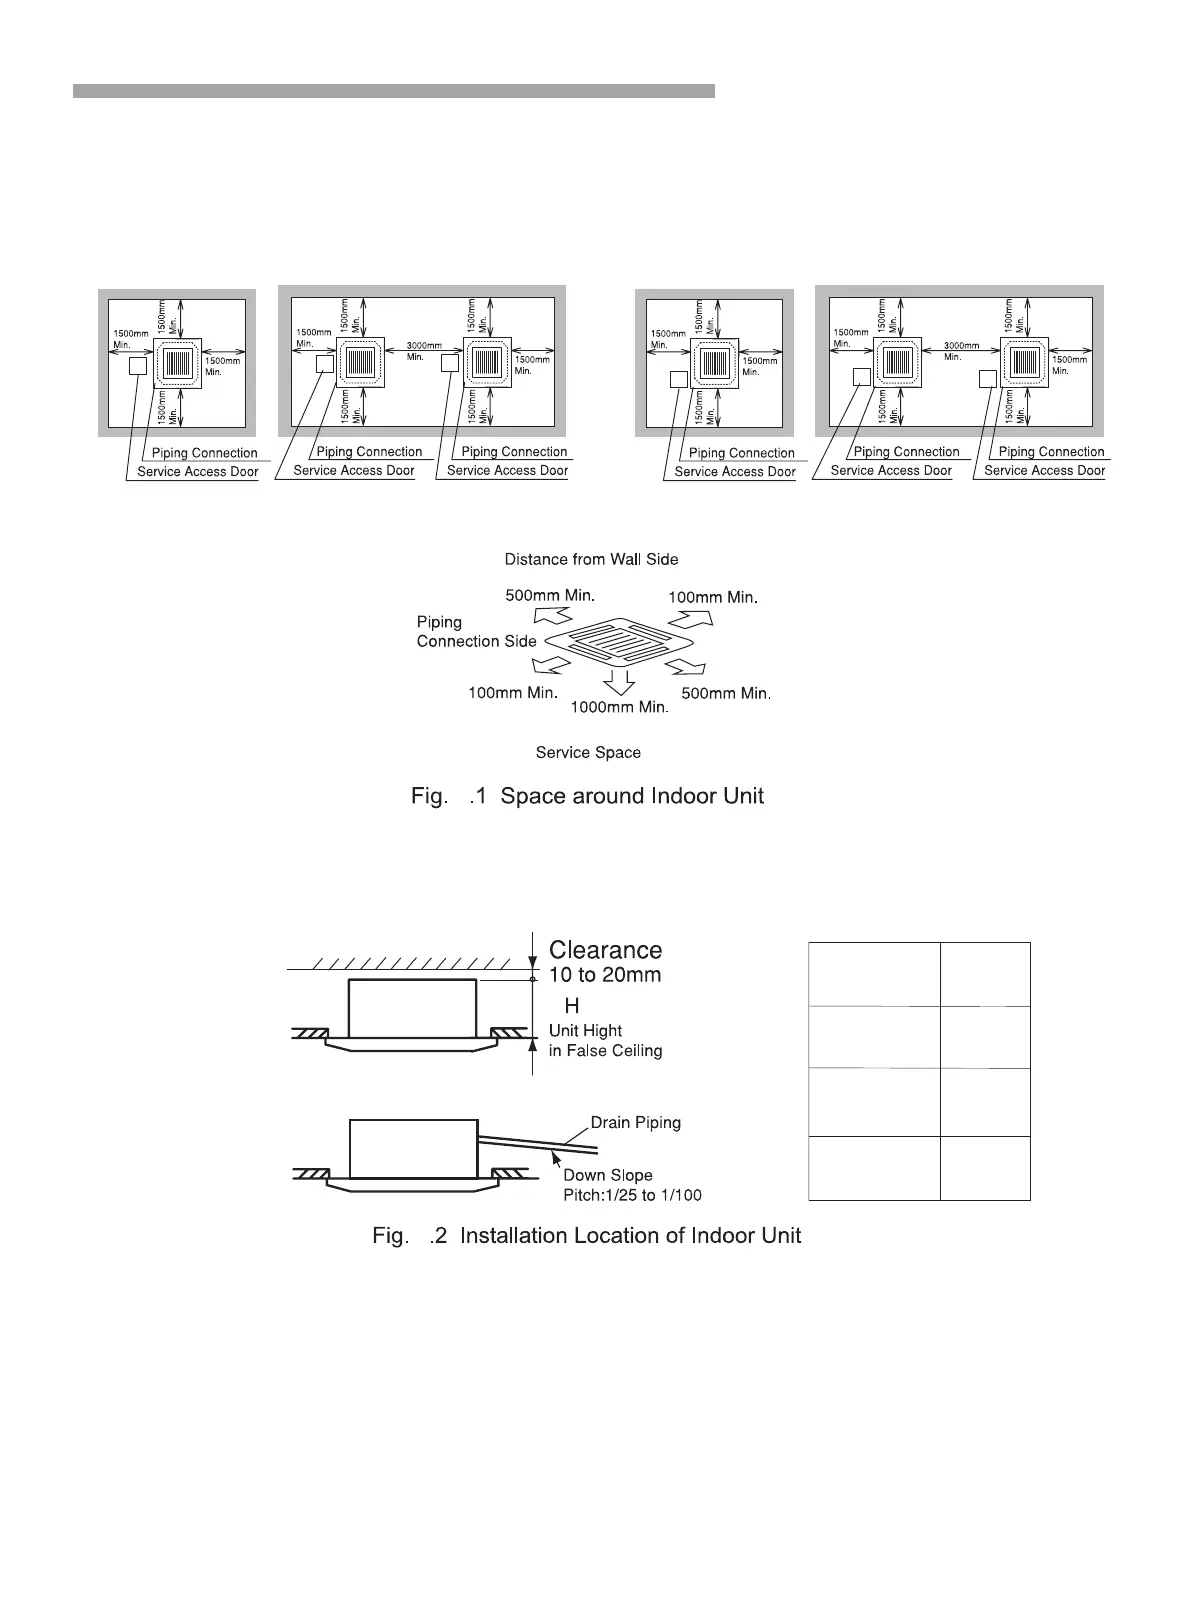
●Install the indoor unit with a proper clearance around it for operation and maintenance working space,
as shown in Fig.3.1.
●Provide a service access door near the unit piping connection area on the ceiling.
●Check to ensure that the ceiling has a sufficient strength to hang the indoor unit.
●Check the ceiling surface is flat for the air panel installation work.
3
●Select the installation location as follows Fig 3.2 :
(A) Minimum Space
(B) Down Slope Pitch of Drain Piping:1/25~1/100
●Consider the air distribution from the indoor unit to the space of the room, and select a suitable
location so that uniform air temperature in the room an be obtained.It is recommended that the
indoor unit be installed 2.5 to 3 meters from the floor level.
●Do not install flammable parts in the service space for the indoor unit.
●Avoid obstacles which may hamper the air intake or the air discharge flow.
Installation and Maintenance
11
(unit : mm)
Model
Capacity (BTU/h)
H
12K,18K
270
24K
248
36K,42K,
48K,60K
298
3
12K/18K
24K/36K/42K/48K/60K