4.
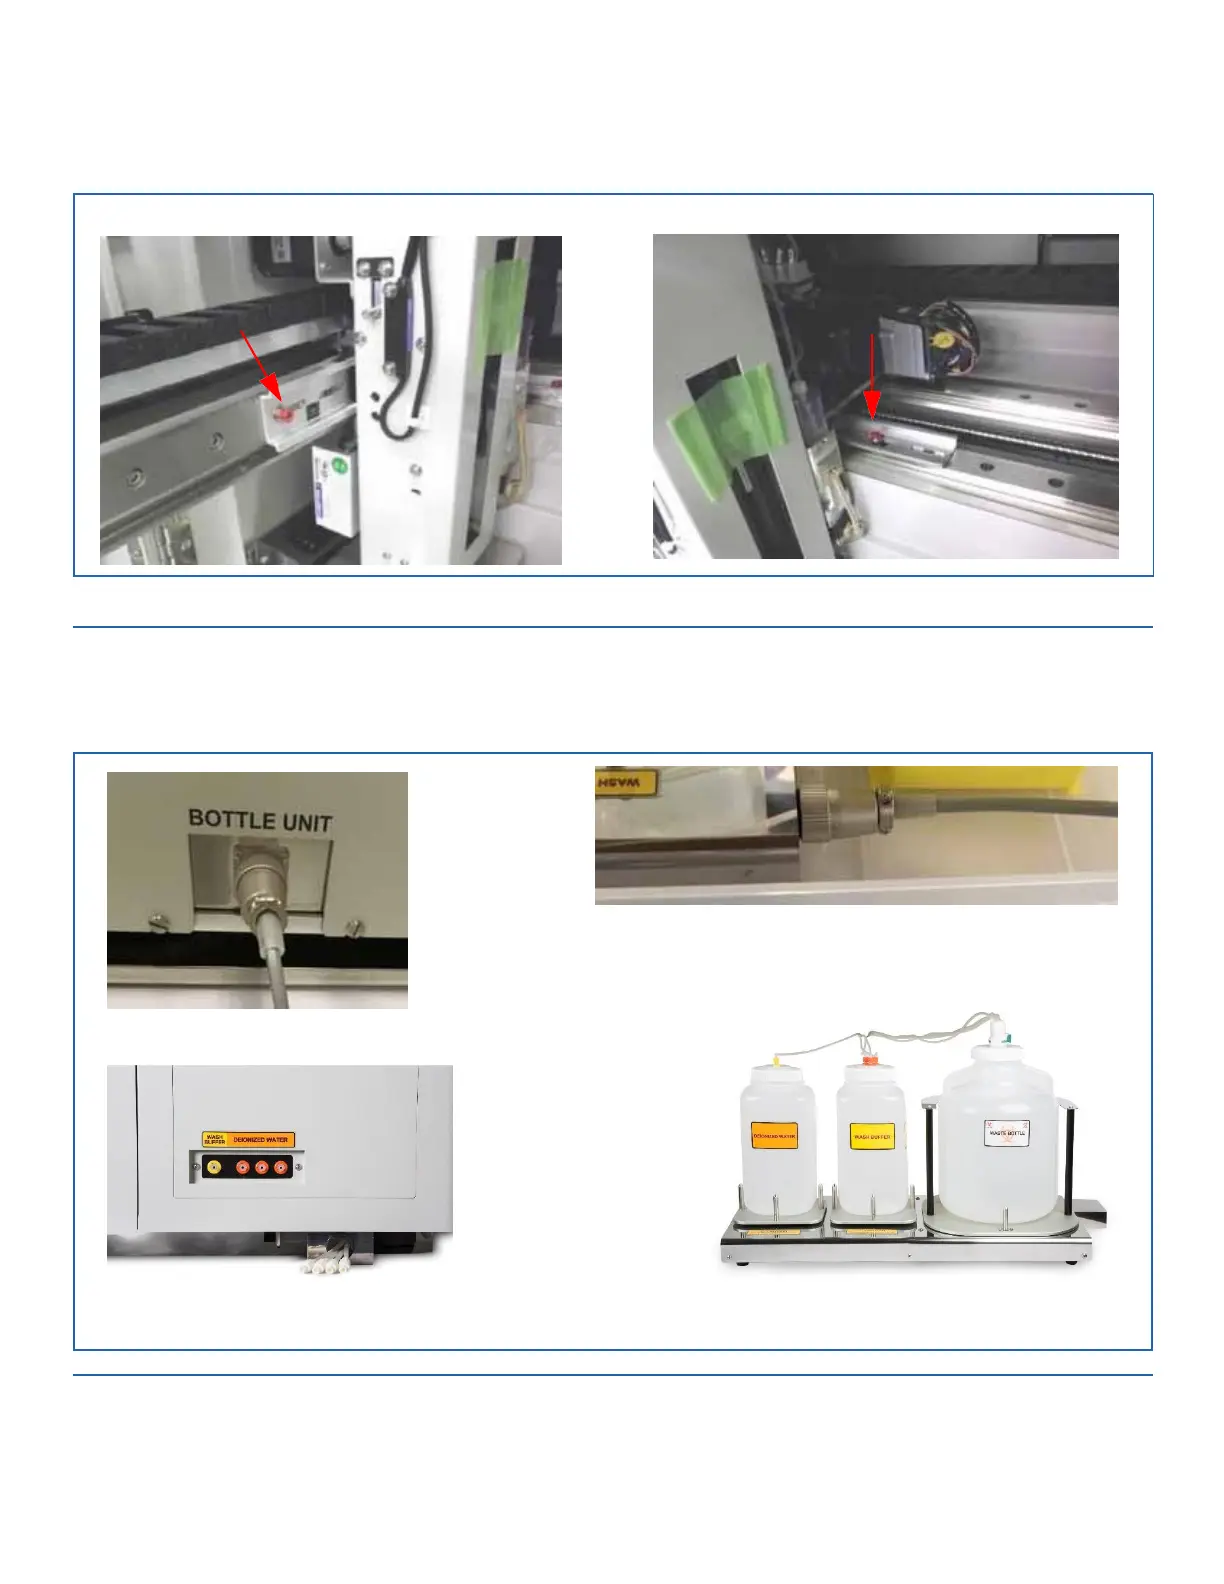
Remove tape from the inside of the instrument. Remove fixing plates from Nozzle Head by removing bolts. Re-screw bolts into the
tapped holes which were used for the fixing plates.
FIGURE C-4. Removing Fixing Plates
5.
If applicable, connect the Laboratory Information System (LIS) network cable (optional) to the Ethernet connector on the monitor.
6.
Install the bottle unit attachment connector. See Figure C-5.
7.
Install the correct caps with tubing for the Wash Buffer, DI water, and waste bottles. The overflow tubing and bottles should be placed
below the instrument on the waste station tray, because the overflow liquid drains by gravity. All caps are color-coded. See Figure C-5
FIGURE C-5. Install Bottle Connector and Install Bottles Under Instrument
8.
Connect the AC power cord to the AP3600 instrument.
9.
Close all instrument lids and covers.
10.
Press the power switch on the front of the instrument to apply AC power to the instrument.
C-3


 To Next Page