24
PMEN0654 rev.0 - 12/2023
5
PIPINGCONNECTIONFOROUTDOORUNIT
REFRIGERANT PIPING AND REFRIGERANT CHARGE
! CAUTION
• At the test run, fully open the spindle and ball stop valve.
• If not fully opened, the devices will be damaged.
• Do not aempt to turn service valve rod beyond its stop.
• Do not loosen the stop ring. If the stop ring is loosened, it is dangerous since the spindle will hop
out.
• An excess or a shortage of refrigerant is the main cause of trouble to the units. Charge the
correct refrigerant quanty according to the descripon of label at the inside of service cover.
• Check for refrigerant leakage in detail. If a large refrigerant leakage occurs, it will cause
diculty with breathing or harmful gases would occur if a re was being used in the room.
• When the cap is removed, a hissing sound may be heard because the gas trapped at O-ring
thread face is released. However, this is not gas leakage.
Use two spanners here for
pipe connecon.
Do not work with two
spanners here.
Refrigerant leakage shall
occur.
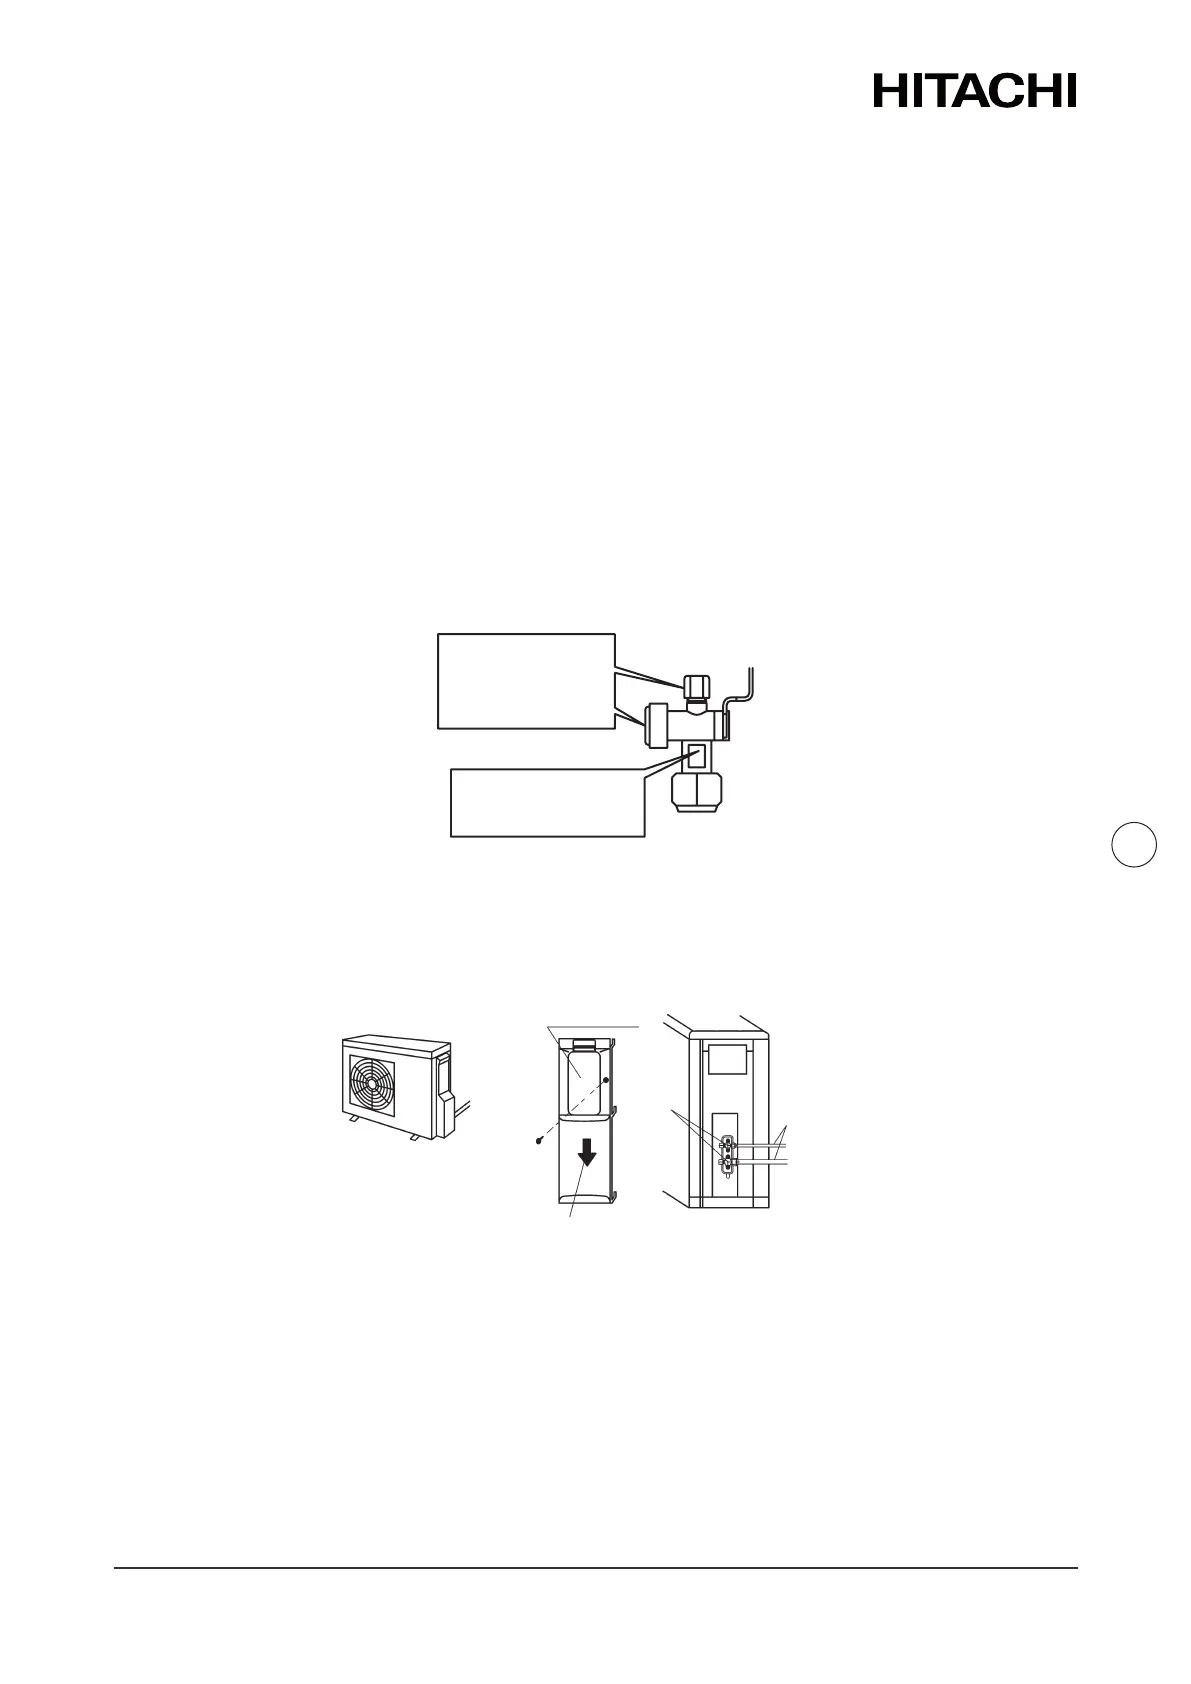
1 Take the piping cover away from the unit. Then fetch the pipes through the rear side and route
piping according to the installaon place as shown in the gure. Make holes by cung along the
guideline at the rear of the cover or punching with a driver. Remove the burr with a cuer, and
place a insulaon (eld supplied) to protect cables and pipes.
Pipe cover
Rear side
piping
Screw
Stop valve
Direcon to remove pipe cover
Connecng
piping
2 Aach the pipe cover in order to prevent rainwater from entering inside the cabinet.
3 Use a pipe bender for pipe bending work when connecng pipes.
4 Check to ensure that the stop valves are completely closed before connecng pipes.
5 Connect the eld supplied refrigerant pipes to the indoor unit and outdoor unit. Apply the oil
thinly at the seat are nut and pipe before ghtening.
6 Operaon of stop valve should be performed according to the gure below.

 Loading...