Glider
(GLID)
Section
– –
76
menus (FLT.C), you can command any position of the inboard flaps, ailerons, and elevator by
flipping the Flt. Mode switch, and without using Speed Flap Trims.
Speed Flap Trim offset #1 is On when the Flt. Mode switch is fully back., and is
commonly used for the "speed" mode, where the trailing edge is reflexed. Speed Flap Trim offset
#2 is On when the Flt. Mode switch is fully forwards, and is commonly used for setting up
offsets needed for good launches.
Setting Up Speed Flap Trim Offsets
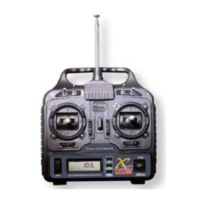
1. Start by locating the S.TM1 menu with the
Up Down Edit
keys, then pressing the
Active/Inhibit
(Clear)
key. Either the 'Off' or the ‘
On
’ display will be flashing, depending on the position of
the Flt. Mode switch. Also, the indicators for CH2, CH6, and CH7 will appear at the top of
the display
S.TM1 -100
CH
16
ON
2
%
7
2. First, you'll set the elevator (CH2) function offset amount. Make sure S.TM1 is ON by
moving the Flt. Mode switch fully back. Verify it's on by looking at the flashing On
indicator. Hit the
Cursor Right
key one time, and a small arrow will appear over the numeral
2.
3. Next, set up the elevator (CH2) motion. Press the
Data +Increase
or
–Decrease
keys to adjust
the amount of elevator offset. Use a small amount at first, as the elevator is very effective.
4. Now set up the throws for the CH6 flap. Hit the
Cursor Right
key one time, and the small
arrow will appear over the numeral 6. Now use the
Data +Increase
or
–Decrease
keys to
adjust the amount of CH6 flap offset.
5. Next set up the throws for the CH7 flap. Hit the
Cursor Right
key once, and the small arrow
will move over the numeral 7. Use the
Data +Increase
or
–Decrease
keys to adjust the
amount of CH7 flap offset.
6. Locate the S.TM2 menu by pressing the
Up Edit
key, and then press the
Active/Inhibit (Clear)
key to turn it on. Either the 'Off' or the ‘
On
’ display will be flashing, depending on the
position of the Flt. Mode switch.
7. Repeat the previous instructions for the second set of inputs for elevator, CH6, and CH7.