Version 1.1, 08/2013. Copyright 2012 Hitron Technologies
63
Version 1.1, 08/2013. Copyright 2013 Hitron Technologies
63
Hitron CGN3 User’s Guide
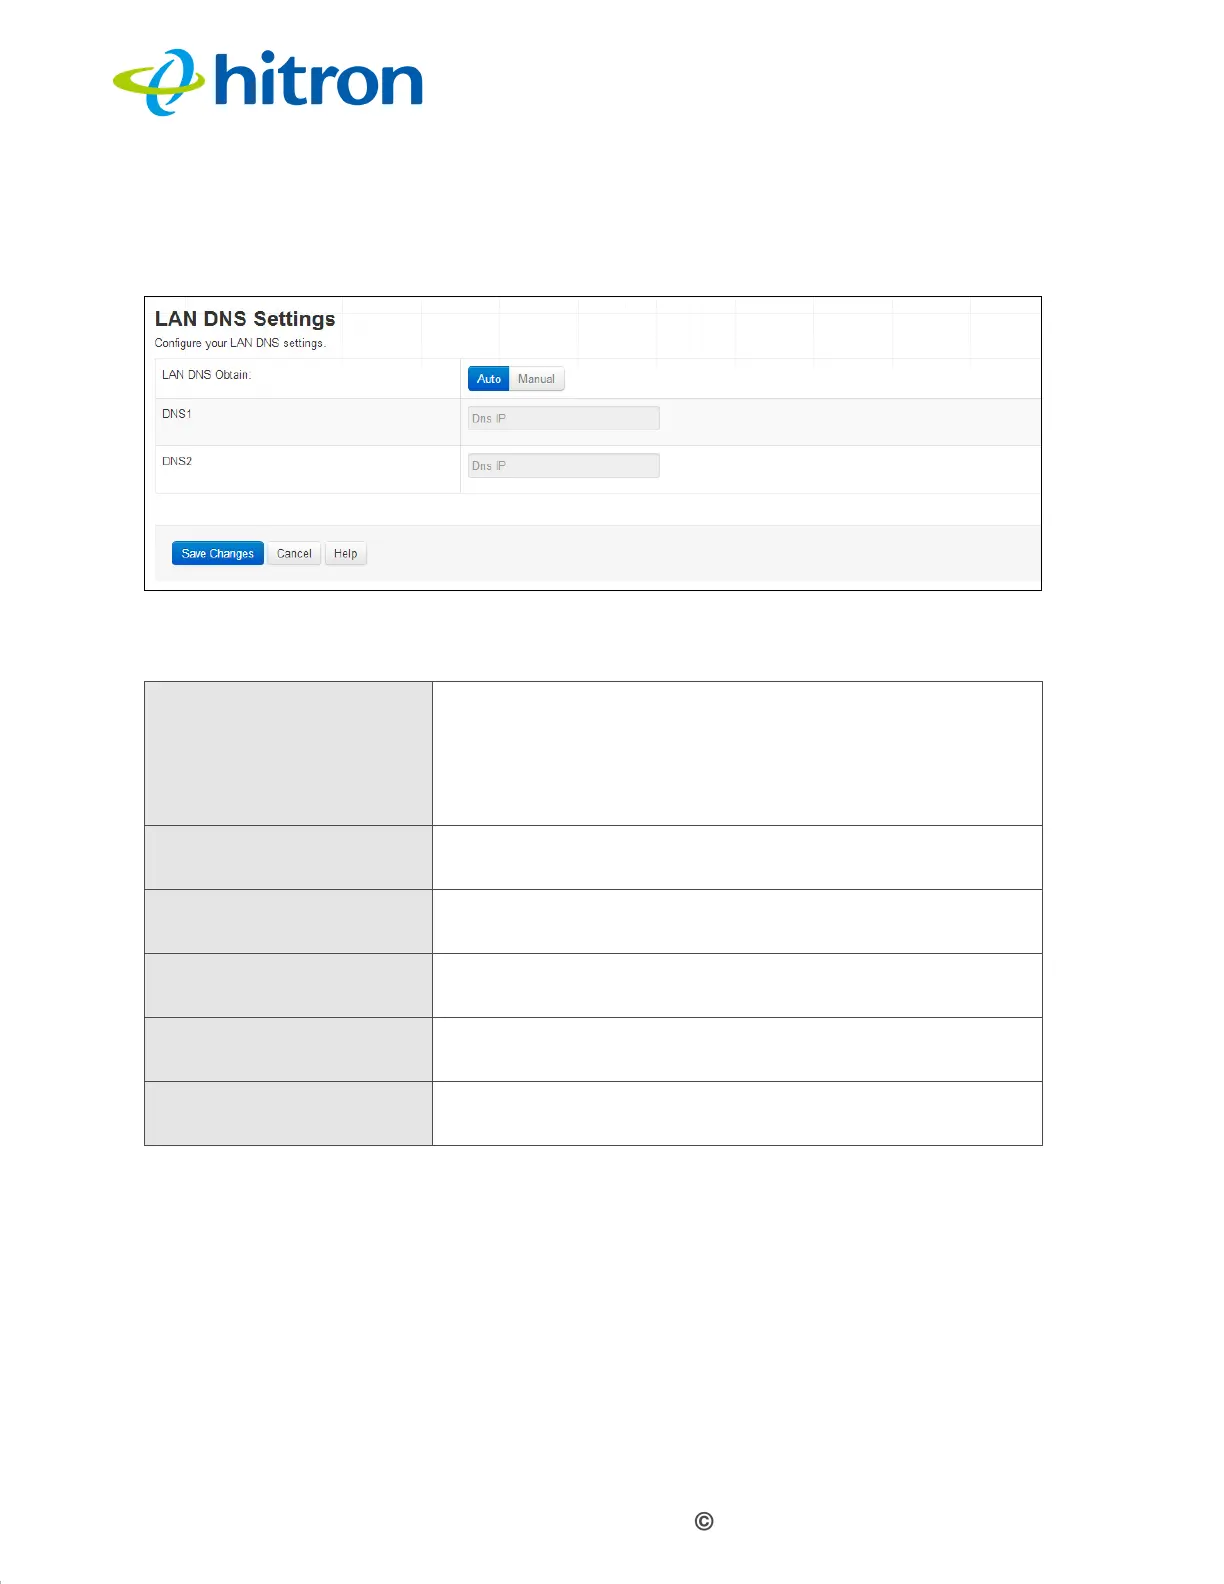
Click Basic > DNS. The following screen displays.
Figure 24: The Basic: DNS Screen
The following table describes the labels in this screen.
4.8 The DDNS Screen
Use this screen to configure the Dynamic Domain Name Server (DDN).
Click Basic > DDNS. The following screen displays.
Table 22: The Basic: DNS Screen
LAN DNS Obtain Use this field to obtain the DNS automatically or
manually.
Select Auto to obtain the DNS automatically.
Select Manual to obtain the DNS manually.
DNS1 Enter the IP address of the computer that you want to
add to the DNS manually.
DNS2 Enter the IP address of the computer that you want to
add to the DNS manually.
Save Changes Click this to save your changes to the fields in this
screen.
Cancel Click this to return the fields in this screen to their last-
saved values without saving your changes.
Help Click this to see information about the fields in this
screen.