Version 1.1, 08/2013. Copyright 2012 Hitron Technologies
52
Version 1.1, 08/2013. Copyright 2013 Hitron Technologies
52
Hitron CGN3 User’s Guide
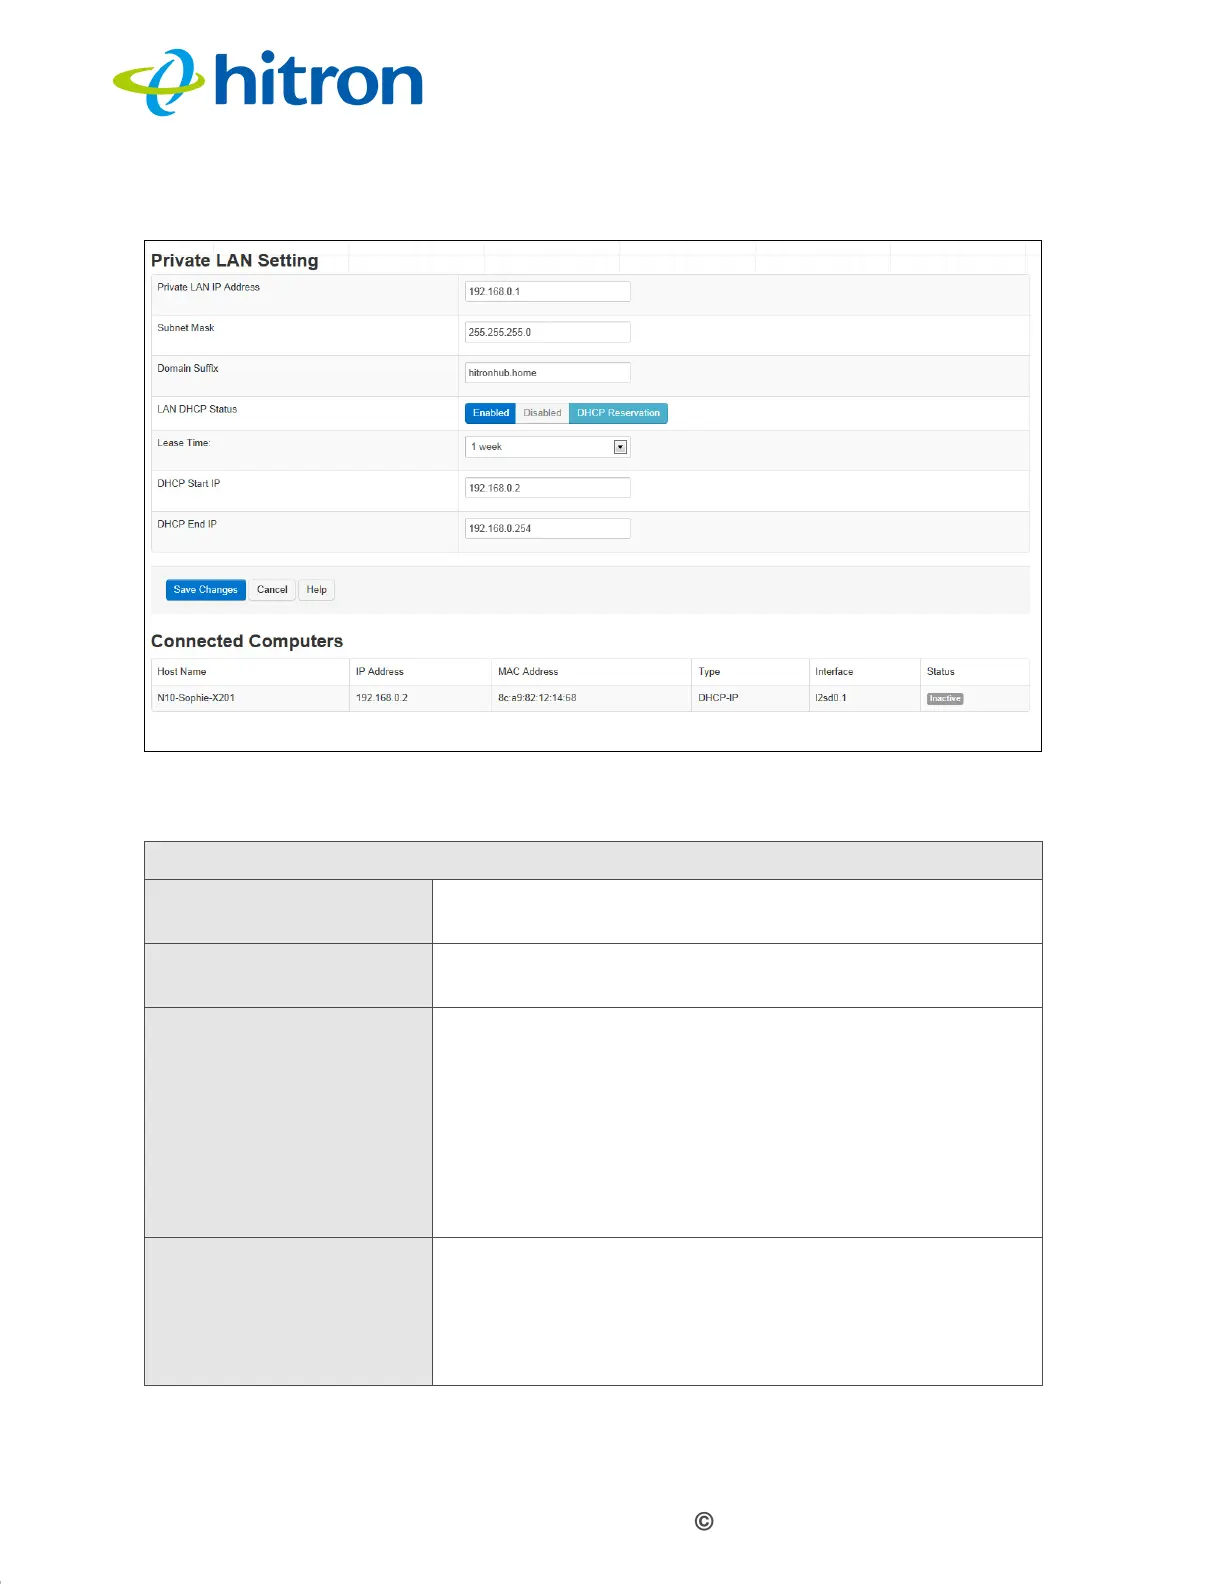
Figure 17: The Basic: LAN Setup Screen
The following table describes the labels in this screen.
Table 15: The Basic: LAN Setup Screen
Private LAN Setting
Private LAN IP
Address
Use this field to define the IP address of the CGN3 on
the LAN.
Subnet Mask Use this field to define the LAN subnet. Use dotted
decimal notation (for example, 255.255.255.0).
Domain Suffix Use this field to define the domain that you can enter
into a Web browser (instead of an IP address) to reach
the CGN3 on the LAN.
NOTE: It is suggested that you make a note of your
device’s Domain Suffix in case you ever need
to access the CGN3’s GUI without knowledge of
its IP address.
LAN DHCP Status Use this field to configure whether or not the CGN3’s
DHCP server is active.
To turn the DHCP server on, click Enabled.
To turn the DHCP server off, click Disabled.