42
HITRON CGNV2 USER’S GUIDE
WAN/LAN
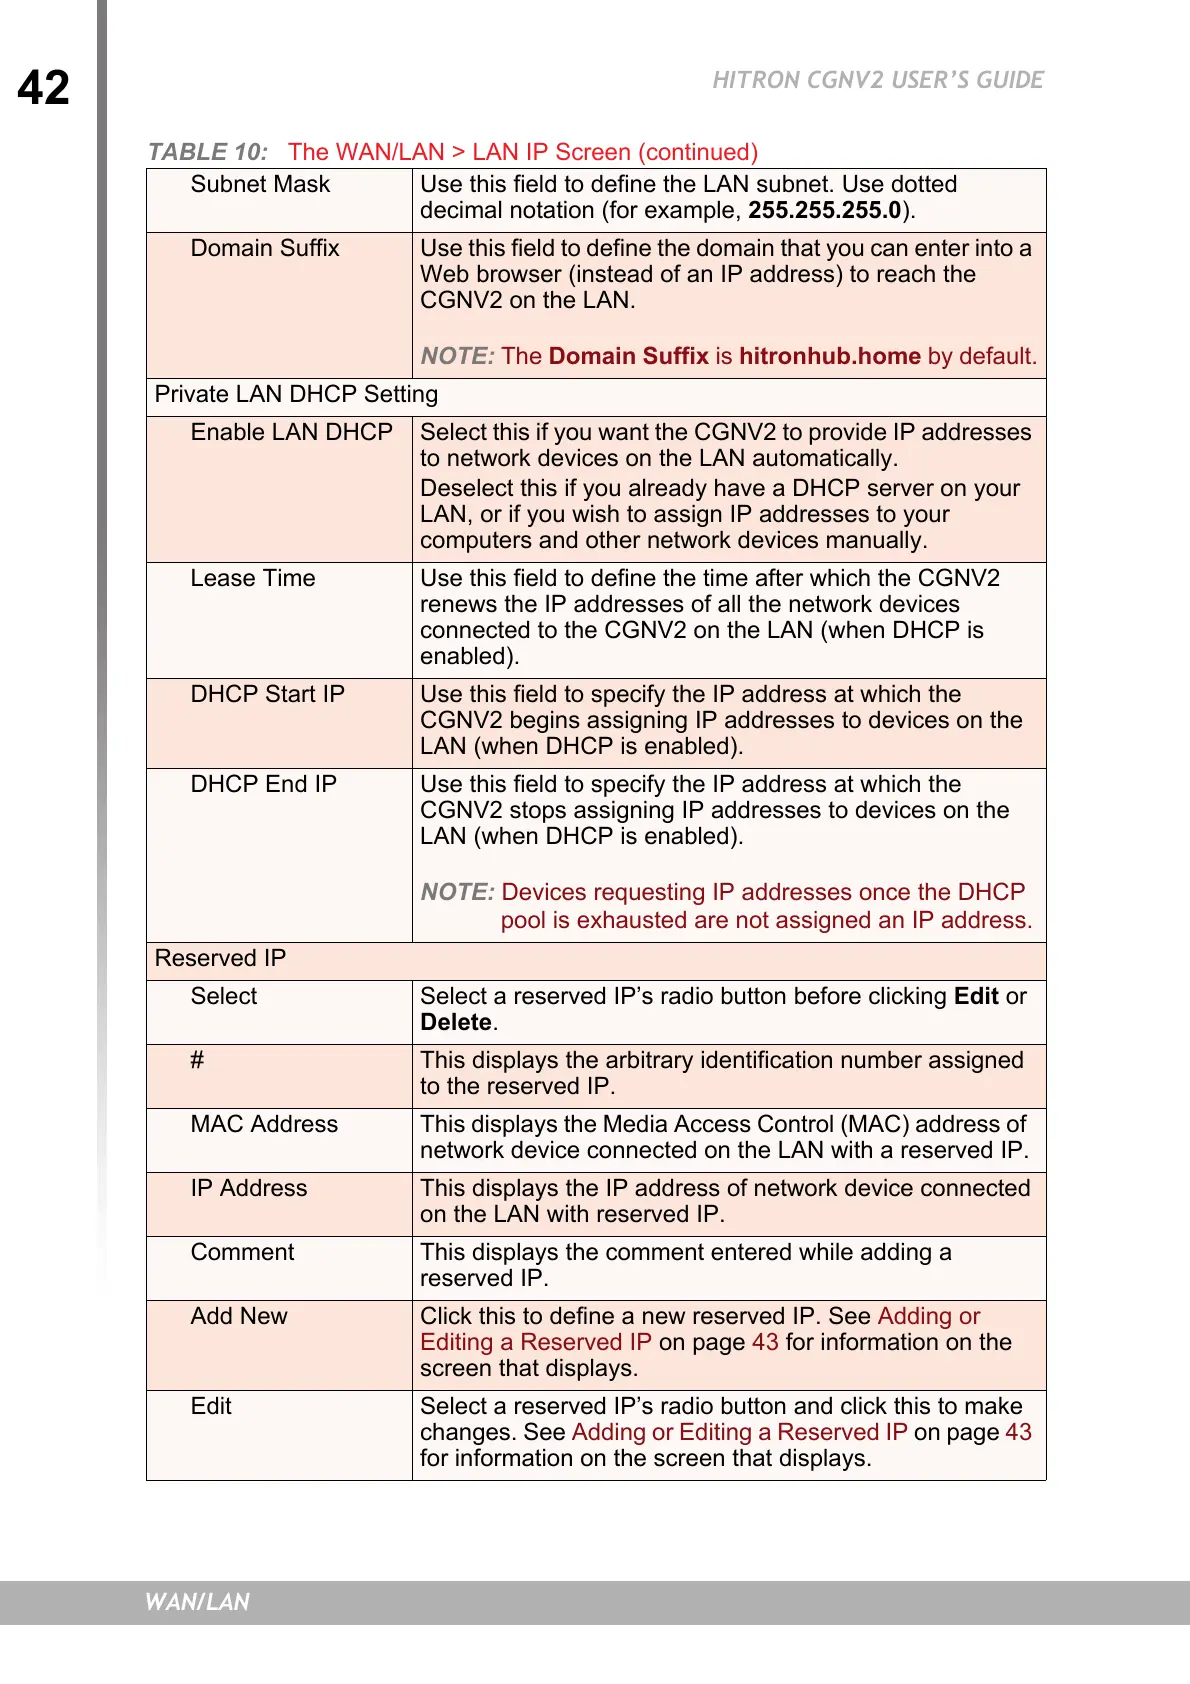
Subnet Mask Use this field to define the LAN subnet. Use dotted
decimal notation (for example, 255.255.255.0).
Domain Suffix Use this field to define the domain that you can enter into a
Web browser (instead of an IP address) to reach the
CGNV2 on the LAN.
NOTE: The Domain Suffix is hitronhub.home by default.
Private LAN DHCP Setting
Enable LAN DHCP Select this if you want the CGNV2 to provide IP addresses
to network devices on the LAN automatically.
Deselect this if you already have a DHCP server on your
LAN, or if you wish to assign IP addresses to your
computers and other network devices manually.
Lease Time Use this field to define the time after which the CGNV2
renews the IP addresses of all the network devices
connected to the CGNV2 on the LAN (when DHCP is
enabled).
DHCP Start IP Use this field to specify the IP address at which the
CGNV2 begins assigning IP addresses to devices on the
LAN (when DHCP is enabled).
DHCP End IP Use this field to specify the IP address at which the
CGNV2 stops assigning IP addresses to devices on the
LAN (when DHCP is enabled).
NOTE: Devices requesting IP addresses once the DHCP
pool is exhausted are not assigned an IP address.
Reserved IP
Select Select a reserved IP’s radio button before clicking Edit or
Delete.
# This displays the arbitrary identification number assigned
to the reserved IP.
MAC Address This displays the Media Access Control (MAC) address of
network device connected on the LAN with a reserved IP.
IP Address This displays the IP address of network device connected
on the LAN with reserved IP.
Comment This displays the comment entered while adding a
reserved IP.
Add New Click this to define a new reserved IP. See Adding or
Editing a Reserved IP
on page 43 for information on the
screen that displays.
Edit Select a reserved IP’s radio button and click this to make
changes. See
Adding or Editing a Reserved IP on page 43
for information on the screen that displays.
TABLE 10: The WAN/LAN > LAN IP Screen (continued)