Web Operation | 83
800-18161 - A - 06/2014
Date and Time
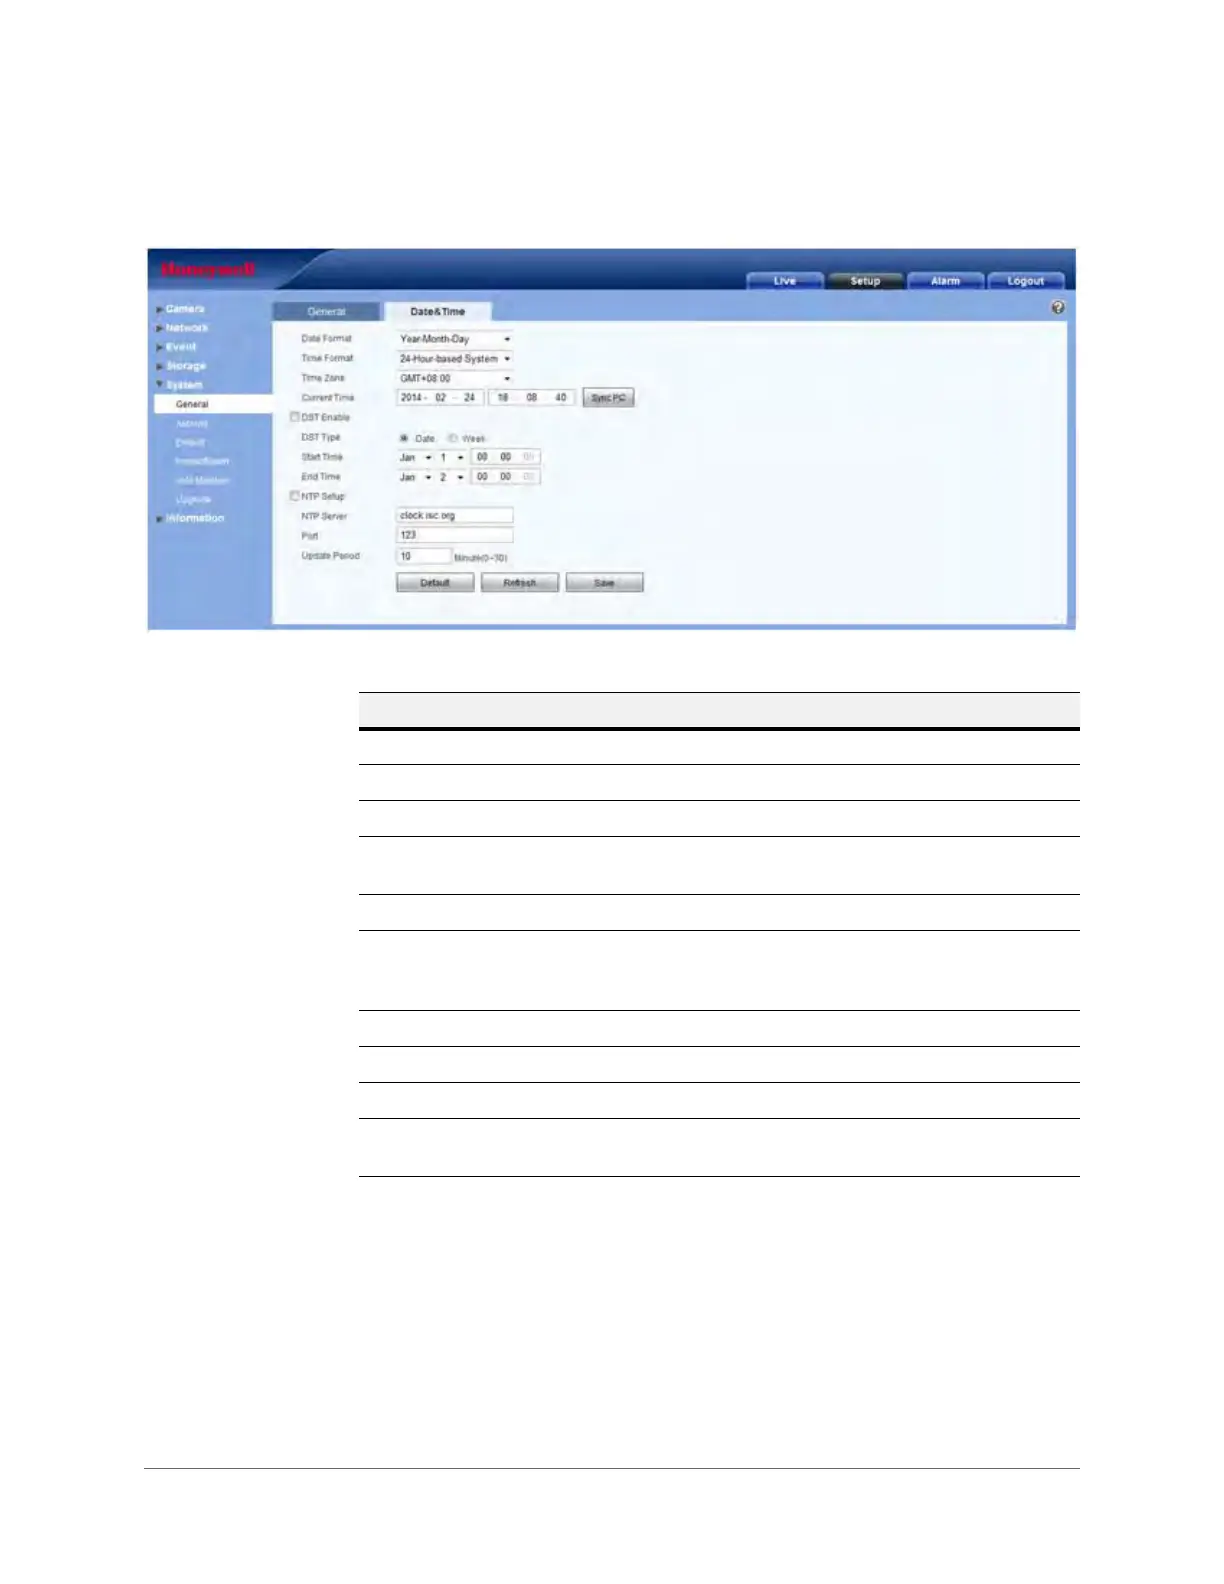
Figure 3-46 Date and Time Configuration Interface
Table 3-25 Date and Time Configurations
Parameter Function
Date Format Select a date format from the drop-down list.
Time Format Select a time format, either 24-hour or 12-hour.
Time Zone Select the time zone for the camera.
Current Time Set it to set the system’s time. You have to Save to activate this
time.
Sync PC Click to sync the camera’s time with your PC’s time.
DST Configure the Daylight Savings Time for the camera, when Daylight
Savings Time begins and ends. Choose from either a Date or a
Week for the DST.
NTP Click to enable NTP.
NTP Server Configure the NTP time server.
Port Configure the port for the NTP time server.
Update Period Configure synchronization periods between the camera and the
time server.

 Loading...